Thursday, December 30, 2010

Salsa: How do we love you? Let us count the ways...

Who doesn’t love Chips and Salsa?  It's one of our favorite food groups. I had tried, in the past, to make salsa that compared to restaurant salsa but was continually disappointed.  Then in 2003 I was on a retreat with some women and my dear friend Catherine made this Salsa, and Eureka! …this was it!  It became a favorite and through the years has become a staple in our kitchen.  I have been contemplating when to post about this salsa, and several friends, who make the recipe, have suggested I post it.  However, I have been waiting for just the right time.  I decided that this was the week.  It is Bowl Game watching time (though, personally,  I am much more interested in watching the bowl of chips that any other kind of bowl), New Year’s Celebrating and winter days that beckon for a spicy, bowl of tastiness.


Some of the reasons we love this salsa are:
the fresh stuff
·      It can be made year round! Because it is made with canned tomatoes, it doesn’t depend on summer garden tomatoes (but you’d never know it).

·      It makes a large batch! You’ll be glad.

·      It is easy to make.

·      It ramps up Dave’s egg white wrap in the morning, which evokes exclamations from him!

·      The flavor is complex and fresh and delicious.

·      It is healthy! (How could something this yummy be so healthy?)

·      It can be made-to-your-liking.  You can tweak the heat, size of chunks, tartness, and flavor (by varying the quantities of the ingredients).
 
chopping
2 cans Del Monte ORIGINAL stewed tomatoes
1 can Rotel, original
2 cloves of garlic, minced
3 green onions, chopped
20 + cilantro leaves
the juice and pulp of 1 lime
a couple of dashes of Tabasco (more if you like HOT)
¼ tsp crushed red pepper
½ tsp cumin (ground cumin seed)
juicing...kinda
½ tsp kosher salt (or table salt)

Place all in a food processor and pulse several times, to desired consistency.
Keeps 10 days or so in the refrigerator.
(I like it best when first made and at room temp)


juicing


scraping out the pulp


the ever-important testing step


One tip to keep in mind- if you are buying your green onions and cilantro from the grocery, you will have more than 3 times the amount you will need for the recipe. So, you might plan other recipes that call for these ingredients in the week that you are making the salsa.  You can also go ahead and buy enough of the other ingredients to make a second batch.  My friend, Melissa B. and I have a practice of sharing some of the onions and cilantro we have leftover with each other so that they don’t go to waste.  I love this quality in a friend- the produce-sharing quality.  She taught me this great tip for extending the life of greens...to lay them onto paper towels and loosely wrap them, then store in a large ziplock bag.
place flat on paper towels


Cover with more paper towels and gently roll

like this


Happy End-of-the-Year!  Celebrate with Homemade Salsa.

Monday, December 27, 2010

Chocolate Fun-Do


the cabin
I have spent the Christmas weekend with my family at my parents’ cabin in the woods- it is picturesque and perfect for a holiday.  It is rustic and has no internet, which provides a nice break, and yet, isn’t great for blog-posting.

So now that we are home,  I can send this post!  I hope you had a great Christmas.


What to post on this week of busyness, baking and feasting? I can’t think of anything as celebratory as Fun-Do, our name for Chocolate Fondue.  It is a food activity-you get to do which is so fun.  Thus…Fun-Do!  The word Fondue is actually a French word meaning “to melt”.  Do you ever fondue?  What a treat it is!

It came on the scene in the 1960’s and my mom has an avocado green fondue pot she got before we were born to prove it.  It’s groovy. (They probably made macramé carriers for them too in that era.)  On special occasions when I was growing up, we would have chocolate fondue.  Back in the day mom would melt a jar of bought chocolate cake frosting for the chocolate sauce.  It can be as simple as that! We dipped fruit, cake and marshmallows in it.  It felt extravagant and is a great memory from my childhood!

Fun-Do Bliss
We began a few years ago making Fun-Do a part of our holiday season- either dessert after dinner with friends, or on New Year’s Eve.  This year we did it when our cousins came to spend the night and then again this week on Christmas Eve!

A year or so ago, I was helping host a baby shower for my friend, Suzanne , when she was expecting her 3rd son.  We wanted to gather and pray and honor them and celebrate.  She is a major chocolate lover, so we decided to do an evening gathering for women where chocolate was the main dish.  Rather than having a table full of little baked goods, we decided to go for a Fondue Spread.  We made chocolate fondue and this ridiculous caramel sauce from the Joy of Cooking (my favorite standard cooking text), and a spread of fruits, cakes, graham crackers, pretzel rods, and even potato chips!  The co-host, Melissa, suggested the chips since her family knew people who sold chocolate covered potato chips in her hometown.  It was good!

[What I can’t stop dreaming about was the caramel dipped potato chips…since I am a big salty/sweet lover, it was perfection!  You might need to try it!]

It turned out to be a fun party food.  We served it on Melissa’s kitchen island and people could plate what they wanted or hover around the fondue pots and dip while they chatted.  And if they were trying to be healthy, they could have a fruit salad if they wanted. (Crazy them…but to each her own).

I have 2 fondue pots.  One is the electric, deep, non-stick Revel kind that is great for making a vat of fondue but is really designed for main dish fondue more than chocolate, as it is so wide and deep.  I also have a little ceramic one that I love, that my dear friend, Karin sent me from Crate and Barrel. It is the perfect size for up to 8 people. 

Here is the recipe I use.  It is basically a ganache.  You can vary the darkness of the chocolate according to your preference. 

1 cup heavy whipping cream
1 cup semi sweet chocolate, chopped
½ cup milk chocolate, chopped

Melt in bowl, in the microwave in 45 second increments, stirring after each, until melted and smoothly incorporated.  Place in fondue pot and light candle/ sterno.  Stir chocolate often to prevent burning on the bottom.

Use skewers (wooden or the metal ones that come with pot) and dip ‘til your heart’s content.

items for dipping (notice the retro fondue pot)
Our favorite items for dipping are: pineapple, banana, strawberries, pound cake (cubed), angel food cake (cubed), pretzels, and marsh-mallows.   And our conversation always seems to find it’s way to “what’s your favorite?”  and “ooh, try the marshmallow AND the banana together” and on and on.

So, maybe this season you too can do a little Fun-Do.
Happy Holidays!


Friday, December 17, 2010

the Best Brownies Ever

Brownies. Classic. Simple. Yet not so simple.  All brownies were NOT created equal!  In fact, the variance between brownies, in quality and taste, can be vast, yet they all go by the same name of Brownie!  I have realized in the past few years that I have a complex relationship with Brownies.  They are, on one hand, a dessert that I can pass up- if they are tough, or chewy from a box (you know, just add water, plain ole box brownies).  However, when brownies are dense and rich and homemade and fudgy and gooey, I don’t know if there is a dessert I love more.  How could it be?  I try not to be a "brownie snob" but I have been known to ask a brownie-bringer to,  “tell me more about them”, which sounds a little ridiculous as I type out the words!  But my underlying question really is, “are they worth the calories?” Because we know that: 1. all brownies are not created equal and that: 2. they are all full of fat and calories.

I have a great, classic, go-to brownie recipe that I have made for years that I got from my mom.  Cocoa is the source of chocolate in it.  It's yummy and can be whipped up in a jiffy.  However,  a couple of years ago, my friend Lane emailed me this recipe with the subject line  “the just right brownie”.  We are always searching for the "just right" recipes. And she found it with this one.  (You need to check out her beautiful, inspiring blog-Apron Days)
Well, just right it is!  It is made with 4 cups of chocolate chips; 2 cups melted into loads of melted butter and sugar and 2 cups stirred into the batter with the dry ingredients to evenly distribute.  They are fudgy, oh my goodness, rich and substantial.  I have been making them for the past couple of years as my new go-to brownie and playing around with mix-ins, toppings, etc. 


And I must speak to brownie batter since it is one of Dave's favorite things on the planet!  Because it is full of raw eggs, Dave gets dibs on it (I don't want to give it to my kids).  So he doesn't even have to play rock/scissors/paper to determine the bowl/beater/spoon licker.  Last year for his birthday he asked for brownie batter for his cake.  Really? Wierd.  So I made a smaller pan of brownies and the rest of the batter was served in a bowl. He loves the gritty sugar texture and the rich chocolate.  When he sees me reaching for the rubber spatula (his enemy) to scrape the bowl he says, "Really? Do you have to scrape it with the rubber spatula?"  It is much too thorough and leaves far too little for him.

  • I decided this was the week to post about these Just Right Brownies for 2 reasons:  1.  My sister's birthday is this week and she loves a good brownie.  She loves gooey, rich chocolate desserts.  For her birthday she typically prefers brownies with hot fudge and ice cream over a birthday cake.  She says that she sees cake as simply the vehicle to carry icing- since the icing is the part she loves.  So, because her birthday is in December and peppermint ice cream is available (and we love it), we often times have brownies with peppermint ice cream and hot fudge for her "birthday cake".  I got to make it last year for her 40th birthday and used this recipe. The recipe is birthday worthy.  So happy birthday Jennifer!

  • The other reason I wanted to post it is because one of my favorite varieties of this is Peppermint Brownies, which are so Christmasy!  I replace the 2 tsp.vanilla with 1 tsp. peppermint extract.  Then a few minutes before the brownies are done, I reach in and sprinkle crushed peppermint on the top of the brownies (see Peppermint Bark post for crushing instructions).  They are so pretty and YUMMY!


  • You can also make the classic brownies and then have toppings so that everyone can make it their way.  Like this week when my girls' group came over and we had brownies with vanilla ice cream, crushed peppermint and toasted sliced almonds as toppings with our brownies.

  • Another variety that is a consistent hit is Symphony brownies.  Have you ever made them?  I don't know who thought them up, but Paula Deen's cookbook was the first place I saw the idea.  They are a very special brownie- and leave people wondering about  the lovely filling.  You take Hershey’s Symphony Bars-the big ones (Symphony bars are milk chocolate bars with bits of toffee and almonds) and spread ½ of the brownie batter in the pan and then cover with 3 large symphony bars and then top with dollops of the remaining ½ of batter and gently spread together.  Bake normally and you have a chocolate almond toffee filling sandwiched between two amazing brownie layers.  (If you want to add another touch, you can throw some sliced almonds on top when there are a few minutes of bake time remaining)!
  • A little brownie tip- Cut brownies with a plastic knife…it's amazing!  Something about the plastic doesn't stick to the brownie like a metal knife does.  And you get beautifully-cut, gooey brownies.  Try it!
Brownies.  So much to say about them!  I love that brownies are just about perfect with ice cream and hot fudge and yet they pack great for a road trip, and are versatile when adding toppings and layers.  Happy baking! 

 2/3 cup butter (11 Tbsp)
1 1⁄4 cup sugar
1⁄4 cup water (or you can substitute brewed coffee for a little mocha kick)
4 cups (24oz) semi-sweet chocolate chips, divided
4 eggs
2 tsp vanilla
1 1⁄2 cups flour
1⁄2 tsp baking soda
1⁄2 tsp salt

Preheat oven to 325 degrees. Grease 13x9-inch baking pan
In heavy sauce pan, bring butter, sugar, water to boil, stirring until butter is melted and sugar dissolved
(or do this in the microwave).
Remove from heat and stir in 2 cups of the chocolate chips until all are melted. Cool a bit, then add vanilla.
In large mixing bowl, whisk eggs, then gradually add the chocolate mix, stirring with spoon until entirely mixed.  In another bowl, mix flour, baking soda and salt, followed by the rest of the chocolate chips, until combined. Finally, stir the dry into the wet, mixing well.  Spread into the pan and bake for 33-35 minutes until cooked through.  Do not over-bake! 


Friday, December 10, 2010

Ode to Peppermint Bark


One of my very favorite holiday treats is Peppermint Bark. 

Is it because it’s basically hunks of white chocolate with crunchy peppermint?
Or because we only eat it in December, so it is novel?
Or is it because it is so beautiful: in a jar, in a bowl, on a plate, in my hand, in my mouth?  Or is it because it makes such a great gift for people to enjoy for weeks?
Or is it because it is soooo simple to make and so tasty and lovely and if you buy it at Williams Sonoma it is a shocking $26.50 per pound , yet you can make it for just a few dollars?

Are you sold?  Should Peppermint Bark be giving me commission?

Really, if you haven’t made it, you should try it.  Simple. Elegant. Crowd Pleasing. Versatile. Yum!


a few simple ingredients
Peppermint Bark
Crushed candy canes, to yield 1 cup
2 pounds white chocolate
Peppermint flavoring, to your taste- start with 1 tsp.


hammer those mints...get out your aggression
Place candy canes in a plastic bag and hammer into 1/4-inch chunks or smaller.


Melt the chocolate in a double boiler or in the microwave 30 seconds at a time (according to the chocolate package).

peppermint-filled white, smoothed on pan
        
Combine candy cane chunks with chocolate (add peppermint flavoring at this point). Pour mixture onto a cookie sheet layered with parchment or waxed paper- I find the thinner is better. Place in the refrigerator for 45 minutes or until firm. Remove from refrigerator and break into pieces. (whatever size you like)


case in point
Some Ideas:
*This is a very good use for broken candy canes- if you happen to have broken candy canes in your world for some reason, say, for instance, you have them as tree decorations and your 2 year old thinks they are really fun to play with, and then drops them on your wood floor, or something like that!


dark chocolate under-layer
on the counter for snacking or to give as a gift
* Make it how you like it. Add and change it as you like. This time I decided to add a dark chocolate layer underneath, inspired by the amazing Ghirardelli Peppermint Bark. Simply spread the chocolate layer on the parchment and let it set somewhat...not all the way, but firm enough that adding the white chocolate won't make it bleed.

Sunday, December 5, 2010

Eeny, Meeny, Miny, Moe

December is such an odd month in my kitchen and in my culinary-mind.  I am a college professor, so December is a wild month with the end of classes, grading papers, administering exams and then more grading.. all while celebrating Advent and Christmas gift buying and celebrating my son’s birthday and baking and gift making!  I have never blogged in December, since this is my first year at this endeavor so I am a little overwhelmed about how to approach it.  So much to write, so much to bake, so little time to edit, photograph, and difficult to know what you’d want to hear about. 

This past week I made an Almond Cake, Spicy Vegetarian Chili, and homemade salsa-  that I’ve wanted to tell you about but I have been busy teaching and grading.  And then last night I made my peppermint bark and mint brownies, and some tangy balsamic vinaigrette dressing for a salad, all of which I want to share with you. This coming week I will be hosting my students in my home for a couple of end-of-the-semester-celebrations and will be baking for some of those. Asher’s birthday is Thursday and he’s already putting in his requests for his goodies:  "a giant chocolate chip cookie…no, a strawberry cake (his usual choice), no, a red velvet cake, no, a pound cake, no, frozen chocolate covered bananas, no, an ice cream cake"!

So, I have a lot going on in my mind and in my kitchen that I want to pass along but am trying to figure out what and how and when. Regardless, I am thankful that there is someone out there to tell about all of these yummy endeavors and to share my mess-ups, successes and ideas. 

I think for today I will give you Almond Cake.  We’ll start at the beginning of last week.

Do you like almond flavoring? I love it!  I have a few friends who love it too: Sara Beth, Amy G., Amy J., Melissa B., Melissa S., Gretchen, Patsy…the list goes on and on.  I think we might should consider forming an Almond Fan Club.  Our club could meet monthly and we could just sit around and eat almond-y things and “ooh and ahh” over them.  We could start an online group forum for local clubs around the country, the world! Okay, I am getting carried away.

Well, a new almond recipe recently entered my life and I just have to share it with you!  This almond cake was brought by my friend Kelly to the flower arranging DIY class, which I hosted earlier in the fall (see post).  The cake was simple and familiar, yet elegant, unique and fragrant with almond!  I had to get the recipe and when I read the ingredients I realized this is really an Almond Pound Cake (meaning it has 2 sticks of butter and tons of sugar)!  No wonder I like it so much. 


Almond cake and pastry filling
It also has an ingredient I didn’t even know existed! Almond cake and pastry filling. I know, crazy huh? It is in the baking section beside the Apple Pie filling at the grocery and it was available in my local Kroger, much to my surprise.  It is basically ground almonds in a goopy filling.  It is strange looking but has a pretty amazing effect!  I can’t really imagine a pie made out of it…like substitute the cherry pie filling for almond and voila an almond pie!?  I think I’ll keep it in the cake for now.  However I never say never.


I emailed Kelly to get her permission to post the recipe and asked for the back-story.  I love a story behind a recipe, don't you?  She said her mother has made it since Kelly was a child and they loved to eat it for breakfast!  The recipe came to her mother from a Jewish friend whose family served the cake at special occasions, like when their children had their very first haircuts.  How great is that?  Thank you Kelly. Thank you Kelly’s mom. Thank you Kelly’s mom’s friend. Enjoy!

Monday, November 29, 2010

O Christmas Tree

Last night we got our Christmas tree!  The house is a wreck, as we just got home from traveling to see family for Thanksgiving, but in the midst of laundry and bags and piles, we pulled the tubs of Christmas decorations out of the attic and made a family outing to pick out a tree.  I love this tradition and it gets more fun every year.

When decorating the tree I always think back to the first year I was married. We lived in a condo, I was in grad school, and we were working many jobs to make ends meet.  It was December and we were trying to decide whether or not we should buy a Christmas tree.  Being the practical one, I suggested we not and save the $25 for a necessity, while Dave being the more adventurous one really felt like we should have a tree for our first Christmas.  I was geared up to string lights and candy canes on our little ficus tree in the living room,  but was thrilled when we made the decision to get a real Christmas tree.  It was a little tree, humble Charlie Brown-like in many ways, but it was OUR tree. 

We didn’t have any ornaments and we had no “extra” money so we decided to make-do.  We threaded cranberry and popcorn garlands and baked salt dough ornaments of various shapes.  We bought candy canes to hang on the tree. It was a sweet and lovely tree.

We had neighbors upstairs who were also newly weds, however they were far more sophisticated and financially stable than we were.   She popped her head in the door as we were finishing the tree and said, “Oh that is so sweet, I love your tree! We just got ours this weekend too.”  I asked if I could come up and see hers.  Walking into the living room, I was stunned by the giant tree that was bending its top at the ceiling.  It was laden with shiny blue and silver balls, sparkely ornaments, tinsel and glitz.  I commented on how glamorous the tree was, to which she replied that she had purchased all the decorations at Pier 1.  And while hers was spectacular, she liked mine better!  Mine had "heart and thoughtfulness", she said.  I came back down and looked at our simple, homespun tree and agreed whole heartedly. 

Well, the same Christmas tree theme remains 15 years later, but with the addition of a couple of boxes of children’s ornaments.  Some handmade by the kids, some given as gifts and some part of the collection that I began when my first child was born.  Each year I buy them an annual ornament, on which I inscribe their initials and that year.  Every year they are anxious to find “their” special ornaments and the corresponding one(s) of their siblings from years past.  Last night I was telling Asher about the ornament with the snow-mommy holding her snow-baby that my friend Carrie had given me at Asher’s first Christmas.  He remarked, “Ornaments really help us remember things don’t they?”  They sure do.

You may have already put up your tree and decorated for Christmas, but here are a few of my favorite parts of our decorating tradition:


  • Play some great Christmas music while you are decorating, and all the time really.  Our family Christmas “soundtrack” includes:

all of Amy Grant's 
and this year's new additions: 

  • Warm some Mulled Cider on the stove top- so easy and yummy and makes the house smell cinnamon-y.  Asher specifically requested Cider this year.  I love requests


2 quarts apple juice, or cider
½ cup brown sugar
¼ tsp salt
3 sticks cinnamon
1 tsp whole cloves
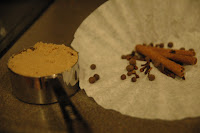
1 tsp whole allspice

Combine brown sugar, salt, and cider in a pot on the stove.  Tie spices in small piece of cheesecloth (or a coffee filter if you don’t have cheesecloth); add to the pot.  Slowly bring to a boil; simmer, covered, 20 minutes.  Remove spices.  Serve hot.

  • Have a snacky meal- I took ½ a block of light Cream Cheese and topped it with a few spoons-full of bought/jarred pesto and a handful of sun-dried tomatoes served with Wheat Thins for our “main dish” and Colby/Jack cheese slices for the kids, raw veggies, apple slices and some deli turkey slices.  Easy, quick, pick up as you decorate, done.  All food groups represented.


  • Use free greenery to deck the halls-  If you have bushes: holly, magnolia, boxwood, etc. you have a resource in your own yard!  Get those clippers and grab some springs that you can stuff as décor and greenery all over your house.  If you don’t have that resource, like I don’t, then take advantage of the pile of free “trimmings” at the Home Depot, or other tree retailer.  They give away the trimmings and I always grab a bunch, use some and keep the others outside in the cool until I need to spruce things up in a couple of weeks.


  • String cranberry and popcorn garlands with a little air popped corn, some fresh cranberries, dental floss and a sharp thin needle.   We have a garland which has lasted for over 10 years.  The cranberries are dried, and obviously not edible but are pretty (just a little wrinkly, but that's what happens over 10 years…my face can attest to this!)


I hope this season of Advent and Christmas is a joyous and meaningful time for you!  


Tuesday, November 23, 2010

Traditions: Old and New

‘Tis the season for traditions!  I love them- some from my household growing up, some from generations past, and some that we have created in our home.  Here are a couple I want to share with you.

Old Tradition: Cheese Rolls
Cheese Rolls have been a favorite in our family for years.  For parties, holidays and special meals, we made cheese rolls:  a crowd pleasing and kid-friendly dish.
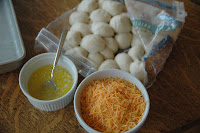
They are too easy! They are made from frozen roll dough with melted butter and shredded cheddar cheese. (If you haven’t used frozen roll dough, you should try it.  It is found in the freezer section of the grocery near the frozen biscuits.  It is versitle and can be used for Stromboli, cinnamon rolls, cloverloaf rolls, and many other treats.)


My mom taught my sister and me to make cheese rolls when we were young girls.  She recalls a party at our house where my sister (at age 10) and I (at age 8) made the cheese rolls for the entire dinner party.  I tell you this for two reasons: 1.  If you are not confident in your baking skills, try this recipe!  It's hard to mess up.  It is simple enough for a child.  2.  This is a good moment to talk about involving kids in the cooking.  My mom’s philosophy has always been:  “Let kids help in the kitchen as soon as they are interested, even though it makes more of a mess and complicates and slows down the process!  You are training little cooks that someday will help you cook dinner.” 

My children love to help cook.  My almost 3 year old has recently been obsessed with being my sou chef.  If she sees me cooking she says, “You cooking mommy? I wanna watch you!  I help you? Get the stool please!”   This is sweet and cute, and yet overwhelming.  But I see the great value in drawing her in.  I keep reminding myself that my son could crack an egg without getting the shells in the batter when he was about 4 years old from all the "helping" he did in the kitchen at this age. And the kitchen is a great classroom, for science lessons, math lessons (fractions, counting, addition) and creating beauty.  So this morning I had a little helper assisting with the cheese rolls.

1. Stretch the thawed dough
2. Dip the dough

3. Sprinkle with cheese
4. Fold and place in pan (notice my
little helper)


5. Finished Product


New Tradition:  Thankful Tree

The Thankful Tree
The past couple of years we have made a Thankful Tree to encourage gratitude during this season of Thanksgiving.  This is a free activity:  branches out of the yard, a repurposed pasta jar, scraps of paper, twine, and an invitation to add your “thankfulness” to the tree.  Last night I had the tree ready to be filled and had started the gratitude with a couple of my “Thanksgivings” placed  on the tree.  As I was getting dinner ready, my kids spontaneously gathered around the tree and excitedly began writing their “thanksgivings” to hang on the tree.  They are sweet sentiments ranging from: my teacher, to oxygen, to books, to my home and shelter, to God providing all we need.  At dinner my 6 year old used the tree as her guide to thank God in her dinner prayer. 

I just had to share this with you.  If this doesn't seem to fit your season of life get creative and start (or continue) your own way of encouraging gratitude in this season.  Before I had kids, I would write a note on a small piece of card stock with a simple fall leaf glued to the front with a personalized greeting to each loved one: I am thankful for your______________(kindness and generousity in my life) to give to friends and family. 

This week enjoy traditions, old and new....Happy Thanksgiving!