Showing posts with label easy. Show all posts

Monday, February 20, 2017

Sautéed Cauliflower: Our Unexpected Crave

Y'all, an unexpected thing happened to our family this winter.  We fell in love with cauliflower. I have always liked it, but never would I have thought that the words *cauliflower* and *crave* would be used in the same sentence.  But now, I crave it, and it shows up on the grocery list every week.

Here's how it happened: I was making the Cauliflower Soup that my friend Lindsey had been raving about.  It is a creamy (from the veggies, not milk) blended soup with bits of roasted cauliflower nestled on top as a garnish.  As I was sautéing the garnish, we tested one to check for doneness and flavor and then we started nibbling.  I swiftly went back to the refrigerator to cut up some more to add to the pan because it was clear none was going to make it to the soup. We ended up loving the garnish even more than the soup. (Though the soup is a winner.)

As we were chomping, we recalled a time we went with friends to the Tavern in midtown and got a buffalo cauliflower appetizer that was incredible.  It made me think about dipping them in some buffalo sauce.  The next time we sautéed cauliflower we tried it and it was yummy- especially to my guys.

Now sautéed cauliflower has become a main dish, a side dish, and a snack at our house. This week we made brown rice bowls layered with sautéed cauliflower and roasted kale, and rotisserie chicken with a drizzle of buffalo sauce and crumbles of blue cheese.


Herb Salted Cauliflower (Roasted or Sautéed)
You can oven roast or sauté depending on the time you have and amount of cauliflower you are making.
If you are making a bunch (a large head or more) you might rather roast on a baking sheet.
If you need it faster, you might choose sautéing in a frying pan.

Wash and chop cauliflower into small pieces.  Toss in a drizzle of olive oil.  Sprinkle with herb salt, or coarse salt and some dried rosemary and/or basil.


For sautéing- place in a pan on medium high heat and stir occasionally until tender, transparent and the edges are golden. Sprinkle with salt or herb salt.

If roasting- place on rimmed baking sheet and cook at 375˚ for 20-30 minutes, stirring a few times here and there.  Remove from oven when cauliflower is tender, transparent and the edges are golden. Sprinkle with salt or herb salt.

Let this simple, nutrient-packed, savory treat inspire your next meal! 

Saturday, September 10, 2016

Southwestern Chopped Kale Salad

This summer my friend Melissa and I met up with our families at the pool for an evening swim and were swapping summer salad recipes, because that is what we do when we get together.  We are always looking for yummy, fresh, new recipes that can be simply done and made ahead.  This one is a winner.  She was inspired by a recipe from a blog but then she tweaked it so much, I think it is absolutely fair to call it her creation!

I have made it multiple times this summer and wanted to post it but haven't had/taken the time to get it written. But before the fresh corn is gone for the year, I knew I must post it.

The first time I made it, I was meeting my friend Jennifer and her kids at their community pool and I wanted to make a yummy salad that my kids and I could eat and that would be a treat for Jennifer too. So, I made it that morning instead of packing up sandwiches. When it was lunch break and we pulled out our food, I opened my container of salad and started chopping up an avocado to mix in.  Two other mommas near us peered over and one said, "YUM! What is that? That looks good!"  I told her what was in it and that it was my friend's creation that I was trying out for the first time.

I scooped up some on a little plate and handed it to this unknown pool lady for her to try.  She gratefully accepted it.  She gobbled it up and said she would try making it at home.

From --> friends swapping recipes at the pool --> to -->  friends sharing salad at another pool --> to --> salad and recipe sharing with strangers --> and so it goes!

I loved that she was outgoing enough to inquire about the salad- it was fun to share a recipe and a taste test with pool strangers.  (If you are reading this, kind lady at the Nolensville pool, I'm finally posting the recipe!)

This salad is versatile and one of the benefits of kale is that it is a sturdy green, and therefore can be made ahead of time! (Just stir in the avocado right before serving.)

it just takes some chopping 

the corn makes it nutty and hearty
Southwestern Chopped Kale Salad
   from Melissa Broadwell

8 cups chopped fresh kale

1/2 bunch of chopped cilantro

2 chopped green onions
(red would be good too)

1 container of chopped grape tomatoes quartered (or 2 diced larger tomatoes)

1 finely chopped jalepeno pepper (with seeds removed)

2-3 cobs of corn (depending on how big they are)- steamed or microwaved and cut off the cob

1 cup cooked quinoa

1-2 avocados (depending on size and how much you love it)

Crumbled tortilla chips for crunchy topping

Simple Lemon Dressing:
The juice of one lemon and 1/4 cup olive oil, kosher salt and pepper swirled together.

Stir together all ingredients (besides the dressing and crumbled tortilla chips)

the quinoa can be made ahead and kept in the refrigerator
Add dressing drizzle by drizzle until fully incorporated and the right amount of wet.  Add avocado just before serving.  Stir in well and then top with the crumbled chips.

>>>>>>>>>>>>>>>>>>>>>>>

As always, tweak as you like, and add some meat or beans in the salad or make this a side and serve with a piece of meat. We served it once with Italian sausage and once with sautéed shrimp.


The pools are closed now in our community for the most part, as Labor Day has passed, but the Southwestern Kale Salad is still going strong.  Hope you find it as tasty and satisfying as we have!


Thursday, June 23, 2016

Mini Cinis! (Quick Mini Cinnamon Rolls)

I am a fan of cinnamon rolls!  And the smell of them in the oven is irresistible! I have always marveled that Cinnabon Cinnamon Roll shops need not market their goods, as long as they keep baking the rolls in the mall.  The smell lures people in!

As much as I love cinnamon rolls,  I often do not have the time to devote to yeast-based cinnamon roll making! So, these quick little treasures are a good stand in! They are made with canned refrigerated crescent rolls and are therefore super fast and easy while still being flaky and tasty.

I like making mini-muffins and mini versions of things so that less is wasted and people can get as much as they want (1 or 2 or 8...like my son did)! Also, when hosting a gathering, I prefer to serve minis so that guests can have a taste of a lot of different things.

There are several variations of this recipe swirling around the internet and in cookbooks- some with butter, brown sugar, and granulated sugar.  I tried this one which doesn't call for butter and they were great (since there is plenty of butteriness in the crescent rolls already). So, feel free to play around with the recipe and adapt to your liking! You can add more cinnamon or chopped nuts inside, or even orange zest. This is just the basic recipe to get you started.

Here's how to make them:

Mini Cinis
(makes about 28 itty bitty rolls)

for the rolls-
1 package (8 oz) refrigerated crescent rolls
1/2 cup brown sugar
1 heaping Tbsp. ground cinnamon

for the frosting- 
1/2 cup powdered sugar
1/2 tsp. vanilla or almond extract
A spoonful or so of milk (or enough to achieve desired consistency)

for the top-
a few pinches of coarse salt to sprinkle on top after drizzling with frosting (because salty sweet is always a win)
chopped pecans if you choose

Preheat oven to 350˚. Line baking sheet with parchment paper.

Unroll crescent roll dough onto a baking mat or another piece of parchment paper.  Separate into 4 rectangles. Firmly press diagonal perforations with your fingers to smooth them out.

Mix brown sugar and cinnamon together in a small bowl.
Sprinkle mixture evenly over rectangles- leaving a 1/2 inch margin around the edge (so that the dough can stick to itself when you roll it).
Carefully roll each rectangle into a log starting from the longer side. 
Cut each log into 1/2 thick slices.  
 Arrange mini cinnamon rolls close to one another on the baking sheet.

 Bake the mini cinnamon rolls in the preheated oven until golden, 10 to 13 minutes.  Transfer onto a plate and set aside to cool for a minute. 
Combine the confectioner's sugar, vanilla and milk in a measuring cup until smooth and a pourable (but not too thin) consistency. Drizzle over warm rolls.  Sprinkle with a little coarse salt (and pecans if you are adding those).

a double batch- minus the handful my son snagged
 This is a simple 
recipe I couldn't resist passing along to you.
Enjoy!

Thursday, June 16, 2016

Nothing Says Summertime Like Key Lime Pie (a recipe worth Re-Posting)


This is a re-post from 5 years ago.  It's a perennial favorite.  It is summertime deliciousness! 

I believe that little things can make a big difference.  It might only take a few more minutes, or a couple more dollars (or not any more $$ at all) – just a little time, creativity and intentionality, and you can greatly enhance the beauty and enjoyment of things.
For example:
>Use a pretty tablecloth or cloth napkin whenever you can (some of my favorites I got at thrift stores and antique stores).  It can add such a nice touch.

>Instead of pens rolling around in your junk drawer, why not put them in a fun jar on the table?

>On a nice evening when a friend comes by, why not light some candles outside and sit for your visit?  (It can feel magical!)

>Or keep a dish of yummy seasonal candy on your office desk to share with those who pass by.

>When you have a meeting to attend, make some cookies or muffins to take with you.

>Place a pretty napkin in a basket when serving muffins.

>Write a handwritten note of love, thanks, or well wishes to someone.

>Have a small vase of fresh flowers in the room for your spend-the-night guest.

>Sprinkle coarse sugar on top of your muffins.

>Use fresh garlic &/or herbs in place of dried when cooking.

>When hosting a gathering, make little tents out of card stock with labels of "de-caf" or "regular" on your coffee or specific titles of the foods being served.

You get my point?  All these things are little things but they can really add beauty, creativity and fun to the ordinary.  I would love to know what special little things you think make a big difference!

I was thinking about all of this as I was making Key Lime Pie this week.  As I made it, I was thinking about how much homemade graham cracker crust and whipped cream for really takes this pie up a notch. Such a small investment for a big difference!

Key Lime Pie.
It is many people's favorite summertime dessert.
The filling is so creamy and tangy and the crust is sweet and buttery.  The whip is so light and fluffy.
I love it in the summer, or when we have Mexican food, or fish or really anytime of day, with any menu.
It is such a simple, timeless recipe.

I don't know if you have made many Key Lime Pies, or have eaten many.  But making a graham cracker crust takes about 5 minutes and the result is a crumbly, buttery, golden crust that you want to just eat by itself!  Buying a Keebler crust is more expensive and just can't compare to the crunchy buttery goodness of a homemade one.  And whipping cream is super simple and it typically costs no more to buy whipping cream than to buy Cool Whip.  And it is so much better (and not filled with a long list of chemical ingredients).

Key Lime Pie
1 1/2 cups Graham Cracker crumbs
1/4 cup sugar
1/2 stick (4 Tbsp. melted butter)

For a normal or deep dish pie pan:
2 cans Sweetened Condensed Milk
1 cup Key Lime Juice
6 egg yolks

{OR for a smaller aluminum pie pan}:
1 can Sweetened Condensed Milk
1/2 cup Key Lime Juice
3 egg yolks

Make Graham Cracker Crust – I put graham crackers in a ziplock bag and crush them with my fist, or with a mallet.  (You can make them as fine or coarse as you like). Stir together ingredients for the crust.  Combine until well incorporated.  Press into a lightly greased pie pan – reserving one spoonful for tasting (okay, you don't have to, but I can't ever resist!) Place crust into oven and bake for 10 minutes at 350 degrees.


In a separate bowl, combine all of the ingredients for the filling. Stir until consistent and smooth. (Hang on to the egg whites, as you can use them in another recipe or have them on hand for breakfast egg whites). Pour filling into crust.  Return to oven for 10 minutes (just to "kill" the raw egg).  Let sit on counter for 10 minutes to cool a bit.  Place in refrigerator for 4 hours or more – until set and cold.


whipped cream
Make whipped cream: 
Pour 1 pint of whipping cream into mixing bowl and let it go full speed for a few minutes until thickened and peaks remain when you pull out the beater. (Watch it or you will have butter in your bowl!) Add a hefty spoonful or two of sugar and voila! 

There you have it!
It doesn't get any better than this simple pleasure – it's the little things!

Thursday, June 11, 2015

Dutch Baby: A Special and Simple Breakfast Treat


It only takes seeing a photo of beautiful food to drive me into a craving that propels me into action!  That's what happened a couple of weeks ago when I saw a photo of a Dutch Baby.

I read an article about race relations on Desiringgod.org one morning in May while I was drinking my early morning cup of coffee.  I really resonated with it and wanted to know more about the author.  I googled her, and found out her name is Kim Ransleben.  The google search listed her twitter feed.   Her most recent tweet was a photo of a Dutch Baby she had at a restaurant.  It was beautiful and delicious! I had seen a Dutch baby in a cookbook before and I thought it looked yummy and interesting, but had never tried to make it.

After seeing that picture, I walked straight into the kitchen, pulled down my Joy of Cooking cookbook, found the recipe and made one.  Right then and there! (You know how one thing leads to another.)  It was shockingly simple…with only a few ingredients, all of which I had on hand.  It puffs up into this beautiful pastry! It was so easy, such fun, and really delicious!

I wish I could offer samples through a screen, because it's difficult to describe the taste of the Dutch Baby.  I think it tastes a lot like french toast.  It's eggy, sweet, puffy and buttery.  Or like a donut, or a funnel cake.  (Just far less work!)

After making one, I started to dig around the web to learn more about it.  Evidently there is some controversy over the name/origin of this recipe.  Some call it a German Pancake, which is not nearly at clever sounding, though potentially more authentic to it's origin.  There are a variety of ways people garnish it.  Evidently people traditionally squeeze a lemon on top.  Others serve it sprinkled with cinnamon sugar, or topped with powdered sugar and dipped in maple syrup.  Some put berries on top of it.  We like it with powdered sugar!

Give it a try! It only takes about 15 minutes from start to finish. Be forewarned, though: you must move fast and serve it quickly because it falls soon after coming out of the oven.

Dutch Baby
adapted from Joy of Cooking

Makes One 10-inch cake; 4 servings

4 Tbsp. (1/2 stick) butter

1/2 cup milk
1/2 cup all-purpose flour
1/4 cup sugar
2 eggs, at room temperature
a couple of pinches of salt

Powdered sugar for dusting
Cinnamon sugar for topping or maple syrup, lemons for squeezing, or jam

Preheat oven to 425 ˚

Melt butter in a 10 inch skillet (ovenproof; cast iron is ideal) on medium high heat on the stove top. Tilt the pan so that the butter coats the sides. 
Whisk together all other ingredients (milk, flour, sugar, eggs and salt) in a bowl.  Once butter is melted in the skillet, pour the egg mixture in and cook, without stirring, for 1 minute.  Then place the skillet in the hot oven and bake until the pancake is puffed and golden, 10-15 minutes depending on your oven.  (The edges will be darker brown). Serve immediately, for the pancake loses its puff, and therefore its drama, almost immediately.

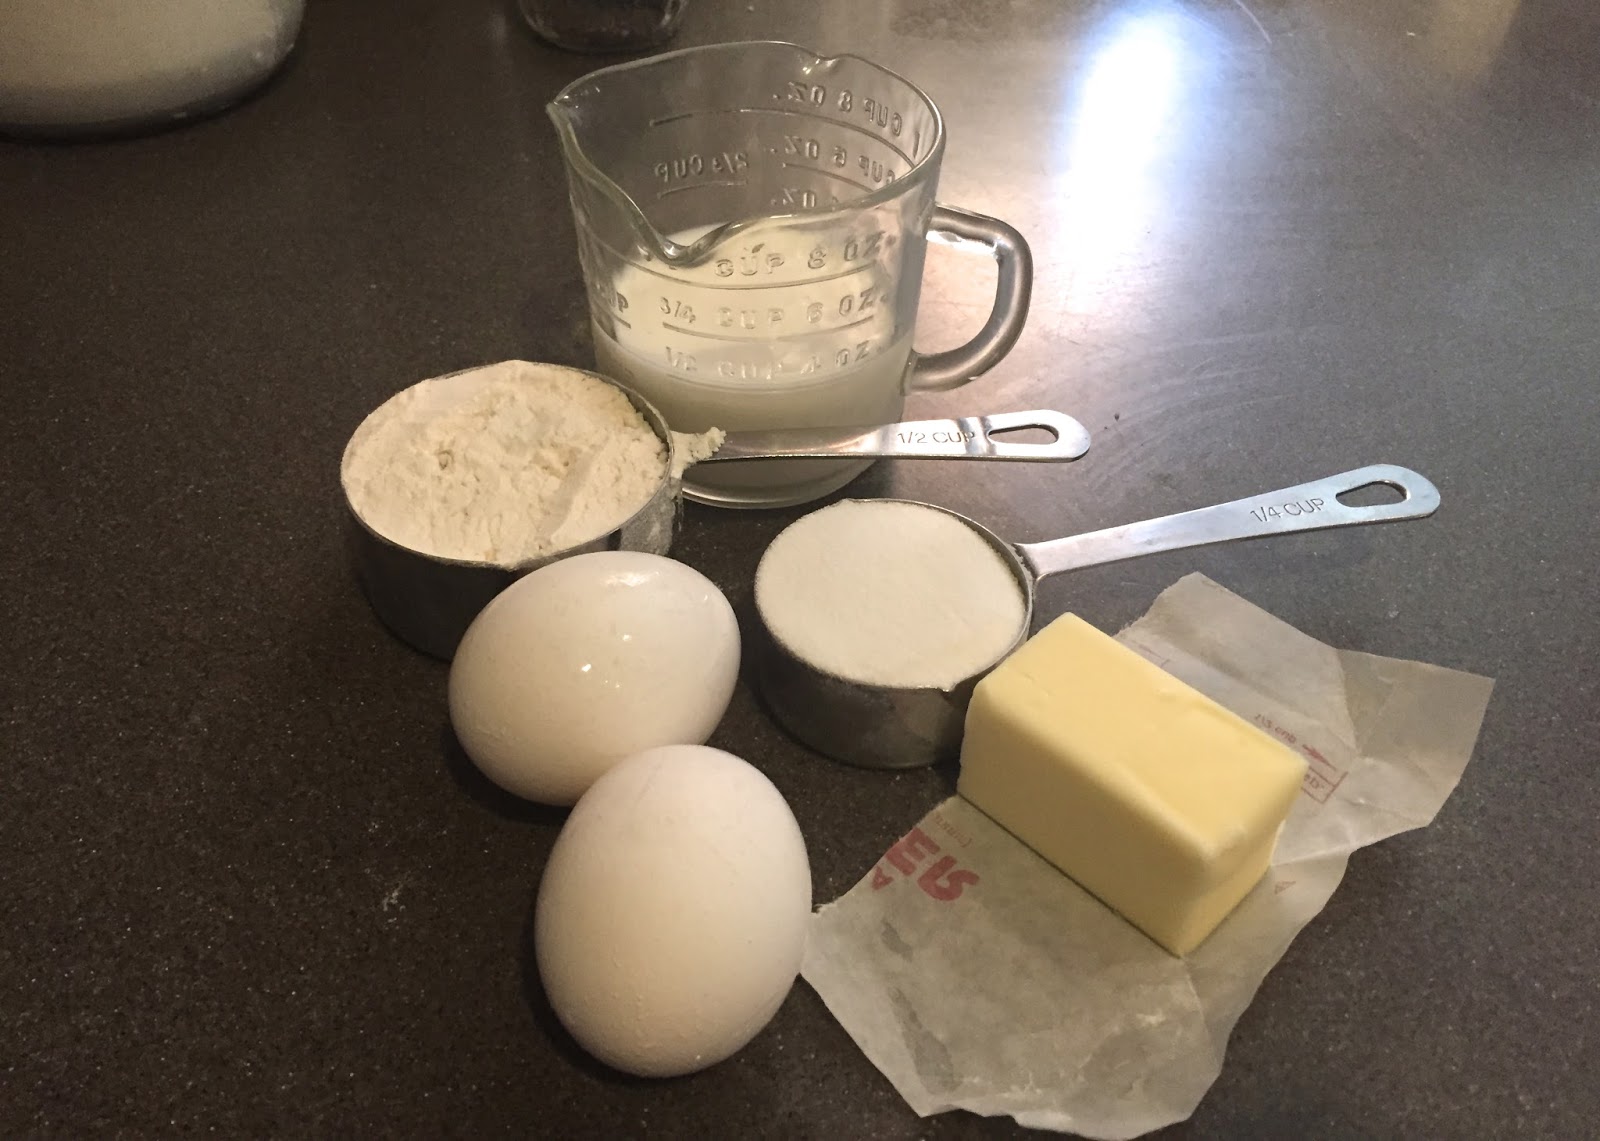
This is it! These few simple ingredients! 

The eggs are to be room temperature.  Since I don't have
farm fresh room temp eggs on hand in my house, I found this
trick from the Barefoot Contessa.  Place the eggs into a container of warm water
for a few minutes before cracking.  Works like a charm!
1/2 stick butter melted in the skillet.  A great beginning.

Pour the batter into the buttery pan and let cook for 1 minute.
Then stick it in the hot oven.

While it is cooking, you can set the table and get ready to move fast. 

Quickly sprinkle powdered sugar on top.
(Or cinnamon sugar if you prefer).

Ready to serve. 


Dig in! 


I am excited to add a new quick and special recipe to my breakfast treats and to share this discovery with you.

Tuesday, May 12, 2015

Blueberry Cheesecake Bars and the Summertime Classroom!

I am so excited that there are no more papers to grade or classes to teach for 3 months! I am breathing a deep sigh of relief.  I have been busy, busy with the end of the semester of teaching and my summer has now begun.

As we celebrated our graduating Seniors at a gathering and gave our parting words, I told them that they were ready-  that they have what they need to do the next thing in their Social Work careers.  I also challenged them to be life-long learners…to never stop learning! Be humble, knowing that they always have much more to learn!  I am struck by how much I learn every year.  At school- new students, new courses, new articles, books and workshops all enrich my life and enliven me.  And at home- new skills and recipes and stages of parenting keep life dynamic and keep me as a student always!

I appreciate that summer is a time to learn creative things.  It's like summertime is another kind of classroom.  I like to try new recipes, and read books, and try to develop skills.  I am hoping my summer will be filled with these things.  I have my book stack (an annual ritual) which I will attempt to chip away at these next couple of months. [And yes,  I'm aware that it is way too tall a stack to accomplish in a summer.] I hope to also practice Calligraphy, and ukelele playing with my girls, studying more about the Enneagram (which I am hoping to incorporate into one of my classes in the fall) and hopefully have time to share lots of recipes on the blog.  (And learn the Spanish language and learn how to sew alongside my daughters and...)

I have been cooking up some things these past weeks that I've been anxious to share with you.
The first is this delicious recipe from my student, Rebecca.  My students teach me all of the time.  I love learning from them!  This time it was a recipe.  She surprised our class, with homemade blueberry topped cheesecake bars.  We were all ecstatic before we even tasted it!  When we dug in, there were many "mmms and yums"!  She shared the recipe with the class after we all requested it.  I was excited to go home and make it.

I made the recipe the next week for my small group since I knew when I tried this recipe I would need some eaters, because if not,  I would be tempted to eat the whole pan.  I decided to double the recipe, since the original recipe is for an 8 X 8 pan and I was making it for a group of 15.  So, I thought I would use my large glass baking dish rather than the square one.  However, as I was making the crust I realized that I had too much crust for this size pan.  It was going to be too thick. So I scooped some out into a shallow dish.  Then I made the filling.  It filled my mixer to the top and was too much for the pan as well.  So, I plopped a few scoops of it on top of my mini crust before spreading the rest into the pan.  Lesson learned.  Use the correct size pan! The silver lining was that Dave and I got to have a mini cheesecake to share that night and didn't have to wait until small group to indulge!

This recipe is simple and delicious and no bake! The baking part of cheesecake-making has always been my challenge.  You want to make sure it is fully baked so that it doesn't goo, but not get too done, and not crack! With this no-bake recipe, you don't have any of those worries.

It is so delicious! BEWARE, however, this is not a healthy recipe… you can tell that by looking at the list of ingredients.  But it is so delicious and simple to make.


Borrowed from thirtyhandmadedays.com

CRUST
12 graham cracker sheets, blended to make 2 c. of crumbs
1/4 c. sugar
1/2 c. (1 stick) butter, melted (or less, this is a lot of butter!)

FILLING
2 (8oz) packages of cream cheese
1 c. powdered sugar
2 c. (1 pint) of HEAVY whipping cream
1 tsp. vanilla extract
1 tsp. almond extract

BLUEBERRY SAUCE
(adapted from Martha Stewart)
2 c. fresh or frozen blueberries
1/2 c. sugar
1 Tbsp. butter
2 tsp. cornstarch
1 tsp. vanilla.

Instructions
CRUST: Using a food processor, blend graham cracker sheets until turned into crumbs (or do this in a ziplock bag with a rolling pin).
Add sugar and melted butter; blend until well mixed.
Press into an 8×8 pan lightly greased with cooking spray.
 
FILLING:  Using a mixer with a whisk attachment, mix cream cheese and powdered sugar until smooth.
Add heavy whipping cream, vanilla and almond extracts.
Mix on medium-high for 2-3 minutes or until thickened.
Pour filling over the crust.

Cover and refrigerate for at least 2 hours.

SAUCE: Add all ingredients to a medium saucepan.
Cook over medium high heat and simmer for about 5 minutes.
The blueberries will breakdown and the sauce will become thick.
Let cool and refrigerate until you’re ready to serve the cheesecake.

Pour on top of cheesecake.
Serve and enjoy!


Here's to a season of learning and cooking and enjoying the tastes of summer! 


Thursday, March 19, 2015

Energy Bites: Healthy & Delicious (For Real!)


I don't know if you have made energy bites of some sort, but I have become a fan of these yummy and healthy snacks.   A while back, my friend Connie gave me a few of these she had made to sample.  After I had one, I immediately texted her, "YUM! I tried them and I need the recipe!"  Then, a few weeks ago it was my snack-bringing week for church and I felt the need to make something a little more substantially nutritious than the biscuits and coffee cake I had made the previous months.  I looked on my Pinterest breakfast board and found this recipe that was pretty much Connie's recipe but with peanut butter instead of almond butter. I had forgotten about the recipe! 

I made a double batch- which yielded 40 something balls.  They were all gone within a few minutes of serving them.  I don't know if people were desperately hungry or they really liked them.  We have lots of kids that congregate around our snack table at church, so I think we can call these delicious when kids and adults ate them, and we can call them healthy since they are chock full of flax seed, chia and oats! 

I made them again for my family this week and we have enjoyed having them for a quick snack or for a breakfast on the go.  I even had one for dessert the other night (though my son believes that despite that fact that they are laced with chocolate chips, they do not qualify for dessert) !

I'm trying to have things on hand that are protein-rich, as my kids tend to reach for crackers, chips, and starches for snacks.  Lately, I've made Hummus and Texas Caviar to have in the refrigerator and try to always keep yogurt and smoothie-making supplies on hand.  If I get my act together to have the good stuff within reach, and prep a couple of things for the week, they have good, tasty, healthy things within reach.  


Energy Bites
Makes about 20

1 cup (dry) old fashioned oatmeal
2/3 cup coconut flakes
½ cup peanut butter (or almond butter- take your pick)
½ cup ground flaxseed
½ cup mini chocolate chips
1/3 cup honey
1 Tbsp. chia seeds
1 tsp. vanilla extract


Stir all ingredients together in a bowl.  Let set in refrigerator for at least 30 minutes.  
Form into small balls (about golf ball size).  
Put in an air tight container and keep in refrigerator. 


If this inspires you to get into healthy oatey bar/bite making, I have two granola bar recipes I love that I wrote about HERE and HERE and my favorite go-to granola recipe HERE, oh and the lovely chewy peanut butter granola HERE.  If you are short on time, these simple but nutritionally dense bites are super easy and quick to put together.