Monday, November 29, 2010

O Christmas Tree

Last night we got our Christmas tree!  The house is a wreck, as we just got home from traveling to see family for Thanksgiving, but in the midst of laundry and bags and piles, we pulled the tubs of Christmas decorations out of the attic and made a family outing to pick out a tree.  I love this tradition and it gets more fun every year.

When decorating the tree I always think back to the first year I was married. We lived in a condo, I was in grad school, and we were working many jobs to make ends meet.  It was December and we were trying to decide whether or not we should buy a Christmas tree.  Being the practical one, I suggested we not and save the $25 for a necessity, while Dave being the more adventurous one really felt like we should have a tree for our first Christmas.  I was geared up to string lights and candy canes on our little ficus tree in the living room,  but was thrilled when we made the decision to get a real Christmas tree.  It was a little tree, humble Charlie Brown-like in many ways, but it was OUR tree. 

We didn’t have any ornaments and we had no “extra” money so we decided to make-do.  We threaded cranberry and popcorn garlands and baked salt dough ornaments of various shapes.  We bought candy canes to hang on the tree. It was a sweet and lovely tree.

We had neighbors upstairs who were also newly weds, however they were far more sophisticated and financially stable than we were.   She popped her head in the door as we were finishing the tree and said, “Oh that is so sweet, I love your tree! We just got ours this weekend too.”  I asked if I could come up and see hers.  Walking into the living room, I was stunned by the giant tree that was bending its top at the ceiling.  It was laden with shiny blue and silver balls, sparkely ornaments, tinsel and glitz.  I commented on how glamorous the tree was, to which she replied that she had purchased all the decorations at Pier 1.  And while hers was spectacular, she liked mine better!  Mine had "heart and thoughtfulness", she said.  I came back down and looked at our simple, homespun tree and agreed whole heartedly. 

Well, the same Christmas tree theme remains 15 years later, but with the addition of a couple of boxes of children’s ornaments.  Some handmade by the kids, some given as gifts and some part of the collection that I began when my first child was born.  Each year I buy them an annual ornament, on which I inscribe their initials and that year.  Every year they are anxious to find “their” special ornaments and the corresponding one(s) of their siblings from years past.  Last night I was telling Asher about the ornament with the snow-mommy holding her snow-baby that my friend Carrie had given me at Asher’s first Christmas.  He remarked, “Ornaments really help us remember things don’t they?”  They sure do.

You may have already put up your tree and decorated for Christmas, but here are a few of my favorite parts of our decorating tradition:


  • Play some great Christmas music while you are decorating, and all the time really.  Our family Christmas “soundtrack” includes:

all of Amy Grant's 
and this year's new additions: 

  • Warm some Mulled Cider on the stove top- so easy and yummy and makes the house smell cinnamon-y.  Asher specifically requested Cider this year.  I love requests


2 quarts apple juice, or cider
½ cup brown sugar
¼ tsp salt
3 sticks cinnamon
1 tsp whole cloves
1 tsp whole allspice

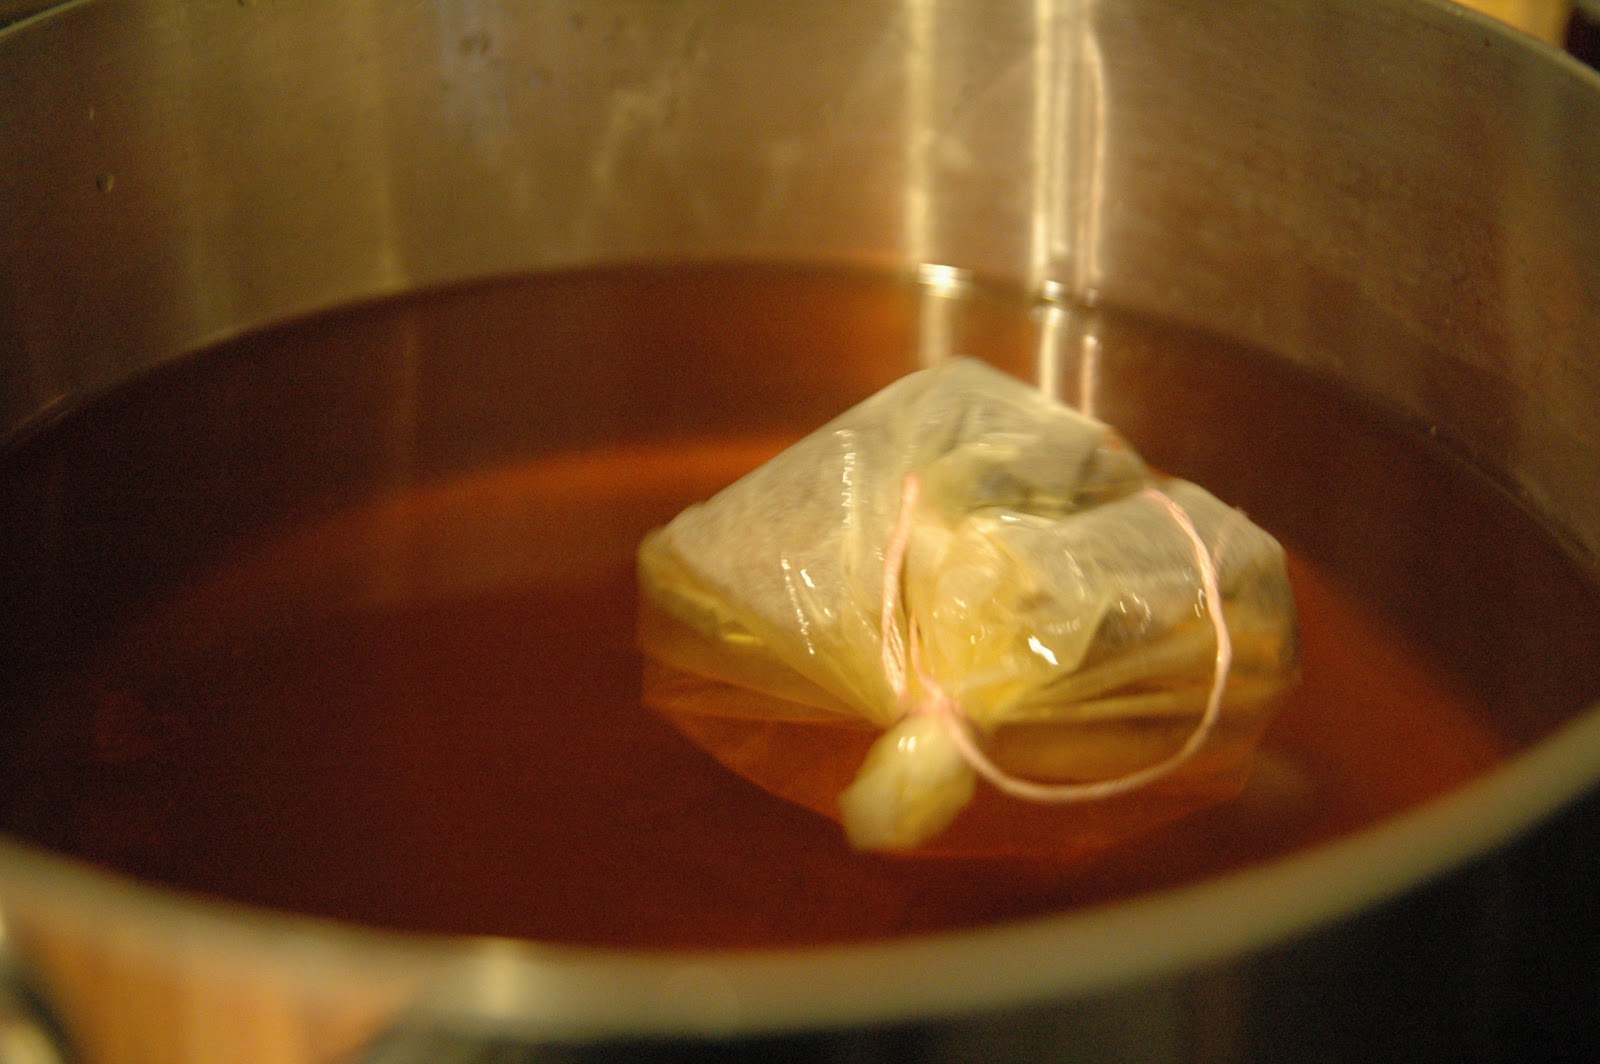
Combine brown sugar, salt, and cider in a pot on the stove.  Tie spices in small piece of cheesecloth (or a coffee filter if you don’t have cheesecloth); add to the pot.  Slowly bring to a boil; simmer, covered, 20 minutes.  Remove spices.  Serve hot.

  • Have a snacky meal- I took ½ a block of light Cream Cheese and topped it with a few spoons-full of bought/jarred pesto and a handful of sun-dried tomatoes served with Wheat Thins for our “main dish” and Colby/Jack cheese slices for the kids, raw veggies, apple slices and some deli turkey slices.  Easy, quick, pick up as you decorate, done.  All food groups represented.


  • Use free greenery to deck the halls-  If you have bushes: holly, magnolia, boxwood, etc. you have a resource in your own yard!  Get those clippers and grab some springs that you can stuff as décor and greenery all over your house.  If you don’t have that resource, like I don’t, then take advantage of the pile of free “trimmings” at the Home Depot, or other tree retailer.  They give away the trimmings and I always grab a bunch, use some and keep the others outside in the cool until I need to spruce things up in a couple of weeks.


  • String cranberry and popcorn garlands with a little air popped corn, some fresh cranberries, dental floss and a sharp thin needle.   We have a garland which has lasted for over 10 years.  The cranberries are dried, and obviously not edible but are pretty (just a little wrinkly, but that's what happens over 10 years…my face can attest to this!)


I hope this season of Advent and Christmas is a joyous and meaningful time for you!  


Tuesday, November 23, 2010

Traditions: Old and New

‘Tis the season for traditions!  I love them- some from my household growing up, some from generations past, and some that we have created in our home.  Here are a couple I want to share with you.

Old Tradition: Cheese Rolls
Cheese Rolls have been a favorite in our family for years.  For parties, holidays and special meals, we made cheese rolls:  a crowd pleasing and kid-friendly dish.
They are too easy! They are made from frozen roll dough with melted butter and shredded cheddar cheese. (If you haven’t used frozen roll dough, you should try it.  It is found in the freezer section of the grocery near the frozen biscuits.  It is versitle and can be used for Stromboli, cinnamon rolls, cloverloaf rolls, and many other treats.)


My mom taught my sister and me to make cheese rolls when we were young girls.  She recalls a party at our house where my sister (at age 10) and I (at age 8) made the cheese rolls for the entire dinner party.  I tell you this for two reasons: 1.  If you are not confident in your baking skills, try this recipe!  It's hard to mess up.  It is simple enough for a child.  2.  This is a good moment to talk about involving kids in the cooking.  My mom’s philosophy has always been:  “Let kids help in the kitchen as soon as they are interested, even though it makes more of a mess and complicates and slows down the process!  You are training little cooks that someday will help you cook dinner.” 

My children love to help cook.  My almost 3 year old has recently been obsessed with being my sou chef.  If she sees me cooking she says, “You cooking mommy? I wanna watch you!  I help you? Get the stool please!”   This is sweet and cute, and yet overwhelming.  But I see the great value in drawing her in.  I keep reminding myself that my son could crack an egg without getting the shells in the batter when he was about 4 years old from all the "helping" he did in the kitchen at this age. And the kitchen is a great classroom, for science lessons, math lessons (fractions, counting, addition) and creating beauty.  So this morning I had a little helper assisting with the cheese rolls.

1. Stretch the thawed dough
2. Dip the dough

3. Sprinkle with cheese
4. Fold and place in pan (notice my
little helper)


5. Finished Product


New Tradition:  Thankful Tree

The Thankful Tree
The past couple of years we have made a Thankful Tree to encourage gratitude during this season of Thanksgiving.  This is a free activity:  branches out of the yard, a repurposed pasta jar, scraps of paper, twine, and an invitation to add your “thankfulness” to the tree.  Last night I had the tree ready to be filled and had started the gratitude with a couple of my “Thanksgivings” placed  on the tree.  As I was getting dinner ready, my kids spontaneously gathered around the tree and excitedly began writing their “thanksgivings” to hang on the tree.  They are sweet sentiments ranging from: my teacher, to oxygen, to books, to my home and shelter, to God providing all we need.  At dinner my 6 year old used the tree as her guide to thank God in her dinner prayer. 

I just had to share this with you.  If this doesn't seem to fit your season of life get creative and start (or continue) your own way of encouraging gratitude in this season.  Before I had kids, I would write a note on a small piece of card stock with a simple fall leaf glued to the front with a personalized greeting to each loved one: I am thankful for your______________(kindness and generousity in my life) to give to friends and family. 

This week enjoy traditions, old and new....Happy Thanksgiving!

Thursday, November 18, 2010

Baked Potato Soup

I grew up with baked potatoes as a staple in our home.  My mom and dad taught us to eat the entire potato, skin and all.  But it wasn’t until I was a teenager that I was exposed to baked potato soup.  I think it was Silver Spoon Café (whose name later changed to American Café) where I first fell in love with potato soup.  And then, when I came to college in Nashville, I started eating it at The Cooker.   These two versions were different: one more creamy, one more cheesy, but both hearty, warm and like comfort in a bowl!

Through the years, I have tried several recipes to find the right one.  I have found a couple that I have liked, but then I got a recipe a few years ago that I really, REALLY like.  This one is from Julie, a family friend of ours.  I have altered a couple of things (lessened the butter and exchanged yellow onion for the green onions).  This is a great “go to” soup and one that a cold November week like this beckons.  So, I answered the call and made Potato Soup last night. As I was stirring the soup, I remembered an incident in my past that I had with Potato Soup.

Years ago, I was taking a meal to my friend Carlee who had just had a baby. I offered to bring soup and salad and she requested potato soup.  I thought it sounded delicious and set out to make a large pot of it. (When taking a meal to someone, I try to double the recipe so that dinner for our house is prepared at the same time, and so that my family  is not robbed in the wake of my meal giving. I learned this the hard way.)

As I was finishing it up, the soup began to stick to the bottom of the pan.  Foolishly, I took my wooden spoon and firmly scraped the bottom of the pan and stirred the soup, which immediately incorporated all of that burnt, blackness right into the vat of creamy potato soup.  I freaked out! I started trying to pick the burnt pieces out of the soup, while I shrieked "oh no! oh no!".  The task was not simple or effective.  I optimistically thought it might not taste bad if I removed all the charred chunks.  I then sampled the soup, which tasted like smokey, burnt potato soup.  Nice.  And the meal was to be delivered in 30 minutes, of course.  

So, Dave, in his typical fashion, talked me down off the ledge and helped me think about solutions.  The solution that we chose was for him to go to The Cooker and BUY a quart of soup.  I didn’t easily embrace this solution for several reasons:   I am cheap, I like homemade things and I really like giving enough food so the friends can have leftovers!  But in this moment, I needed potato soup pronto and it worked.  My friends had dinner and they didn't have to prepare it.

So I learned from this disappointing experience to stay near the soup, stirring frequently and to keep the temp at medium to low OR to cook it in the microwave, as it won’t burn on the bottom when not on a stove top. 

This recipe can be made with Baked Potatoes or frozen hashbrown potatoes (the square cut ones, not the stringy ones).  I prefer using Baked Potatoes as it is cheaper, fresher and you can make extra potatoes for picky eaters at your table who won’t eat soup (hypothetically).  However, if you have more money than time, you can save a step by buying the frozen hash browns.  You make the call.

To make tasty baked potatoes follow these instructions: 
Wash potatoes
Pierce several times all over with a sharp knife or fork
Rub kosher salt on the outside of potatoes
Bake at 400 for 45 minutes to 1 hour depending on size of potato, until tender when pierced with a knife.
The skin is so yummy!


1/2 stick butter (4 Tbsp.)
1 cup chopped onion
2/3 cup flour
6 cups milk
4 large baked potatoes (or 1 bag of frozen hash browns)
¾ tsp. salt
½ tsp. pepper
6 slices of bacon
1 cup shredded cheddar cheese
1 cup sour cream (optional...or less than 1 cup if you want it less thick/creamy)

Bake potatoes. Melt 1 stick of butter in a pot.  Add onion and sautee until onions are clear.  Add the flour and milk and stir until it begins to thicken a little.  Add baked, peeled, chopped potatoes, salt, pepper and bacon.  Stir until incorporated. Add cheese.  Cook until thoroughly heated.  Stir in sour cream.  If the soup is too thick, add milk.
Garnish bowls of soup with a sprinkle of cheese (and a crumble of bacon if you’d like).


Saturday, November 13, 2010

What a mess!


There is a danger with blogs.
We peek into someone’s life via a few carefully selected photos taken with a nice camera, then we read a couple of beautifully crafted paragraphs describing an event, a memory, or a moment in a funny, poignant, clever or profound way.  And we connect.  We are entertained and possibly inspired in some way.  And then, unfortunately, sometimes we compare.  And we might even judge, envy, self-loathe. And then we say to ourselves, “their life looks so perfect! Mine isn’t like this! How do they do it?!” 

I speak from experience! Perhaps that is why I have very limited personal engagement with social media, as it has the potential to send my analytical, sensitive, visual self into unwanted places.  But surely we all know that there are failures and messes and bloopers  to every beautifully edited post.  We are people! I am reading a great book called The Gifts of Imperfection, by Brene Brown that is inspiring and relieving and calling us to live a connected, compassionate and courageous life of whole hearted living.  If you are anything like me, you should read it…it might change your life.

As a new blogger, it has been such fun creating posts weekly as my “creative outlet”.  I  try to find the best photos from the dozens that we sort through and carefully edit the stories I write, hoping they are fun and inspiring.  And then the other day it dawned on me that, while many of you are friends of mine and know the TRUE authentic, imperfect, rough around the edges me, some of you don’t see the whole picture.  Recently a friend said to me, “I am glad I know your everyday life, because it makes you real, if not, I might read your blog and feel discouraged that I don’t have it all together like you do!”  I thought “Oh no! I need to widen the lens and reveal the reality of my MESSY life!” 

My home is not tidy much of the time: emotionally or physically or logistically.  It is a wild, wonderful ride in our household and we make mistakes, in the kitchen and in our days, but we also have a love of learning, living deeply, and being creative, even if it means making mistakes and messes along the way.  Living Juicy is what SARK (creative artist and writer) calls this.

Messes and mishaps are no strangers to my kitchen.  In fact, in the past 3 weeks I have had three.  Each time, Dave says, “take a photo of THAT!” and we have. 


1. I undercooked the sticky buns I was making for Sunday morning last week and the first pan resembled warm dough. (I always err on the side of under-baking, because I want to avoid: dry, burned, crunchy, over-cooked baked goods).


2. I tried a new recipe for M&M cookies, which spread all over the pan and were still doughy in the middle when they became overcooked on the edges and then were stuck to the pan. URG!


I was too busy doing surgery on the cake to
capture the full mess in a photo!


3. Half of my apple cake stuck to my pan when I made one, the week after my Apple Cake post.


But there are lessons to be learned through the mishaps.

Wisdom I’m learning through the messes:

1. Trying a new recipe when the stakes are high is foolish- Dave reminded me of this the other day when I was making those failed M&M cookies on the morning of a fundraiser bake sale…DUMB, foolish!

2.  If at first you don’t succeed try, try again (at least 2 tries then ditch the recipe- there are other recipes in the sea).

3.  Get creative with the mess-ups.  Cakes that fall apart provide a great beginning for Trifles.  (Trifle definition:  beautifully layered dessert ie: chocolate cake, pudding, whip and candy bars OR pound cake, whip, yogurt and berries); those torn M&M cookies made a great topping for ice cream.

4. Don’t let it get you down. In my house we say, “Oh well!” when we bomb something and can’t do a thing about it (and are tempted to cry or scream or throw a tantrum). When water is spilt, or we break a dish, or have cookies cemented to a baking sheet, we push ourselves to say, “oh well!” and then proceed to clean up the mess. 

5.  Learn from your mistakes (in the kitchen and in life). We live and learn.  Try to think about what happened, where the breakdown occurred and make note of this to help prevent it from happening in the future. 


For those hoping for a recipe today, rather than a confessional, I have linked the sticky buns…and another post is coming in the next couple of days with one of my favorite recipes. 
the redeemed sticky buns

Saturday, November 6, 2010

Cranberries are in...better stock up!


Years ago, when my friend Hannah had her baby Frances, I wanted to take her a tasty baked good and squeeze that little girl.  I found a cranberry orange muffin recipe in a Martha Stewart cookbook, whipped them up, and took them over to her.  Hannah is one of the most lovely gift recipients!  She expressed her gratitude on the spot.  Then a few days later I received this postcard from her.

My inspirational bookmark


It was a thoughtful note that I wanted to keep, so I stuck it in the cookbook as my bookmark for the cranberry muffin recipe.  It continues to be my bookmark (and inspiration to give the gift of muffins).


The next year I decided, when planning a brunch with some ladies, that those muffins would be a good fit for the menu.  I volunteered to bring them.  Little did I know that cranberry orange muffins in February are NOT a reality UNLESS you have done some stowing away of the cranberries.  I was not aware that the “cranberry season”  lasts all of 2 weeks…okay a little longer than that…2 months maybe.  I had no idea!  And unlike the blueberries and strawberries that I can find in the freezer section of my grocery, I cannot find cranberries (which by the way I do not understand… there is money to be made on these amazing berries year round)!  Appalled, I called my mom and she said, “Oh, did you not know?  They have a very limited availability in the stores and you have to stock them up and freeze them!” 

So I learned my lesson.  My mom, who is a bulk-buyer (in life) suggested that she and I buy a case and split it when the season rolls around again.  I said, “YES! That should last me a calendar year”.  Well, when my 13 bags of cranberries arrived and we were trying to fit them into my one little side by side freezer/fridge Dave said, “Really?  Do we need this many?  What are we making with them?”  I said, “You know muffins and stuff”.  Of course, my mom has 6 freezers in her life, so the storing is not that big of an imposition.  At my house we were eating bowls of ice cream and cooking meat from the freezer that week to make room for the cranberries.

About June, when we had approximately 10 bags remaining, and our household was having to alter our ice cream purchasing because of the cranberry stockpile, Dave suggested we ramp up the cranberry recipe making!  And we did. And eventually, about 2 years later, we made our way through them all. 

So I learned another lesson.  Buy in bulk proportionate to your freezer capacity and the amount you realistically think you will use in a calendar year.  I am getting better over time at predicting this.  And am trying to be sensitive to the small amount of freezer/refrigerator space, and the shared dominion over them.

It is November.  I have been watching and anticipating the cranberry season.  And I am thrilled  to tell you that I came home one day this week and opened my fridge and you won’t believe what I found stacked on the shelf in my refrigerator… 4 bags of fresh cranberries that Dave bought when he was at the grocery!  I let out a squeal! Not only are cranberries in, but Dave’s cranberry resentment is gone…he actually purchased them voluntarily!

Lucy, in her costume, helping me top the
bread with cranberries- a great counting game!
I have been having a cranberry fest this week.  I am writing about cranberries, talking about them and making cranberry recipes! Earlier this week Lucy, my 2 year old, and I made a Cranberry Pecan Bread recipe, that my friend Emily emailed to me recently. Yesterday my college student friend, Caroline, came to bake and we made Cranberry Oat Muffins and Cranberry Orange Salad.

It has been hard to decide what to post.  I have included the Martha Stewart –"Welcome baby Frances" Cranberry Orange Muffins I told you about, Cranberry Oat Muffins (my favorite), and my mom’s  Cranberry Orange Congealed Salad that I request every Thanksgiving!  They all have a cranberry-orange element to them, which I love.  There might be some more cranberry recipes coming on future posts, but I'll try to keep it under control.

In the meantime I suggest you go buy your stash of cranberries and clear some space in the freezer. The clock is ticking!


<><><><><><><><><><><><><><><><><><><><><><><><><><><><><><><>

1 ½ cups Whole Wheat Flour (I use part whole    wheat/part white whole wheat)
¾ cup quick-cooking rolled oats
¼ cup buttermilk powder (dry milk)
2/3 cup sugar
2 tsp baking powder
½ tsp salt
1 cup fresh or frozen cranberries, chopped
½ cup chopped pecans (optional)
1 Tbsp orange zest
2 large eggs
¾ cup milk
1/3 cup melted butter

Glaze: 
1 Tsp orange juice
½ cup powdered sugar

Whisk together the dry ingredients, stir in chopped cranberries and nuts.  Whisk together the orange zest, eggs, milk and melted butter.  Add the wet ingredients to the dry, stir until fully combined but don’t beat it or over-stir!  Fill greased muffin cups almost to the top. 

Bake in 375 degree oven for 16 to 18 minutes, until they are golden.  Remove from oven, leave in pan for 5 minutes.  Stir glaze ingredients together, adding powdered sugar and orange juice to get the desired thickness.  Dip the tops of the warm muffins into the glaze.
Using this handy pampered chef chopper makes the cranberrry and pecan chopping simple.
Zesting the orange!
Dipping the tops in orange glaze
Several years ago I found this recipe in a King Arthur Flour ad.  Because I believe in King Arthur Flour, I tried it and LOVED it!  It became my new favorite. They call them Cranberry Whole-Grain Muffins but I call them Cranberry Oat Muffins because the oats are such a defining characteristic of the muffin.  They have a crispy, craggy crown and a hearty, dense crumb which I appreciate in a muffin.  I love the wholesome complexity of them.


<><><><><><><><><><><><><><><><><><><><><><><><><><><><><><><>
The Cranberry Orange Salad is my favorite cranberry dish for Thanksgiving.  It is a congealed salad that my mom invented by merging a couple of other recipes.  It is chock full of fruit and texture and is both tart and sweet.  It goes great with all the creamy, rich, savory foods of the season.


1 (1 pound) bag of fresh cranberries
1 orange
1 cup sugar
3 3oz. boxes of jello (one each of lemon, raspberry (or cranberry) & orange)
20 oz. can crushed pineapple

Grind 1 bag of fresh cranberries and a whole orange (with rind) in the food processor.


Pour 1 cup sugar over and let soak for 1 hour.


Add 3 jello packages to  2 cups hot water.
Drain the juice from the crushed pineapple. Add water to the juice to equal 1 cup of liquid.
Add crushed pineapple.

Stir together all ingredients until combined well.  Pour into dish and refrigerate for several hours until set.

Great to make ahead!


Friday, October 29, 2010

Timeless Sugar Cookies


My mom is an amazing cook and baker  (and mom and grammy for that matter).  I can’t remember when we started making these sugar cookies for holidays, but the recipe dates back about 35 years, mom says, according the timeline of people,locations and ages of my sister and me.  I can’t remember them NOT being in my life.  Mom knows all kinds of tricks for successful sugar cookie baking that she taught us along the way.  It wasn’t evident to me how important they were to pass along until I started giving the recipe to friends in college. After a couple times of making them, you will find that they are not difficult at all, albeit time-consuming!  So I wanted to share them with you.


1 cup butter, softened
2 cups sugar
2 eggs
4 cups flour
1 tsp. baking powder
1 tsp. salt
1 Tbsp. vanilla
1½ tsp. butter flavoring

Blend softened butter with sugar. Add eggs, then flour, baking powder and salt. Add vanilla and butter flavoring. Chill dough for at least 30 minutes. Roll out dough to ¼“ thick. Dust cutters and rolling pin with powdered sugar. Cut out cookies in desired shapes. Place on ungreased cookie sheet, allowing about 2 inches between cookies (they will spread). Bake at 375 degrees for about 10 minutes (or until edges begin to turn golden). Remove from cookie sheet immediately. When cooled, glaze with the following glaze or frosting of your choice.

Glaze for Sugar Cookies
3 cups powdered sugar
3 Tbsp. milk (approximately)
1 tsp. almond OR lemon OR vanilla extract

Mix all ingredients until smooth. If glaze is too runny, add more powdered sugar. If glaze is too stiff, add more milk.


Here are some of the tricks:
*Mom taught us to sprinkle our cookie cutters, surface and rolling pin with powdered sugar rather than flour.  That way it provides the dusting effect without drying out or dulling the dough’s taste.

*Make sure you space these cookies apart a couple of inches because they really grow.

*It takes a while to make the batch of these cookies, as there are several steps and it makes a big batch.  I suggest you break down the steps into different sessions if you don't have a big time block.  You can mix up the dough and refrigerate it for another day.  Or you can make the cookies and let them cool until the next day when you ice them.

*If you  don’t want to deal with icing the cookies, you can put sprinkles on them prior to baking so they can stick on by baking OR my mom, when we were young, would sometimes let us “egg paint” the cookies prior to baking them.  Mix an egg yolk with some food coloring and a little water and use clean, new paintbrushes and paint the cookies.  Then bake and they come out looking glossy and colorful.

(Do you like my chaotic cabinet?)
*Another great idea my mom had (are you wondering at this moment, like I am, why she is not the one with the food blog?) was to store her very large supply of cookie cutters in empty oatmeal cardboard containers, divided by category.  Here is my cabinet with mine.

Some things that have “evolved” over time in my kitchen with these cookies are:
*The name:  Timeless Sugar Cookies.  Growing up we always just called them sugar cookies…then my friend Karin (pronounced kuh- REN), in her creative, dreamy fashion started calling them “timeless sugar cookies” and it stuck.  They truly are timeless.  

*Since being married to a lover-of-soft-cookies-husband (with a dislike of crunchy cookies) I have worked to find the correct amount of cooking time on cookies of all kinds.  The timing makes such a difference in the softness of the cookie.  2 minutes can make a huge difference.  So I remove them from the oven at the sight of the golden edges.  It is good to note, however, that glaze added atop a cookie will soften the cookie by the next day.
Glazing the cookies with my back-of-the-spoon technique

*I started making the almond glaze when I was inspired by Ham and Goody’s bakery that makes these yummy teacakes and sugar cookies with beautiful, smooth, glossy glaze that I am in love with.  I think it is the perfect companion to this great cookie and makes them so beautiful!  Karin and I have observed the “marriage” that happens between the cookie and the glaze that makes the cookie soft and sweet and it is just mysteriously beautiful (kinda like marriage).  And I use the back-of-the-spoon technique where I blob some glaze on the cookie and then use the back of the spoon to guide my smoothing it all over the cookie.

*These cookies are fun on a stick (I use the paper lolly-pop sticks).  They are a great party favor or teacher gift (we have given “bouquets” to teachers and have given “single” flower cookies sticks to teachers).  They are BEAUTIFUL as hearts for Valentine’s Day.  When my friends, Karin and Eric, got married we made little bags of K and E cookies for the wedding guests as a favor.  Get creative.

*Some of our young friends have milk allergies and thankfully there is a margarine that is oil based rather than milk that can be used in this recipe and it works! And tastes great.  And they can have a “normal beautiful sugar cookie" just like everyone else! ( Just a good thing to know.)

<><><><><><><><><><><><><><><><><><><><><><><><><><><><><>

Dia de los Muertos Update (refer to my last post-Pumpkins, Sombreros and Skulls for the back story)

The situation I was in this week, with 2 school-kids celebrating fall with class parties, but with one focusing on The Day Of the Dead and the other class deciding to not have food or "maybe a little healthy snack ", my pumpkin sugar cookies were not the appropriate treat.  So, I did it.  We did it.  With much support from Dave, I made cookies in the shape of colorful skull masks that are part of the typical Dia de los Muertos (Day of the Dead) celebration and some sombreros. ( I also made some pumpkin mini muffins to send to my daughter's "healthy class".  It just didn't feel right to not send anything).
  
SInce skull mask & sombrero cookie cutters were not readily accessible to me, I had to improvise and use a circle that I formed into a skull-like shape and a cowboy hat that I morphed into a sombrero with a little elongation of the crown and a "snake" of dough placed as the brim.  I used really fun, bright food coloring that Dave found at the craft store.  I tried to make the skulls at least happy little fellows, which Asher noticed first thing when he came downstairs this morning.  He said, "Oh they are great! And they are smiling! How creative!"  He is terrific.  And while I was cutting and baking I went ahead and made a pan of pumpkins....I will make more this weekend for Sunday but I just had to.  We all ate one and I gave my daughter's teacher a couple of the pumpkins because I love to give her baked goods and they are so festive.  


I never dreamed that these sweet cookies my mom taught me to make as a girl would one day resemble a brightly colored skull! But if you close your eyes it tasted just like a flower cookie, or a bowling pin cookie or a pumpkin cookie for that matter!

Tuesday, October 26, 2010

Pumpkins, Sombreros and Skulls

I have been so excited that the week is approaching to get to post about Sugar Cookies.  These “Timeless Sugar Cookies” are one of my favorite and most loved recipes from my mom. When I started this blog, I strategized about when it would make the most sense to write about them.  Halloween is the first holiday to come since I started Cup-A Cup-A and I always make pumpkin shaped cookies for this holiday, so I thought it was fitting to get to share the recipe for this occasion.

Last week when I saw that my kids were having class parties at school, I signed up to bring cookies for Asher’s 3rd grade class.  I thought it would be fun to share some of these with his friends and get a jump start on the baking for the weekend!
I somehow missed the line in the info email that the theme of their “fall party” this year in his class is going to be the Day of the Dead- Dia de Los Muertos (which is the Mexican holiday honoring those who have died.  The traditions connected with the holiday include building private altars honoring the deceased).  My kids go to a Spanish Immersion School so they use holidays as a chance to learn about the various Latino cultures and customs.  Which I appreciate and honor. But. Really? Let me show you the images that are associated with this holiday. These are the cutest, least scary and most colorful of the 100 images I sifted through related to the Day of the Dead.


I was looking forward to sending sweet pumpkin shaped cookies with pretty orange colored glaze but instead I am going to make skulls? I told Dave that I don’t think I can do it:  make yummy, time-consuming, spooky skulls for kids to eat…that is weird and gross!  He said he thinks the kids will think they are cool, and delicious (he's probably right).

So, I just wanted to warn you that that is what is in the works here in my kitchen.  The party is Friday and Halloween is Sunday so by the end of the weekend I will have some photos and stories and a recipe for you.  I am thinking Sombreros and Skulls (eek) for Friday and Pretty Pumpkins for Sunday.  Unless you have a better idea. If so, bring it!

(Here are a couple of photos of times when these sugar cookies have been part of our celebrations.  There are many more but we can't yet locate those photos to post).
A bouquet of flowers at a ladybug picnic
Bowling Pin Cookies to accompany the bowling ball birthday cake at the bowling alley birthday