Showing posts with label cookies. Show all posts

Friday, March 11, 2016

A Season of Liminality: A Threshold

What do you write when it's been 3 months since you've written anything? It's been an unusual season for my family. And it feels like we are now in an "in-between".

I was already behind on blogging- I had a few batches of photos from foods I had made that were awaiting the day when I could write and post. January had been filled with some good eats: yummy Mustard Greens with Hoppin' John from New Year's celebrating, a lovely Chocolate Cake (via Barefoot Contessa) for MLK day, and homemade donuts from my Lucy's birthday and a few other snacks and goodies.

And then one Wednesday afternoon at the end of January we came home from work/school to find that our house had been robbed and ransacked.  It was a watershed moment.

You know, the moments that then mark time.

So we have been picking up the pieces, literally and figuratively.  We have been doing the logistical, spiritual, parental and psychological work of the aftermath of something like this.  Through this, though, we have been given a chance to reevaluate things- what is important, what's not, where we are "storing up treasures", the limits and illusion of safety, the complexity of life, the comfort of loved ones.

Sadly, the loss included my computer and my camera.  So my photos of those January foods I mentioned are gone.  And I have just now been able to buy a computer and camera to replace the stolen ones.  I'm still waiting for the wind in my sails to motivate me to blog-on.  It hasn't seemed to return yet.

It seems like we are in a place of liminality.

Li·mi·nal of or relating to a sensory threshold;  being in an intermediate state, phase, or condition. (Merriam Webster Dictionary)

An artist that spoke at Belmont several years ago, Makoto Fujimura, spoke of liminality and its challenge and opportunity.  About liminal spaces, places of threshold, he said,
These are dangerous places, filled with struggle.  Uncomfortable.  But places of unique perspective; fertile with creativity.  One who is courageous enough to live there can be a harbinger of truth.
It feels like that space between right now- not quite spring, but not quite winter.  Not quite settled after the break-in, but not in disarray; still replacing stolen items and awaiting another update from the detective, yet trying to find resolution without yet having reconciliation.

So, for this Liminal Space- I share these two recipes.  A great cold buster smoothie recipe that was passed along to me that I have been loving the past few weeks (a good any season breakfast) and an oatmeal cookie recipe that I find comforting.

My colleague Debbie sold me on this "cold buster smoothie" that her husband has been making for her this winter.  I was fighting cold symptoms so I took her recommendation.  This is an adaption of their recipe,  so of course, adapt even more as you like.  Debbie described this as "bright", and I think it depicts it perfectly! 

(And my cold was busted!)

Cold Buster Smoothie (inspired by Debbie and Steve)
Blend together:
  • two fists-full of fresh Spinach leaves
  • a peeled whole orange
  • 1/2 of peeled lime
  • a small slice of fresh ginger root
  • 1/2 banana OR frozen mango- for creaminess and vitamins
  • frozen pineapple- a handful
  • brewed green tea-(I brewed a pitcher and kept it in my refrigerator the week of my cold) some mornings I just use water instead of green tea
  • honey- if you need a little sweetening

Mix together in a blender until smooth.  Drink immediately.  Makes 1 large or 2 small smoothies.

And a quick, easy, and comforting cookie recipe.

I was talking with my friend Lindsey on Sunday about baked goods and she mentioned loving those decadent chocolate chip cookies with frosting sandwiched between them that they sell at the mall. You know those?  And she said one of her favorite treats is Oatmeal Cream Pies.  I didn't know.  I will tuck that little information in my memory for some day when a treat might be in order.  She said she loves Oatmeal Cookies.  I told her that I make oatmeal chocolate chip cookies- THIS delicious go-to-recipe my sister developed.  But I usually don't make traditional oatmeal raisin cookies.  For 2 reasons- my kids don't love raisins and I don't especially love cinnamon in cookies (unless they are snickerdoodles...but that's another story).  

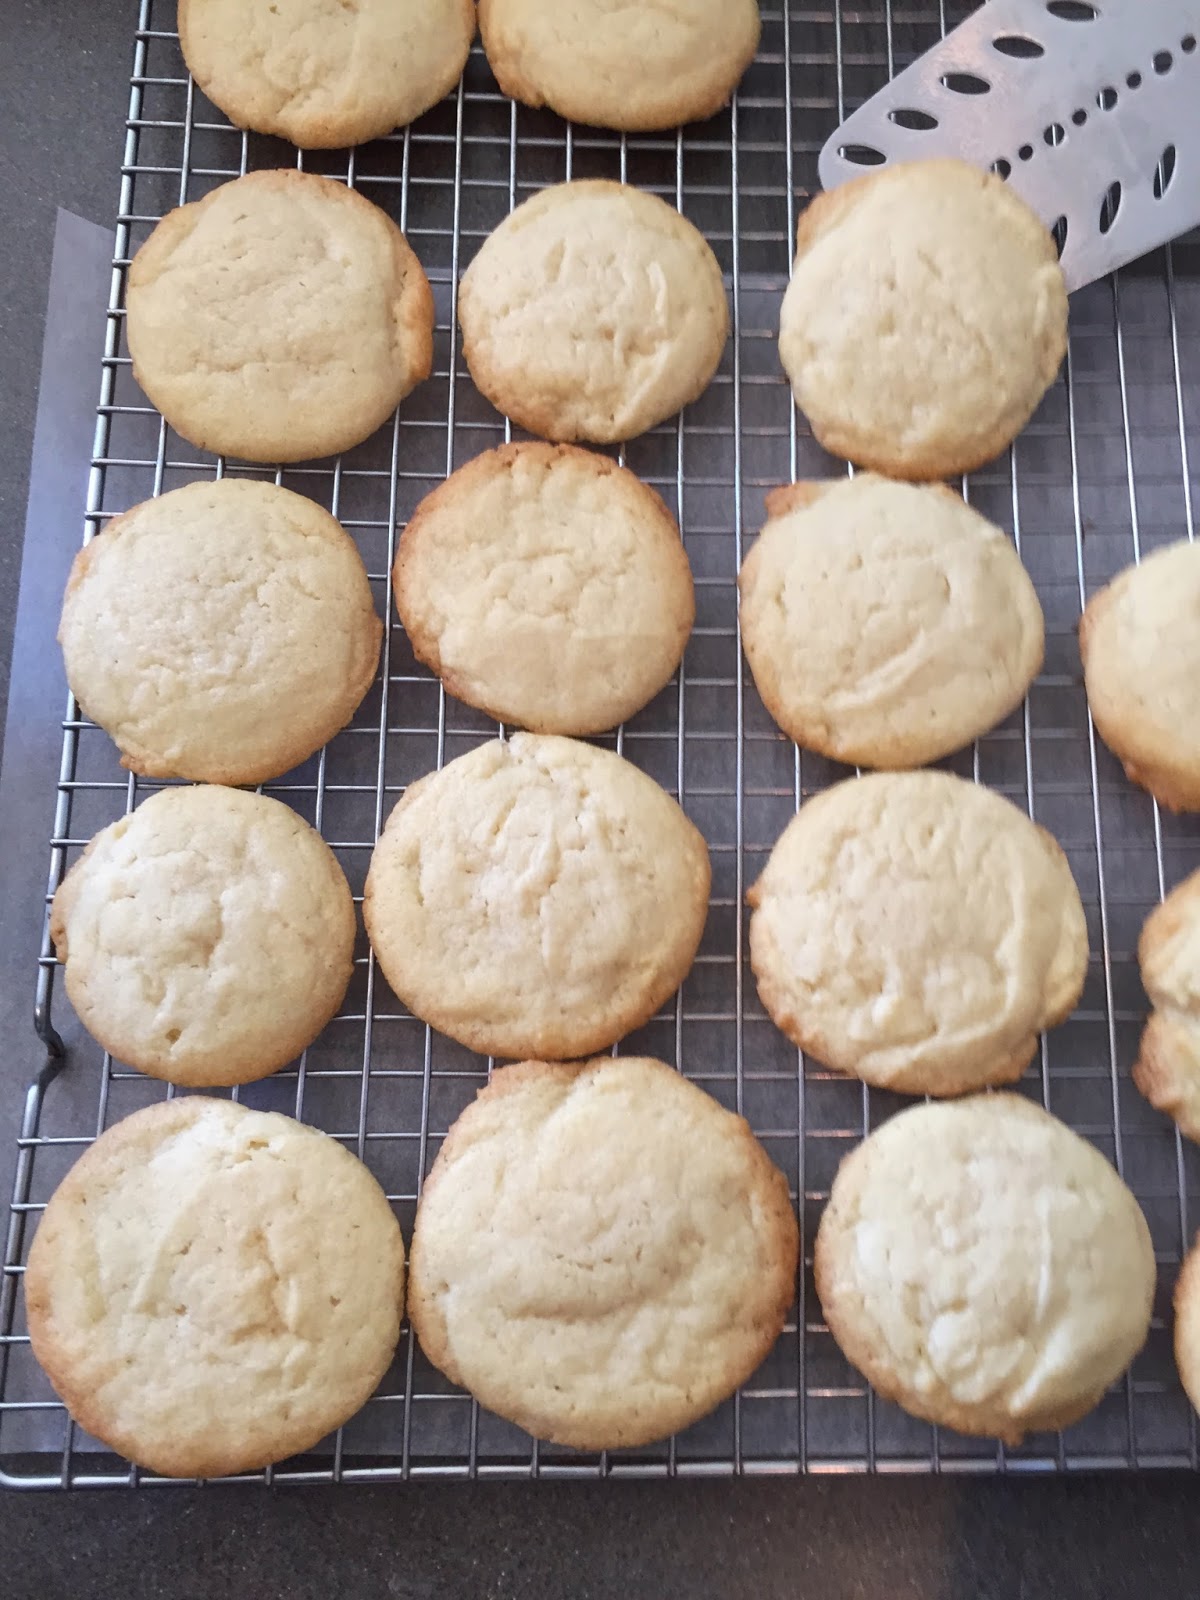
My dad loves oatmeal raisin cookies.  His birthday was this week. So I decided, because I had two people to share with, I should make them.  I searched in cook books and online and decided to go with Smitten Kitchen (which is always a low-risk choice).  I made a couple of slight changes.  I used golden raisins and omitted the cinnamon.  The recipe calls for using all brown sugar (no granulated white sugar), a little extra salt and chopped walnuts.  All of these were the keys, I believe, to their yumminess.  They are nice and chewy (with all the oats and brown sugar) with a golden edge. The cookies turned out tasty and my kids gobbled them up! Which was a bonus.  


Oatmeal Golden Raisin Cookies
adapted from Smittenkitchen.com
(makes about 2 dozen)

1 stick (1/2 cup) butter, softened
2/3 cup light brown sugar, packed
1 large egg
1/2 tsp vanilla extract
3/4 cup all-purpose flour
1/2 tsp. baking soda
1/4 tsp. kosher salt (or a little more if you are using unsalted butter)
1 1/2 cups rolled oats (old fashioned oats)
3/4 cup golden raisins
1/2 cup walnuts, chopped (optional)

In a large bowl, cream together the butter, brown sugar, egg and vanilla until smooth.  Add in the flour, baking soda and salt and mix together.  Stir in the oats, raisins and walnuts.  CHILL the DOUGH.  (You can do this in the refrigerator for an hour or more, or in the freezer for 20 minutes, or you can scoop them into balls and freeze them for future baking.)

Once dough is chilled, scoop them out and place on parchment lined baking sheets.  Place in preheated 350˚ oven for 10 minutes or until golden brown.  Let sit for a few minutes on the pan and then slide them off with a spatula to cool on a rack.


As we wait for winter to pass and the spring to arrive, for seasons of liminality to pass, I want to courageously embrace the unique perspective and fertile ground that is the present. 

Saturday, October 10, 2015

Monster Slice (Oatmeal Peanut Butter Chocolate Chip M & M Cookie Bars)

Last weekend our family braved our first family camping trip. We went with our friends the Snaders (who are experienced campers)! It was a success, though I am not so great at sleeping on the ground.

I made some bar cookies for the trip and when I pulled them out for an afternoon snack at the campground, Melinda said, "Oh that reminds me of our Australian friend Rachel.  She always bakes for every occasion, including camping."  Evidently you always want Rachel at an event because she brings delicious baked goodies. I asked Melinda what all she makes and she said mostly Slices.  I asked what a slice was.  She said "Slice" is what they call "bars" in Australia.  Not plural, "Slices"- singular, "Slice".  She said she makes different types of Slice: Lemon Slice, Chocolate Slice, Raspberry Macadamia Nut, etc. So fun.

I looked up the definition when we got home and had access to Google again to see what constitutes a Slice.  (One of the refreshing parts of being in the woods was not having phone service!)

Here's what it said: Slice: (Australia, New Zealand) A class of heavy cakes or desserts made in a tray and cut out into squarish slices.

Why do words seem so much cooler when they have an international influence?

Cheers instead of Hello,
Holiday instead of Vacation,
"throw that in the bin" rather than the trash
stand in the queue rather than the line

I think I'm going to have to adopt the name "Slice" for bars.

I've been wanting to post this bar cookie recipe for some time, but needed to get some photos before I could post it.  I got it from Kathryn who kindly made these last year for her Sunday School class in honor of Lucy's birthday.  Lucy was so honored that Kathryn, her teacher, made a birthday goody and I was so happy that she shared one with me!

I asked for the recipe and held onto it, wanting to make it.  The hang up was that I never seemed to have M & M's when I wanted to try the recipe.  There is a reason for this.  I can't keep them in my house.  People snack on them and then they are gone...or at least not enough to make the recipe.  So, this summer, I bought M & M's and declared them "off limits" for sneaking.

Little did I know the recipe makes a huge amount- an entire jellyroll baking sheet!  I shared them with neighbors and we had them for several days until I froze the rest.  Since then, I have halved the recipe since, to make a more manageable size. Another bonus to this smaller batch is that you only need 1/2 cup of M & M's.  So that means in my house, there's a better chance of being able to have enough to make it.

This recipe is Gluten Free if you use Gluten-Free Oats (not all are..so watch it, if you need/want GF).
They are hearty and healthy-ish, in that they have peanut butter and oats and no flour.  But I'm not deceived...they also have butter, sugar, chocolate chips and M & M's! But most of all they are yummy, easy to make, and they travel well.

Monster Slice 
(Oatmeal Peanut Butter Chocolate Chip M & M Cookie Bars)

16-20 bars

5 ½ Tbsp. butter, room temperature
3/4 cup light brown sugar
1/2 cup white sugar
2 eggs
3/4 tsp baking soda
1/2 tsp vanilla extract
1 Tbsp.pure maple syrup
1 cup peanut butter (crunchy or creamy- I use natural peanut butter)
3 cups old fashioned oats
1/2 cup semi-sweet chocolate chips
1/4 cup M&M's candies, for topping (I like Mini M&M's)

Preheat oven to 350 degrees. Beat together the butter and sugars. Add the eggs, vanilla, syrup, and baking soda. Stir in the peanut butter. Add the oats and stir again until well combined. Mix in the chocolate chips.

Press the dough into the bottom of a 8 1/2 X 11  or 9 x 13 baking dish- depending on what you have- the bigger just will make bars a little thinner. Top with the M&M's and lightly press them into the dough. Bake for 16-17 minutes, until the bars are lightly browned and just past looking wet on top. They will not be firm, but they will set up as they cool.


Monster Cookie Bars -BIG BATCH RECIPE
Makes 32-40 bars

2/3 cup butter, room temperature
1 1/2 cups light brown sugar
1 cup white sugar
4 eggs
1 1/2 tsp. baking soda
1 tsp. vanilla extract
1 Tbsp. real maple syrup
2 cups  peanut butter (crunchy or creamy- I used natural creamy)
6 cups old fashioned oats
1 cup semi-sweet chocolate chips
1/2 cup M&M's candies, for topping (I like using the mini ones)

Preheat oven to 350 degrees. Beat together the butter and sugars. Add the eggs, vanilla, syrup, and baking soda. Stir in the peanut butter. Add the oats and stir again until well combined. Mix in the chocolate chips.

Press the dough into the bottom of a large baking sheet, or jelly roll pan. Top with the M&M's and lightly press them into the dough. Bake for 16-17 minutes, until the bars are lightly browned and just past looking wet on top. They will not be firm, but they will set up as they cool.


If you were hoping for something more seasonal, instead of Monster Slice,
maybe you should click back in my archives and find a pumpkin recipe... click HERE for my favorite Pumpkin Cake 
or HERE for Pumpkin Whoopie Pies


 or HERE for consistently delicious Pumpkin Muffins
or HERE for How-To-Roast your Pumpkin Seeds

Or if you would rather read about our Halloween Traditions and recipes, you can click HERE.

Cheers!

Friday, September 11, 2015

Always Learning, Always Changing: Recipe Edits


This post is about old recipes that I have updated/improved/tweaked since posting them originally.

When I am cooking, I like to write in the margins of the recipe things I discover as I am making the dish, noting changes/additions/subtractions that I made along the way.

I 'm not great at cooking with an electronic device as the source of my recipe. I'm a pretty messy cook (okay, a really messy cook)! I don't want to touch screens or buttons or have my screen go to sleep while my hands are sticky, so I usually print off recipes when I am cooking from a blog or website.

Ironically, some of the recipes from this blog that I have in my notebook also have scribbles on them from the time since I posted them.

Even though they are tested, tweaked and approved before I post them, I sometimes alter things after the fact.  I love getting feedback from people about recipes and new ideas of how they altered them. I have often tried changes people have suggested.

I decided that I needed to tell you some changes I've made, rather than sneaking in and changing the recipes on the past blogs without alerting you (and thereby confusing those of you who have made them before). 

So here are some of my updates, improvements and changes from previous posts.  
This is still my favorite sugar cookie recipe and so many friends have told me that they make these too.  So fun, that my mom's tradition that she started could be passed down far and wide.

My long-term challenge with these cookies has been that they spread so much! This is especially a problem when you are cutting them into detailed shapes.  The shapes tend to spread to the point of unidentified objects!  Which, of course, defeats the purpose of cut out cookies!  My mom looked up a shortbread recipe one day and noticed that the absence of baking powder was the main difference between the recipe and her sugar cookie recipe.  It makes sense that baking powder would change the spreading of the cookie- that's its main job.  So, since this discovery, I have dialed it back from 4 tsp. of baking powder to 1 tsp. baking powder in my "Timeless Sugar Cookie" Recipe.  It makes a pretty major difference in the spreading.  They have the same taste and texture as before, they just keep their shape much better. 

2. Banana Muffins 


These are a staple in my home for breakfast treats and to take for breakfast events.  They are so easy and are made with things you most likely have on hand.  They are a good use for dying bananas and do not even require an egg! My college roommate, Karin, told me that she likes this recipe and uses it but cuts the sugar.  I thought…"Cut the sugar? Why would you ever do that? :) "  But I tried it, and she's right- especially if you are going to add mini chocolate chips or sprinkle the tops with sugar before baking. :)  I think the flavor of the other ingredients really comes out when there is 1/4 cup less sugar.  Who knew? Thanks, Karin!  So rather than 3/4 cup sugar, I do 1/2 cup.  

3. Baked Potato Soup

This is my son's most requested soup.  One day when I was making it, I thought, "really does it need a STICK of butter??" and I gave it a try with 1/2 a stick (4 Tbsp.) and it was just as rich and creamy and tasty!  I have a hard time with a stick of butter in soup! I mean, in cookies, yes, 2 sticks most of the time, but in soup, I try to lighten it up if I can without compromising taste or texture.  Certainly, this one fairs well with that reduction. Also, you can take or leave the sour cream depending on how creamy and dairy-ish you want it.  My husband says, "Yes" and "Always" to including sour cream in all things, but sometimes I think it makes it more thick and creamy than necessary.  So, in summary, my changes are cut the butter in half to 4 Tbsp. and take/leave/or reduce the sour cream.

4. Key Lime Pie 

This is a our family's favorite pie.  It's just so good.  My challenge with it has been the size of pan and amount of filling.  In the original recipe I posted I gave two sizes- a traditional pie pan and a deep dish. Well, this summer I tried to make the standard size and the 1/2 recipe of the filling was not enough at all.  I ended up tripling the filling and putting it in 2 crusts...meaning it really needs 1 1/2 batches of the filling for a traditional pie plate.  So, my conclusion is, use a deep dish and the large batch of filling unless you have a much smaller pie pan (diameter wise) like an aluminum pan.

5. Tea Cakes 


I made Tea Cakes recently for an event.  I always love them more than I remember!  Sometimes I forget about them and then when they resurface and I make them, I fall in love all over again.  They keep longer than sugar cookies and they are less work, but just as lovely.  When I made them this summer, they just didn't stay puffed up as high as I like them.  I texted my friend, Melissa B.(when she makes them they always look perfect).  She said she rolls them in small balls and that helps keep the roundness. I had rolled mine out with a rolling pin and cut them with a biscuit cutter. They turned out bigger and flatter.  So, though in the blog post I said "roll and cut out or roll into balls", based on my experience, I will now say roll them into balls!

6. Popcorn and Kettle Corn 

We make stove-top popcorn most every week in our house (sometimes for family movie night on the weekends and sometimes for our Snack dinner on Sunday nights).  Several months ago someone at church said I should ask our friend Drew for his Kettle Corn recipe.  My kids and I are big fans of kettle corn.  I asked Drew for his recipe and he said, "there isn't really a recipe, but rather it's just a matter of adding a few Tbsp. of sugar to the oil before popping."  That simple!  So, now we sometimes make a batch of each.  For the recipe, we simply add 3 Tbsp. sugar to the oil as it is heating up and swirl it around to distribute it evenly amongst the kernels.  Make sure you salt the popped corn well, as the salty/sweet combo is what makes it so super-delicious!

I'm sure there are a dozen more recipes that I have tweaked-since-posting, but these are the main ones that have been on my mind.  I often write about making recipes your own, altering them to your liking, and getting creative! So, since I have done that and have taken your advice on making things better, I wanted to let you know.  I will update these 6 posts with these changes so that they will be "new and improved".

Keep your great suggestions coming!

Monday, May 18, 2015

Irresistible Lemon Cookies


This is another recipe passed down to me from Sandi this year.  (I wrote about her and her delicious Nana’s Cake and Apple Coleslaw recipes in an earlier post).  Sandi had told me about these cookies, that she found on the blog, Chef in Training.  She explained how delicious and irresistible they were.  She brought them to small group one week and we all went crazy…to the point that we were driven to do math to figure out how to slice up the remaining few cookies on the plate to divide evenly amongst the group members! 

These cookies have a lot going for them.  They have a great texture: a little crispy on the outside and chewy on the inside.  They are buttery.  They are lemony (with zest and fresh lemon juice). And they have a lemon glaze on top!  They are zippy but not too tart! (My tart-sensitive child loves them, which is a good gauge.  She is pretty much the barometer of most things in our home.*)

When I made them a couple of weeks ago, I ate one and then another.
And then I packed some up in a to-go container** to share with friends, the Joneses, as they were headed on a journey.  And then I ate another one.  So then I put 4 on a plate to take two-doors down to Lindsey for her family of 4, so there would be less temptation in my house. 
The hilarious part was that I later got a text from Matt, her husband, that said,
“I ate 3--yes, 3—lemon cookies last night. So, so good.  Thank you!”
To which I replied, “I love it! I’m honored. Who was the recipient of the one other cookie I gave you all?”
To which he replied, “Lindsey! We opted against sharing with the boys.”

Sounds like a strategic parenting decision.

Here's the recipe:


Cookie dough
1 cup butter, softened
1½ cups sugar
1 egg
1 tsp. lemon juice
1 Tbsp. Lemon zest
1 tsp. vanilla
½ tsp. salt
½ tsp. baking powder
2¼ cups flour

Lemon glaze
1½ cup powdered sugar
1 Tbsp. lemon juice
1 Tbsp. lemon zest
1 Tbsp. milk
¼ tsp. vanilla

Preheat oven to 350 degrees.
In a large bowl, cream butter and sugar together.
Add egg and beat in well.
Add lemon juice, lemon zest and vanilla and mix until well blended.
Add salt, baking powder and flour and mix until well incorporated.
Chill dough or use immediately.  ( I find they have a nice shape if you refrigerate the dough until firm).
Roll/Scoop cookies into 1 inch balls and place on greased cookie sheet.
Space cookie dough balls about 2 inches apart from each other.

Bake at 350 ˚ for 8-10 minutes or until lightly golden on the edges of cookies.

Combine glaze ingredients in a medium bowl and whisk until smooth glaze is formed. Drizzle as much as desired over slightly warmed cookies and let finish cooling completely before eating.
Footnotes
*If you are curious about this comment, about my daughter being the barometer of our family, here’s a little more on that topic.

I was introduced to this concept from Mary Sheedy Kurchinka in Raising Your Spirited Child.  It has helped me to understand her more (and pay more attention). 
According to the dictionary:

barometer |bəˈrämitər|
noun
·      an instrument measuring atmospheric pressure, used esp. in forecasting the weather and    determining altitude.
·      something that reflects changes in circumstances or opinions: furniture is a barometer of changing tastes.

So, when tensions are high, she is the instrument that “measures that” and then “indicates that”.  When it’s hot, or cold, or tense, or sad, or intense, or scary, or hostile, or sweet…she’s my sensitive one that feels all the feels and lets us know! So, when I see/hear/learn from her how it’s feeling to her, I can predict that she is giving the read on the situation. 

**To-Go containers.  My mom taught me this tip.  If you are someone who enjoys sharing food with people, this is a tip that I recommend.   Save your plastic containers from to-go food, or yogurt, or lunch-meat, or hummus, or whatever you buy in plastic containers.  And save them for when you are giving away food.  I personally don’t like to use them in my fridge for my leftovers because the labels confuse me! To see a  Greek Yogurt container in my fridge leads me to believe that I have Greek yogurt, when in fact, it is filled with homemade hummus.  However, they are great for giving food away! And… you don’t have to spend money on “disposable plastic wear”.  Our favorite is when we get Pei Wei to-go containers.  They are perfect for packing baked goods or anything really. 


Speaking of lemons…I am loving putting lemons, limes and mint (from my
yard) in my ice water these days! Refreshment!


Monday, March 9, 2015

Turtle Back Cookies


Our friends, the McCulloughs, started a tradition several years ago of bringing our family pizza dinner, from Pizza Perfect (a yummy local Pizza shop) on the night of my first day of class each year.  What a gift to have someone else take care of dinner after day 1 of class.  How thoughtful is that?  I love this tradition for many reasons, including that they stay and eat with us and that Lindsey usually brings homemade cookies!  A couple of years ago, she brought these incredible Turtle Back Cookies.  I love good cookies, and I am tempted to eat more than I should.  However, these were on an entirely other level.  They were like cookies meets spice cake with caramel frosting! Trouble!  I loved them…maybe too much!

I asked Lindsey for the recipe.  She said she was still trying to find the right recipe.  She is attempting to recreate a favorite cookie from a bakery (Traeger's Bakery) in Demopolis, Alabama.  Visiting the bakery was a tradition in her family.  When visiting their grandparents, they would always go get these Turtleback cookies, as would many people in that community.  (She also shared that her grandmother would always get Easter Egg Cake there at Easter time. Fun!)

The bakery has since closed and the Turtle Back Cookie fans are left scrambling to recreate these special treats at home.  Unfortunately the owners haven't shared their secret recipe. If you google "Traeger's Bakery Turtle Back Cookies" you will find many attempts at the recipe. This is Lindsey's favorite recipe thus far.  I told her she can stop the search!  I have never had the originals, so I can't compare them, but I can say that they are one of my favorite cookies/desserts!  The texture of the cookie is lovely. It is chewy, with a good cinnamon/brown sugar/nutty flavor and a nice crunchy edge.  The thick caramel frosting on top makes them more of a dessert than just a cookie.


From Lindsey McCullough

Spice Cookies
2 cup shortening (I used 1 cup butter & 1 cup Crisco- since that’s what Lindsey did)
1 cup brown sugar
1 cup sugar
2 eggs
1 tsp. vanilla

5 1/2 cup sifted flour
1 Tbsp. cinnamon
1 tsp. baking soda

1/2 tsp. salt

1 cup pecans (plus additional ¼ cup to press on bottom)

Sift together flour, cinnamon, soda and salt; set aside.
Cream together shortening/butter, sugars, eggs and vanilla.  Stir in other dry ingredients (flour, cinnamon, soda and salt).  Add pecans.  Chill dough several hours or overnight.
Drop with 1 5/8 inch cookie scoop onto foil or parchment paper, which has a layer of chopped pecans.  Press bottom of cookies onto pecans.  Place on cookie sheet lined with parchment.  Bake at 325 degrees for about 12 minutes or until fully cooked when touched.  Cool before icing.

Icing:
½ cup (1 stick) butter
1 tsp. vanilla
1/2 cup light brown sugar, packed
1 box (4 cups) confectioner’s sugar, sifted
3/4 tsp. cinnamon
4 to 5 Tbsp. evaporated milk (or cow’s milk if you don’t have evaporated)
Bring butter and brown sugar to a boil and simmer 2 minutes.

Remove from heat; stir in vanilla.  Alternately add sifted sugar and milk.  Add cinnamon to some of the sugar as it is sifted.  Beat with wire whisk or mixer.  Adjust sugar and milk to spreading consistency. (It might not take all the sugar or all of the milk.) You want it spreadable but thick.  You can put it back on the burner if it starts to solidify   


I have made them twice and one time the dough felt dry and crumbly.  They turned out thick and puffy, which looked good, but they were drier and crumblier.  If this happens to your dough for some reason, add a little milk or water to your batter to soften it up a bit.  


toasted coarsely chopped pecans
pecans are pressed into the bottom of the cookie
as well as stirred into the dough
the carmel frosting that is quite addictive


This is a with and without frosting photo.  If you don't love the richness of the thick caramel frosting,
the cookie itself is an an excellent spice cookie!  
Make someone's day by baking them some of these lovelies.  It makes a nice big batch, so there are plenty to keep and share.  And while you're at it, maybe offer to bring a pizza over too and sit down and enjoy it with them.  And make their entire week brighter!


Saturday, February 7, 2015

Chocolate Shortbread Valentine Cookies


I love Valentine's Day! So fun! So much prettiness and love and sugar!  I have written about my adoration of this holiday in years past and have shared some of my favorite traditions, recipes and treats 
HERE and HERE and HERE 
So, I will refrain from repeating myself and will make this a short post.  

In my home (and my home growing up) Valentine's was a fun holiday not a romantic, "Hallmark", pressure-filled holiday.  It's a day to say "I LOVE YOU" to people you adore- friends, family, co-workers, neighbors.  

Heart garland- fun to make and have love draping from your ceiling! My
friend Connie made this one for me several birthdays ago and I
bring it out each year!


Valentine BINGO played with conversation hearts

Meringue Cookies- heart shaped! 
I usually make heart cut out cookies because they are so pretty and delicious and lovely.  Hearts are my favorite cookie cutter shape and the easiest to frost, in my opinion. 

 I sometimes make sugar cookies or these linzer shortbread cookies.


If you are more in the chocolate mood, these chocolate shortbread cookies are a treat!  

They are soft and like a thin brownie!  

The dough is just a few ingredients that you mix together.

They are easy and fun to ice.


After a bit of refrigeration, the dough is easy to cut out.


Here's the recipe:


from Everyday Food- Martha Stewart
1/2 cup (1 stick) unsalted butter, room temperature
3/4 cup all-purpose flour
1/2 cup powdered sugar
3 Tbsp. unsweetened cocoa powder

Preheat oven to 300 degrees.  With an electric mixer, beat butter until creamy.  Add flour, sugar and cocoa; mix just until combined.  (Chill dough in refrigerator for 10 minutes or more…if you chill it for longer, set out to soften a bit before rolling as it becomes hard in the refrigerator with all of that butter!)

Pat dough onto a flat surface and roll out (using a dusting of powdered sugar or flour to keep from sticking). Cut with cookie cutter into hearts (or desired shape). Place on cookie sheet (I line mine with parchment for easy clean up and no sticking). Bake 10-12 minutes until firm but not crispy.  
Cool completely and then frost as you wish. (See below for ideas)


1. Ice with a simple glaze-
I scooped 1/2 cup powdered sugar, a heaping Tbsp cocoa powder, a few drops of vanilla extract in a small bowl, stirred and added drops of water until it was smooth and thin, but not too thin. Spread on cookies with a spoon.  Add sprinkles while they are still wet.
Or
2.  Melt melting chocolate wafers (I use the Ghirardelli brand) and dip the cookies (half or entire cookie) adding sprinkles while still wet.  
Or
3.  I had some buttercream frosting left over from making a Giant Chocolate Chip Cookie Cake and decided to make sandwich cookies (inspired by the double-doozie cookies at the cookie store)

I think the key is frosting them in a way that makes them easy to stack and package for giving away! The sprinkles provide a nice barrier to cookies which keep them from sticking to each other. 


Bake some lovely goodies, write a kind note, make something pretty, bring warmth to this wintry month, share your adoration with someone! 


Wednesday, July 16, 2014

The Sure Thing Chocolate Chip Cookies

I think Chocolate Chip Cookies are always a good idea. I'm a fan.
They are a crowd pleaser- no matter the eater's age, no matter what the occasion, no matter what the menu.  They are classic and delicious.

The chocolate chip cookie recipe I typically use is the one printed on the Nestle’s Semi-Sweet Chocolate Chip bag.  How can you go wrong with that?

(And my other go-to variety, when I want a little twist, is my sister’s Oatmeal Chocolate Chip Cookie.)

My only struggle with chocolate chip cookies (other than limiting the number of them that I consume) is that it’s hard to use real butter and have consistent results:  in cookies with good body that don’t go flat. And yet I want to use real butter (instead of  Crisco or margarine). 

Recently, my friend Melissa B. shared a chocolate chip cookie with me that she believes is “the one”.  She (like me) loves salty/sweet and so she sprinkles some coarse salt on the scooped dough before baking.  Y-U-M. The texture and body were ideal, and they were just delicious.    She had the recipe written on a card with no source noted.  (She doesn’t remember where she got the recipe so we don't know who to assign credit for it.) I jotted down the recipe and promptly made them the next day.  And about 6 times since! The recipe calls for 1 tsp. baking soda dissolved into 2 tsp. hot water.  We think that must be the trick, along with refrigerating the dough.

I have been trying to name this cookie for the past few weeks (while I make them over and over, and eat them and share them) and I’m so tempted to call them the perfect chocolate chip cookie. But I can't.
If you are on Pinterest and type in “the perfect chocolate chip cookie”, gobs of photos and accompanying recipes pop up.  The truth that I have realized is, what one person calls the perfect chocolate chip cookie is very different from what another person calls perfect.  I have long been searching for the “perfect chocolate chip cookie”.  I have made many recipes that claim to be the best, and what I have discovered is that what constitutes a person’s ideal cookie is very personal.
Perfect cookies can be salty, or chewy or cakey, or crunchy.  Some like them really chocolately, some less chocolately,  some dark,  & some milk chocolate.  Some like cookies dense and some like them airy.  So, to claim these cookies as “the perfect chocolate chip cookies” is really a misnomer!
I think they might need to be called the Consistent Chocolate Chip Cookies or The Sure Thing Cookies or the Steady Chocolate Chip Cookies, or maybe THE Chocolate Chip Cookies.  I've been affectionately calling them the Lovely Chocolate Chip Cookies. They have consistently worked and that is what I want in a cookie recipe!   


1 cup (2 sticks) butter, softened
1 cup sugar
1 cup brown sugar
2 eggs
1 tsp. baking soda
2 tsp. hot water
2 tsp. vanilla
3 cups all purpose flour (I use ½ all-purpose and ½ whole wheat pastry flour)
½ tsp. coarse salt
2 cup chocolate chips
coarse salt to sprinkle on top
 
Preheat oven to 350˚
Cream butter and sugar.
Add eggs (one at a time).
Stir in vanilla.
Dissolve baking soda with 2 tsp. hot water, then add to batter.
Add flour and salt and chocolate chips.
Mix until fully incorporated.
Refrigerate dough until good and firm (at least an hour).
Roll or scoop into balls.  Space a little apart on cookie sheet.
Sprinkle tops with a little coarse salt.
Bake 10 minutes- or a little longer depending on size – til golden around edges.


Maybe you should try to make them and let me know what you would name them! In the meantime, I'll just keep making them and eating them.