Showing posts with label family. Show all posts

Friday, January 13, 2017

Celebrating MLK Day (Chocolate Cake with Buttercream Frosting)


January is one of my favorite months.
It's marked by: 
*New calendars-functional ones & pretty ones
*Goal setting
*The winter days start their swing towards more daylight in our part of the world (These short days are brutal.)
*Sweaters, scarves, layers
*Warm beverages
*Starting a new year- a clean slate (I love marking things off a list, so to mark an entire year off feels pretty great! Especially tough ones like 2016.)
   & 
*MLK holiday

I always relish honoring Dr. King and all those who have boldly and sacrificially fought with truth and peace for equity* (see footnote for more on equity) for all people and continue to.

In our home we always seek to celebrate MLK Day with some type of reading/reflecting/commemoration/dreaming. We sometimes listen to/watch the "I Have a Dream" Speech, or watch a racial justice focused film.  If you haven't watched President Obama's Farewell Speech, it would be a good pick.  And we always make an “integrated” birthday dessert- usually some combination of chocolate and vanilla. Here are a couple of our past celebrations. 
Here's a favorite. 
It’s Ina Garten’s Beatty’s Chocolate Cake recipe that my friend Jennifer recommended to me. What a
lovely cake.  (It is one of the many chocolate cake recipes from Ina, the Barefoot Contessa). It's moist, with a nice body. [Read more at: http://www.foodnetwork.com/recipes/ina-garten/beattys-chocolate-cake-recipe.html?oc=linkback]

Her recipe is topped with a whipped mocha frosting that is silky and delicious.  I decided for the MLK cake to top it with vanilla almond buttercream frosting instead so that it was white and black.
[I made it with butter and coconut oil.]  If you use Refined Coconut Oil (like the Crisco brand Coconut Oil) it doesn't taste coconut-y.

And the fun part was making these toppers. 

The inspiration for the chocolate flower toppers was from The Great British Baking Show.  They made these on an episode and my girls and I were enamored.  They look so impressive to be so simple to make! You really should try making them.  I haven't tried other shapes but you could really have some fun with this! 

Chocolate Cake
Butter or cooking spray for coating pans
1 3/4 cups all-purpose flour, plus more for pans
2 cups sugar
3/4 cups good cocoa powder
2 tsp. baking soda
1 tsp. baking powder
1 tsp. kosher salt
1 cup buttermilk, shaken
1/2 cup vegetable oil
2 extra-large eggs, at room temperature
1 teaspoon pure vanilla extract
1 cup freshly brewed hot coffee
 
Vanilla Buttercream Frosting
makes more than enough, but better too much than not enough! 

2 sticks butter, softened (or 1 stick butter & 1/2 cup unrefined coconut oil or crisco for whiter, thicker frosting)
a couple of pinches of salt
(32-oz.) package powdered sugar

to 7 Tbsp. milk
1 tablespoon vanilla extract- or I use 1 tsp. vanilla/1 tsp. almond extract
Preheat the oven to 350 degrees.

Butter and flour (or use Baker’s Joy to coat) 2 or 3 round cake pans -depending on what you have and like

Add the flour, sugar, cocoa, baking soda, baking powder, and salt into the bowl of an electric mixer fitted with a paddle attachment and mix on low speed until combined. In another bowl, combine the buttermilk, oil, eggs, and vanilla.

With the mixer on low speed, slowly add the wet ingredients to the dry. With mixer still on low, add the coffee and stir just to combine, scraping the bottom of the bowl with a rubber spatula. Pour the batter into the prepared pans and bake for 35 to 40 minutes, until a cake tester comes out clean.

Cool in the pans for 30 minutes, then turn them out onto a cooling rack and cool completely.
Place 1 layer, flat side up, on a flat plate or cake pedestal.

For the frosting:
Beat butter and salt at medium speed with an electric mixer 1 to 2 minutes or until creamy.
Gradually add powdered sugar alternately with spoons of milk, beating at low speed until blended and smooth after each addition. 
Stir in extract. Add milk or powdered sugar to arrive at desired thickness and texture. 
(You can make frosting while cake is in the oven.  Keep on counter until cake is cooled- if you refrigerate it will harden and you will need to thaw before frosting cake.)
With a knife or offset spatula, spread the top with frosting. Place the second layer on top, rounded side up, (if you made a third layer, repeat,) then spread the frosting evenly on the top and sides of the cake. 

For chocolate decorations:
Melt a small amount of dipping chocolate (I like Ghirardelli the best) following instructions on the package for melting.  Melt and stir to where it is smooth but not too runny.
using a spatula, spoon it into a plastic zip-top bag.
Lay a piece of waxed paper on the counter.
Use scissors to clip a very small bottom corner off of the bag.
Quickly and gently let it pour in a looping formation. You may have to try it a few times to get the hang of it.  I like to do a loop and then continue across from it and then start a new loop across from that, and so on, making 6 loops total, crossing in the middle to give it strength. 
You can also draw on a piece of paper the design you want and place that under the waxed paper as a guide. 
Once they solidify, transfer the wax paper to the refrigerator.

[Here's a little video Lucy and I made for you.]

Hoping you are having a great start to the new year and that you have a peaceful and meaningful (and delicious) MLK weekend. 

*footnote: Equity and equality are related but distinct terms.  One day in class, I was speaking about equity and a student asked, “Do you mean equality? Is that the same?” I said, "Well, equality is when people are given the equal amount of something or equal treatment, but equity goes beyond that and seeks to level the playing field- thus making people at a common level, or equal place.  This requires more for some than others!" This graphic is the one I think most simply communicates this. 

Monday, August 31, 2015

Pizza!


Our family loves Pizza.  We have it almost weekly, often on Fridays. In Nashville we have quite a lot of really good places to get pizza (Desanos, Five Points, Pizza Perfect, Mellow Mushroom, City House, Mafiaozas, Bella Nashville, and more)!  We like trying different pizza, trying different toppings and styles of Pizza: thin and thick, simple, and gourmet, with egg on top, sauce-less and with major sauce.  
One of the newest pizza shops in Nashville is Blaze Pizza.  It’s a really fun concept.  It's individual pizzas made to order on the spot.  You walk through the line, like at Subway or Chipotle, and tell them what you want on it.  You can choose one of their specialty concoctions or make your own custom pie.  They then stick it in their super-hot ovens and flash bake it. We all gobbled up our pizza and enjoyed it so much. (My only complaint is that if each person gets an entire pizza, it quickly gets expensive). 

This was Lucy's pizza, they "call out your name" when it's
 ready and my sometimes shy girl was
embarrassed at the thought of them calling out
her name?! So my mom suggested she
give them a different name, like Sarah.
Thus this pizza's "Sarah" label.  Crisis averted.


I grabbed a menu so I could get ideas for toppings.

Though I love going out for pizza, making it at home is so simple and much cheaper for a table of 5. We've been trying different dough recipes for years and tweaking our methods.

I have been contemplating writing a post about Pizza for a long while because it is one of our go-to meals.  However, I have felt reluctant to post until I found the perfect crust recipe that is fool-proof, and became an expert pizza-maker. Each time I take photos just in case this is the one! 

I have not become an expert.  However, at this point I feel like I’ve learned enough about homemade pizza, and found a recipe that works well, and made enough of it to write about it... with the disclaimer that you just have to try it and maybe try a few recipes to find the one that suits your taste.  (Much like my post about Chocolate Chip Cookies...it's hard to claim one as the "perfect" one, because what makes one perfect is a matter of personal preference!) RIGHT?

This is a recipe that I have found to be simple and consistent.  The texture and flavor are good and using the honey, bread flour and a long knead really make this a nice dough to work with and taste!

It’s easy and quick to put together. 

Here's a good basic dough recipe:

(makes 2- 12-inch pizza crusts) 
1 cup warm water
2 1/4 tsp. active dry yeast
1 Tbsp honey
2 tsp. salt
2 Tbsp. olive or canola oil
2 1/2 cups bread flour

In a large mixing bowl, stir yeast and honey into warm water.  Sit for 5-10 minutes or until bubbles form and mixture starts to foam.  

Pour in salt, oil and half of the flour and mix. If you have a stand mixer with a dough hook attachment, this is the time to use it! 

Once that flour is incorporated, start adding in the rest of the flour,  bit by bit until you get the pizza dough to the consistency you want: slightly tacky, but not sticking to your hands (you can add up to 1/2 cup more flour if you need to).  Once you reach this stage, knead for 6 minutes.   Turn the mixer on and walk away for 6 minutes.  The dough should be smooth and easy to work with.  And the bowl should be clean. 

Lightly grease the bowl and the dough so it doesn't dry out, cover with plastic wrap and let it rise in a warm place 1-2 hours.  

Preheat oven to really HOT...450 - 500 degrees!

Remove dough from the bowl and divide into 2 balls (sprinkling flour on the dough and your hands to keep it from sticking).  Let dough rest on the counter for a few minutes. 

Sprinkle a little flour (or cornmeal) on the parchment lined baking sheet or stone.

Place stretched out dough on the baking stone/sheets.  Spread to the edge of the pan- making sure it doesn't get too thin and tear.

[My friend Karin sent me this video from her kitchen in Vermont, of her technique for stretching out the dough that was so helpful.  It's always been my frustration in pizza making. I asked her if I could attach it to the post for all to see.  She obliged.]

Par-bake the crust for a few minutes (maybe 5) so that the crust is evenly baked under the
toppings, and then pull out.
Then add sauce/toppings.
Bake for 10 minutes or until golden and bubbly.  Remove and let sit for a few minutes before slicing. 

While the dough is rising, you can prep your toppings. 

You can go for cheese and red sauce and be done or you can get creative.  


Sauce: Red Sauce, Olive Oil, Pesto, BBQ sauce

Meat of Choice (if you want): pepperoni, ham, rotisserie chicken, sausage, bacon, prosciutto, meat balls (thinly sliced) 

Cheese: mozzarella, fontina, goat, feta, white cheddar, you name it!

Veggies: don’t limit your thinking on this- thinly sliced squash, peppers, onions, banana peppers, tomatoes, sundried tomatoes, fresh spinach, artichokes, garlic, olives, capers... [Karin also suggested corn for a veggie- it's a Dominican standard. YUM.]

Fruit: not just pineapple! We had an incredible Peach pizza (with no red sauce) at Dave’s birthday dinner last month and another time we had fig on a pizza!

Finishing touches: a drizzle of balsamic reduction, or pesto,  or sauce; or shredded fresh basil, thinly sliced spinach, or sprinkle of arugula


Pizza Making Tips:
  • You can keep your yeast and bread flour in the freezer, if you don't use them often.  They will last much longer that way.   
  • If you want to make the dough to use later, place in freezer bag, removing all air from the bag before freezing.  You can freeze or refrigerate.  If frozen, remove and let sit out to get to room temperature and double in size, 6-8 hours.
  • Parchment paper is a great help when making pizza.  It makes for easy clean up and transferring pizza off of the sheet.


If you have no time to make dough (or no interest) you can make our favorite quick pizza. Simply pile great toppings on a Flour Tortilla and putting it on the skillet until its melty and golden.  Or if you are making more than a couple of them, you can put them on a baking sheet in the oven to cook multiple pizzas at the same time.  They are really yummy. Thin crust and delicious! You can make them crispy or chewy, depending on how hot and how long you cook them.

I would love to hear any ideas/tips/recipes/favorite toppings people have so that we can make it even better!  Grazie!

[Thanks to Karin for reading this post and giving me her ideas and tips.  We are better together, people]


Monday, May 18, 2015

Irresistible Lemon Cookies


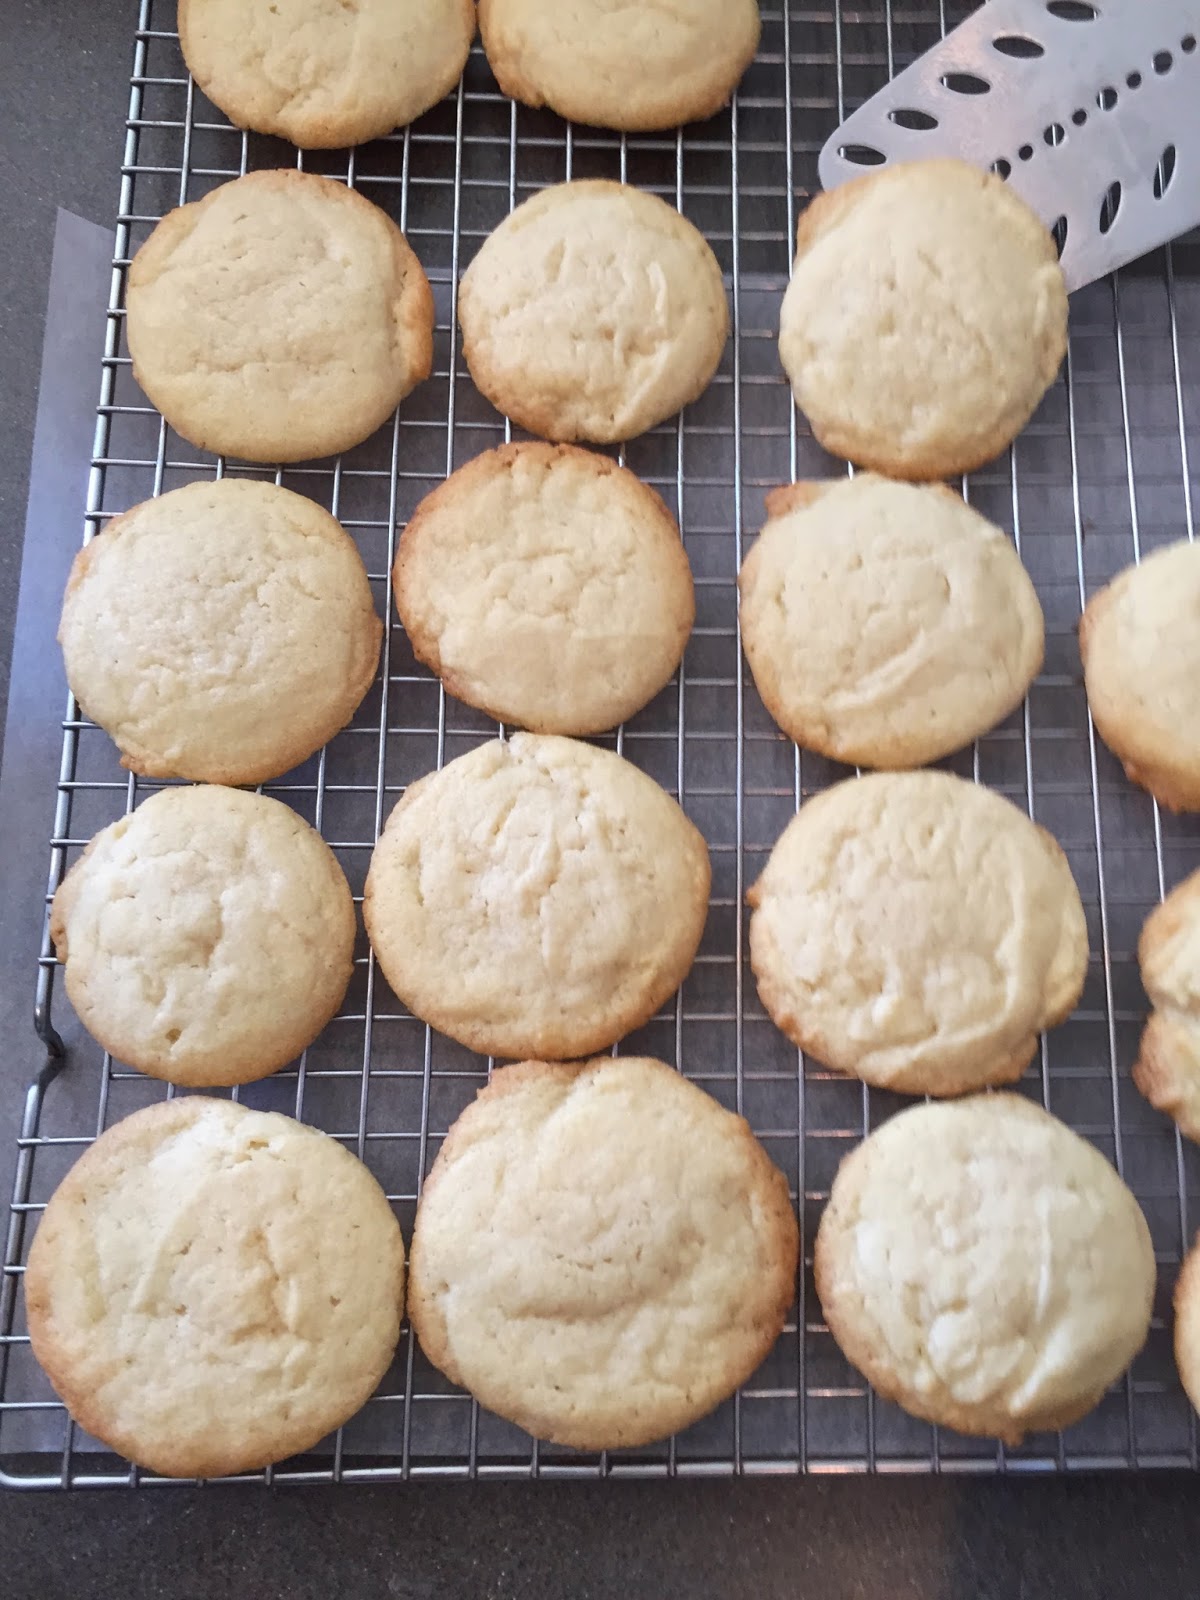
This is another recipe passed down to me from Sandi this year.  (I wrote about her and her delicious Nana’s Cake and Apple Coleslaw recipes in an earlier post).  Sandi had told me about these cookies, that she found on the blog, Chef in Training.  She explained how delicious and irresistible they were.  She brought them to small group one week and we all went crazy…to the point that we were driven to do math to figure out how to slice up the remaining few cookies on the plate to divide evenly amongst the group members! 

These cookies have a lot going for them.  They have a great texture: a little crispy on the outside and chewy on the inside.  They are buttery.  They are lemony (with zest and fresh lemon juice). And they have a lemon glaze on top!  They are zippy but not too tart! (My tart-sensitive child loves them, which is a good gauge.  She is pretty much the barometer of most things in our home.*)

When I made them a couple of weeks ago, I ate one and then another.
And then I packed some up in a to-go container** to share with friends, the Joneses, as they were headed on a journey.  And then I ate another one.  So then I put 4 on a plate to take two-doors down to Lindsey for her family of 4, so there would be less temptation in my house. 
The hilarious part was that I later got a text from Matt, her husband, that said,
“I ate 3--yes, 3—lemon cookies last night. So, so good.  Thank you!”
To which I replied, “I love it! I’m honored. Who was the recipient of the one other cookie I gave you all?”
To which he replied, “Lindsey! We opted against sharing with the boys.”

Sounds like a strategic parenting decision.

Here's the recipe:


Cookie dough
1 cup butter, softened
1½ cups sugar
1 egg
1 tsp. lemon juice
1 Tbsp. Lemon zest
1 tsp. vanilla
½ tsp. salt
½ tsp. baking powder
2¼ cups flour

Lemon glaze
1½ cup powdered sugar
1 Tbsp. lemon juice
1 Tbsp. lemon zest
1 Tbsp. milk
¼ tsp. vanilla

Preheat oven to 350 degrees.
In a large bowl, cream butter and sugar together.
Add egg and beat in well.
Add lemon juice, lemon zest and vanilla and mix until well blended.
Add salt, baking powder and flour and mix until well incorporated.
Chill dough or use immediately.  ( I find they have a nice shape if you refrigerate the dough until firm).
Roll/Scoop cookies into 1 inch balls and place on greased cookie sheet.
Space cookie dough balls about 2 inches apart from each other.

Bake at 350 ˚ for 8-10 minutes or until lightly golden on the edges of cookies.

Combine glaze ingredients in a medium bowl and whisk until smooth glaze is formed. Drizzle as much as desired over slightly warmed cookies and let finish cooling completely before eating.
Footnotes
*If you are curious about this comment, about my daughter being the barometer of our family, here’s a little more on that topic.

I was introduced to this concept from Mary Sheedy Kurchinka in Raising Your Spirited Child.  It has helped me to understand her more (and pay more attention). 
According to the dictionary:

barometer |bəˈrämitər|
noun
·      an instrument measuring atmospheric pressure, used esp. in forecasting the weather and    determining altitude.
·      something that reflects changes in circumstances or opinions: furniture is a barometer of changing tastes.

So, when tensions are high, she is the instrument that “measures that” and then “indicates that”.  When it’s hot, or cold, or tense, or sad, or intense, or scary, or hostile, or sweet…she’s my sensitive one that feels all the feels and lets us know! So, when I see/hear/learn from her how it’s feeling to her, I can predict that she is giving the read on the situation. 

**To-Go containers.  My mom taught me this tip.  If you are someone who enjoys sharing food with people, this is a tip that I recommend.   Save your plastic containers from to-go food, or yogurt, or lunch-meat, or hummus, or whatever you buy in plastic containers.  And save them for when you are giving away food.  I personally don’t like to use them in my fridge for my leftovers because the labels confuse me! To see a  Greek Yogurt container in my fridge leads me to believe that I have Greek yogurt, when in fact, it is filled with homemade hummus.  However, they are great for giving food away! And… you don’t have to spend money on “disposable plastic wear”.  Our favorite is when we get Pei Wei to-go containers.  They are perfect for packing baked goods or anything really. 


Speaking of lemons…I am loving putting lemons, limes and mint (from my
yard) in my ice water these days! Refreshment!


Sunday, March 30, 2014

True Confessions (and Baked Ravioli)


During this season of Lent, our family has been practicing confession of our sins, our shortcomings and frailties at the dinner table.  We have this wreath in the center of our table with a little dish of toothpicks.  We stick a "thorn in the crown" representing our sin.  We have done this during this pre-Easter season for the past few years.  It is so convicting and powerful.  [If you don’t know of this ritual and want to know more (and the beautiful conclusion)- read about it HERE].

My kids have really engaged with this practice.  They quickly grab for the toothpicks, ready to confess.  They are aware of their struggles and the ways they have lived out of a selfish place.  This humility and self awareness seems so important.  (We have had a lot to confess lately- as we've had some rough days). It has been a beautiful and convicting experience to have my children model conviction for me.

One of the most humbling parts of it this year has been the repetition of sin in my days.  As I ponder the day's words, thoughts and deeds, I find that I repeat the same sins over and over.  The other day, I followed my kids’ lead by grabbing a toothpick.  And then I just held onto it.  My daughter asked, “Are you going to share your sin?” I said, “I’m thinking.” She replied with some suggestions of sins from my previous week, (thank you very much) “What about self pity, judging, impatience?”  Yep. Those are the ones.  The ones that keep surfacing.

The silver lining of this disappointment is that it has made me sick of myself! I have thought, “NO MORE SELF PITY!! THIS IS GETTING OLD!” And it has prompted me to resist when the urge to “compare and despair” rises up in me.   I have been fighting the temptation to let my comparison lead me to judging myself or others. (My comparison typically tends to lead to one or the other.)

While I’m confessing, here’s another. (Not nearly as ugly.)  I am tired of dinner.  I am tired of dinner planning, of preparation, of dinner itself.  I wish that we could just make a peanut butter and banana sandwich, or have a salad, or open a can of tuna, or take some "dinner pill" and call it a night.  But I have people in my house that like a real meal for dinner.  Sigh.

I am grateful for the longer days of sunshine, as it helps with my motivation.  My friend Lindsey was telling me this week that last month she planned out the entire month of dinners for her household.  I'm so impressed.  She said she went ahead and bought all of the non-perishables for the month and then bought perishables each week.  I think this is brilliant (and ambitious) and I'm hoping that maybe she will just give me her month-of-menus and I won't even have to think! We like the same kinds of meals, so I would be happy to adopt her plans. 

If my daughters had it their way they would choose pasta every meal.  I really try to limit it to one dinner a week.  I felt like I needed to add another pasta dish to my repertoire.  I was trying to think of something easy but different and delicious to make.  I didn’t want to do a meaty lasagna- for the sake of cost and trouble and my meat-adverse people.  My family loves ravioli.  I found a recipe from Martha Stewart's EVERYDAY FOOD for Baked Ravioli.  It is so simple and is lasagna-like in that it has the pasta, cheesy and savory filled, with red sauce in between, but much less work. 

I followed her recipe, and even made the sauce she instructed to make.  It was so delicious.  I think next time, I confess, I might just make it with jars of good quality pasta sauce. The homemade sauce didn’t make that much of an impact.   Then the recipe would be even simpler!!  I also think I'll attempt to sauté some vegetables to layer into the dish- maybe zucchini and squash to incorporate some healthiness.

(adapted from Martha Stewart’s EVERYDAY FOOD)

2 Tbsp olive oil
1 medium onion, chopped
2 cloves garlic, minced
coarse salt and ground pepper
1 ½ tsp. dried oregano
1 tsp. basil
1 can (28 oz.) diced tomatoes
1 can (28 oz.) crushed tomatoes
2 (1 lb. bags) store-bought frozen cheese ravioli
2 cups shredded mozzarella
½ cup grated Parmesan cheese

 [OR if you are making it with bought sauce- omit first 8 ingredients and replace with 2 jars of pasta sauce. ]
And, if you are making for a smaller crowd, you could make it with one bag of ravioli and one jar of sauce and make it in a square baking dish.

Preheat oven to 425˚ degrees.  Heat oil in a large saucepan over medium heat. Add onion and garlic, and season with salt and pepper; cook, stirring occasionally, until softened, about 5 minutes.  Add spices.  Bring to a boil, reduce heat and simmer, breaking up tomatoes with a spoon, until sauce is thickened and reduced (about 20-25 minutes).  OR heat up 2 jars of quality pasta sauce.

Meanwhile, cook ravioli in a large pot of boiling water, salted.  Cook for just a few minutes- until pasta rises to the top of the pot.  Drain pasta.

Toss sauce with pasta.  Pour into a large baking dish (13 X 9).  Sprinkle with mozzarella and parmesan cheeses.  Bake for 20 minutes or until golden on top and bubbly.  Cool slightly before serving.
chop

simmer

boil for 3 minutes

pile in a dish

stir in sauce

top with cheeses and bake

Done!

I hope you are having a lovely beginning of spring, a meaningful season of Lent (if this is something you practice), and inspired dinners!