Showing posts with label Party Food. Show all posts

Sunday, June 15, 2014

Banana Bread (Cream Cheese) Sandwiches

Banana bread sandwiches (cream cheese smeared in between two slices of banana bread) have been the answer to a lot of questions for me lately.

Q:What should I do with these spotty bananas? I just bought them a few days ago, but evidently people weren't into them this week and I don't want to waste them.
A: Banana Bread Sandwiches

or

Q: What should I make for a goody to take to church Sunday morning…something that I can make the night before?
A: Banana Bread Sandwiches

or

Q:What should I serve at a brunch I'm hosting that will be pretty and a little different but universally liked?
A: Banana Bread Sandwiches

or 

Q: Our office is having a mid-morning meeting and we were asked to bring snack foods– what should I contribute? 
A: Banana Bread Sandwiches

I made them again this week.  Y'all, they are yummy. And the answer to so many questions!  (If only they could answer some of the bigger, tougher questions that I'm grappling with in my life! But let's be realistic here. You know how I like to be pragmatic.) I won't get into those bigger questions at this time, in this space... so here's the recipe:

 1/2   cup (1 stick)  butter, softened OR 1/2 cup coconut oil
 1      cup  sugar
 2      eggs
 2      cups  flour (I use a mix of whole wheat or multi grain pastry flour, and all purpose)
 1      tsp. baking soda
1/8    tsp. salt
 1      tsp. vanilla extract
 1/2   tsp. grated lemon peel
 3      ripe bananas, mashed (with a fork)

optional mix ins:  3
1/2   cup of chopped pecans, raisins, chocolate chips, chopped apricots,  or sweetened coconut 


Cream butter and sugar.  
Add eggs, one at a time, beating well after each.  
Combine flour, soda, and salt; add to creamed mixture.  Fold in remaining ingredients.  Pour into small loaf pans that have been greased or lined. (If you have added mix-ins put a clue on top- sprinkle a few chips, nuts, coconut or slice of an apricot, so people will know what they are getting.) 
Bake at 325 degrees for 20 minutes or more, depending on the size of your pans.  You can also make one large loaf. Test with toothpick for doneness.  Allow them to cool for a few minutes in the pan and then using a knife, gently pull it from the edges.  Then remove from pan. 
 (This pan is so nifty.  It makes 8 mini loaves all at the same time.  It is easy to pop in and out of the oven- being in one pan.  HERE's a link to get one for yourself.)

To make the sandwiches
Use softened cream cheese (from a tub or a block)

If you want them sweeter, you can add confectioner's sugar to taste, OR you can just use the cream cheese as is. 

Slice the bread very thinly- since they will be eating 2 slices at the same time for the sandwich.
Gently spread cream cheese on the bread and place pieces together.  


If you already have a banana bread recipe that you are married to, but have never tried slicing pieces thinly and spreading cream cheese between, you should give it a try.

If you haven't already committed life-long to a banana bread recipe, you should give my mom's recipe a try.  It is just so consistently delicious.  

I was making it last week for church and realized I was out of butter (a terrible moment in my kitchen).  I had just made dinner for some friends  which included quick sour cream biscuits and oatmeal raspberry bars, so I had used up all the remaining sticks of butter the night before, without realizing it.  I didn't have the time or the will to pack up the kids and go to the grocery early Sunday morning.  So I decided to try using Coconut Oil.  It was my first time to try it in this recipe.  It worked beautifully.  I might just switch!  It made the bread a little richer, with a hint of coconut flavor, and a little more crusty on the top. 

And remember you can always freeze bananas that are looking too ripe to eat.  If you don't have time to make banana bread that very day.  Make sure you peel them first and put them in ziplock bags.  You can put 3 in a bag, and you'll have what you need to make a batch.  Just thaw them when you are ready to use.  They look gross and slimy but they work great.  

Also, this bread can be baked and frozen to keep on hand, or just to prepare ahead of time for an event.  (I recommend you wait to slice and make into sandwiches until thawed.)  

So, for some questions you are asking this recipe might be the answer you are seeking.  For the rest of the questions I recommend you look to Google, your mom (or dear friend), or The Bible.  I have found that most other answers are found there.


Wednesday, February 26, 2014

Cilantro Sour Cream Dip and Tostadas

We have been having a lot of conversations lately in our house about whether foods are finger foods or fork foods.  My 12 year old is the chief offender of eating with his hands.  In his defense, he is a great eater and his messy eating struggles really have to do with the passion with which he eats his food! (He comes by this passion honestly.)  He wants to get more in a bite than the fork sometimes can capture.  We occasionally joke about sending our family to manners classes or Cotillion… but we are not really serious about this.   We just remind them, when necessary, that "this is a fork food", or "put your other hand in your lap while you are eating to keep it out of the food".  I tell my son that, perhaps he just lives in the wrong country. "In India they eat with their hands as a normal custom.  They scoop the food with Naan and use their hands as their main utensils.  It is culturally appropriate." He nods. "In India."

A favorite meal lately in our house has been Tostadas.  People define them differently, but basically- in our home - they are a flat, open faced taco pile.  I don't know if you make them, but I like that they are a change of pace from soft tacos and burritos and yet a lot easier to fill and eat than hard shell tacos. AND they can be eaten with your hands (forks are optional).

They are so delicious, quick and made-to-order!  We made them with leftover rotisserie chicken and refried beans last week.
We make them by putting the meat or beans on a flat taco shell and top with shredded cheese


and warm on a baking sheet in the oven for a few minutes until it's warm and the cheese is melted.  

Guacamole- [My favorite way to whip up some guac is: 2 ripe avocados, smashed; 2 cloves of minced garlic; the juice of one lime; a sprinkle of coarse salt; and a large spoonful of salsa (whatever is nearby). Stir and eat. YUMMY!]
 
Then we remove it from the oven, place on plates, and top with lettuce, tomato, sour cream and guacamole.  

We typically use tostada shells that you buy in a bag (or a box) at the grocery, though sometimes we bake tortillas for a few minutes to crisp them up and use them when we don't have hard shells.  I have never fried tortillas to make my own tostada shells (because a large motivation for me to make this meal is the EASE of it), but you could.
And to add some excitement to the meal you need to try this dip!

A few weeks ago, at the Social Work department Chili supper that I wrote about, my student Bryan brought this delicious dip to share! He had asked me at class earlier in the week if the students were to bring anything.  I told him that he was free to bring anything if he wanted to, but nothing was required, or expected.  He brought a bowl of this dip and we were glad he did!

It's tangy, creamy and so flavorful.  You can alter the amount of kick it has to your liking.


It's similar to Chuy's Creamy Jalapeño dip, if you have ever had it (just a little thicker).

Cilantro Sour Cream Dip

16 oz. sour cream
1 jalapeno
1 bunch of cilantro
1 clove garlic
1/2 package of dry Hidden Valley Ranch dressing mix
1/4 cup light mayonnaise
juice of 1 lime

Seed and chop the jalapeños (You can leave in just a bit of the seeds and membrane if you like the dip to be spicier.)
Wash and trim the cilantro of thick or long sections of stem.
Chop garlic cloves
Juice lime
In a food processor or blender, add all of the ingredients.  Pulse till it is a soft and creamy constancy.
Serve with chips, on tacos, as a mexican taco salad dressing.  


Enjoy!

P.S. I asked my son's permission to write about this "eating fork food with hands situation" on my blog. He said,  "well, it's true, so yes, you have my permission". 

Saturday, January 4, 2014

Some December Favorites


December was such a busy month with a very full load of grading and closing down the semester,  followed by a child-filled holiday season. Therefore,  blogging had to be put on the back-burner.

However, two things that I made this month, that I just have to share are Cranberry Sauce and Jalapeno Poppers.

Homemade Cranberry Sauce.
I have a great love for cranberries. I wrote about it HERE.  And this very time-limited cranberry season is about to end!  So, if you haven't already stocked your fridge/freezer with cranberries, get them quick.  My Kroger had them on clearance this week for 25 cents a bag!

Cranberry sauce is one of those recipes that people think is complicated or difficult but actually it is quick and very simple. I made a few batches of cranberry sauce this season. YUM! So easy and so delicious!
Just a few ingredients!
Place a bag of fresh cranberries in a large pot on the stove (pick out any rotten or shriveled berries from the pot). Add 1 cup of granulated sugar. Pour in 1 cup of water. If you want, you can add the zest of an orange. Stir ingredients together. Heat on medium high for 10 minutes, stirring often, until the berries pop. Take off of stove and let cool. Sauce will thicken as it cools. Store in a tight container in the refrigerator.


I love cranberry sauce on top of meat, on a turkey sandwich, as a side dish with a savory meal, or swirled into my plain greek yogurt for breakfast!
Having a jar of it in the refrigerator inspires all kinds of uses.


Secondly, these Bacon Wrapped Jalapeño Poppers were a favorite of our season.

Maybe because it's been the holiday season and it inspires party food.  Or maybe it's because cooking a whole meal lately has felt overwhelming.  But I've been wanting snack dinners lately.  We have had appetizers for dinner several times during the holidays.  Sometimes we have had crackers and cheese, sliced apples,  hummus and veggies, goat cheese with pesto and sun-dried tomatoes with crackers and pita chips, texas caviar and chips.  And if we're really going for it- these bacon wrapped pepper poppers have made it on the menu!
We made these a couple of summers ago for the first time when grilling with friends and we fell in love.
They are a little kicky but the spiciness really varies pepper to pepper.

They are simple and just have three ingredients: jalapeño peppers, cream cheese and bacon.

Slice jalapeños long-wise and carefully hull out the seeds and the white inside the pepper (the seeds are the hot part of the pepper, so be careful when handling them!).
Use a knife to smear softened cream cheese into each of the peppers.  Slice bacon in half and wrap a piece around each pepper, securing the two sides together on top.  Place them on a grill over medium heat.  If you have a higher rack, use it. Cook until bacon is fully cooked and crispy, and the jalapeños are softened. Serve immediately.

Or if you don't have easy access to a grill, you can place them on a baking sheet and bake them in a 375˚ oven for 25 minutes, or until bacon is crispy.    


I love December and the foods and festivities, however, I sure enjoy starting a new year, embracing a clean slate.  So, I've packed up the Christmas decorations, made some resolutions and am thankful it's January.

 I hope you are having a great start to a new year.


Tuesday, September 3, 2013

Mexican Layer Dip- A Party Food Where The Party Is Optional


Do you love Mexican Layer Dip as much as I do?  Tell me you've had it.  It's one of my favorite party foods to make (and eat). It is always a crowd-pleaser.  You can add or delete anything you like.  I put cilantro, mostly because it's so fresh and pretty, but you can omit it.  I didn't put olives, though some people include them.  I was afraid the non-olive people would be turned off.

 In deciding what to blog about this week,  I was looking through photos of food I have made and kept coming back to the photos of the Mexican Layer Dip.  It's so yummy! It's a shame that it is a party food, since I don't have any parties to cook for this week and instead I have family dinners I need to be cooking every night!    

The more I think about it and the longer I look at these photos, the more I'm tempted to make this for dinner this week – served with chips and warm tortillas. And we can scoop up the dip and make a meal out of it.  

Who says Thursday night family dinner can't be a party, right?   


2 cans refried beans

cumin, garlic powder & hot sauce

16 oz. container of sour cream

guacamole (bought or homemade)

1 cup grated cheese (cheddar, pepper jack, colby-jack)

lettuce- shredded

diced tomatoes

cilantro leaves


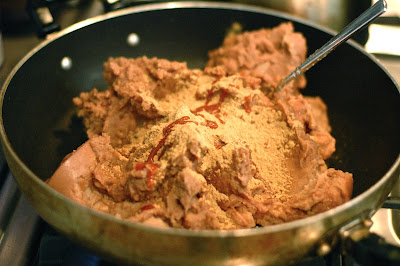
Warm beans in a skillet on the stove top.  Add 2 tsp. ground cumin, ½ tsp. garlic powder and a couple of dashes of hot sauce.

 Stir together and warm until thoroughly heated. Spread on platter. Smooth until even. 


Spread sour cream on top, leaving an edge to reveal the beans underneath, and then guacamole


Continue to layer with cheese, lettuce, tomatoes and cilantro.

Serve immediately (or keep covered in refrigerator until time to serve).  Serve
the day you make it. 


Friday, September 21, 2012

Cracked Out on Cracker Toffee


I have cooked several things lately that I am excited to share with you: Pulled BBQ,  Black Bean Torte,  Homemade Sushi, Chicken Salad, Rosemary Parmesan Muffins and thick French Toast, to name a few.  I was deliberating about which should be this week's post and then Cracker Toffee (A.K.A. Crack) resurfaced in my life and I can't stop thinking about it.  It quickly rose to the top of the "to post" list, when my co-worker Patsy asked for the recipe.  So, here's what happened: I innocently went to a baby shower last week for my friend Stephanie.  I knew the treats being served would be delicious, as the hosts are all great cooks.  And then I saw it. There on the serving table was one of my favorite confections: Cracker Toffee.  I love it and haven't had it in a long time! I ate one piece, and a slice of poundcake with Strawberry Coulis, along with caramel corn, and banana pudding adorably served in repurposed glass baby food jars.

Tuesday, May 8, 2012

Wheat Crackers: Cooking Lab #2

  
I became a fan of King Arthur Flour a couple of years ago, thanks to my friend, Steve - the bread-man.  This company produces great flour and a very useful website, filled with beautiful recipes.  So, when I saw online that they have published a cookbook, I was excited to get it.  I put it on my wish list and my sister and mom ordered it for me for my birthday.  When it arrived, I was quite surprised. It is HUGE. It’s Joy-of-Cooking-huge – a manual for baking!  I wasn't expecting such a large, reference style cookbook. It's a little intimidating and will take some time to get acclimated to it.  I am very excited--now that classes are over and summer is on the horizon--that I will be able to use it as a textbook for baking this summer.   It’s on my "summer reading list", along with 20 or so other books.  I am fully aware that a summer book list of this length is impossible to accomplish with 3 kids at home all summer.  However, I am determined to make a dent in my stack and make this a reading-filled summer!
My reading list is filled with books that I have been accumulating and stacking around my house, in hopes of getting to read them at some point.  Now it’s time to get focused on making it happen.  I see this as marathon of reading.   I cannot imagine running 13-ish miles (the ½ marathon, which many people I know just did), and I certainly can’t imagine running the full marathon – 26-ish miles (which a few of my friends did). This seems an impossibility.  I cannot imagine the months of training leading up to this event, with all of the sacrifice and energy day in and day out! Furthermore, the idea of doing this ALONE sounds impossible and miserable.   I have found that even my marathon-running friends deem going it alone to be absurd. How could you train for this, week after week without the companionship and camaraderie of partners?  So, I am thinking I want to attempt a READING MARATHON (okay, ½ marathon maybe). And I'm beginning to think partnership would greatly enhance the experience and increase the likelihood of me completing this. Not to mention a whole lot more fun.

(I am trying to find some friends who would be interested in reading a book from my list alongside me! We could set a goal date to have it read, and then meet to discuss it... like multiple mini book clubs.  It would help me to prioritize my list and motivate me to do what it takes to make it happen.  And make it even more fun!)  

Speaking of camaraderie, I have recently called on my cooking lab pals to help me redeem my failed attempt at homemade crackers.  A couple of months ago, I cracked open my King Arthur Baker's Companion to give a recipe a try (knowing I would have to wait until summer to study the book).  I decided to start with Crackers.  They seemed quick and basic.  The recipe is very fluid and loose, which is nice if you are craving creative license, and torture if you are wanting a clear and guaranteed successful recipe.  I made a batch to serve with homemade chicken noodle soup.  They were a little mediocre and my family responded with, “Really? Why did you make crackers, Mom?”  I then proceeded to eat them and they nibbled on them a bit. It was discouraging and felt pretty much like a failure.

So, I started looking around on Pinterest to see what cracker recipes I could find and discovered 3 recipes for crackers that looked especially tasty.  That's when I called in my reinforcements. Friends are what embolden me to experiment with something that feels beyond me. (Kind of like running multiple miles every Saturday morning – for some people).


I asked Blair and Caroline, my poached egg cooking partners, to join me in a cooking lab for crackers.  And it was a success!  
We looked at the 3 recipes and decided on two that looked especially good to us.  We then decided to make double batches of those two so that we could try different seasonings. 
We made “saltine-like” crackers and  “wheat thin-like” crackers.  We all voted on the wheat thins as the winners.  They are very simple to make and are delicious!  We all decided we liked the Wheat ones the best and there was a varied response on the favorite flavor: garlic/kosher salt was my family's favorite  and the rosemary/parmesan/kosher salt were the lab team's favorite.  

We learned some things along the way:
*Thin-ness is crucial.  You need to roll them really thin.
*Prick the dough with a fork, to prevent them from puffing up.
*Transfer dough to the baking sheet (or stone) before adding toppings, as the toppings might fall off during the transfer, if moved with the toppings (we learned this the hard way).

our taste test
When we had our taste test, I threw together a fruit and goat cheese studded green salad to have with our piles of crackers, and my family joined us. Dave asked, “now WHY would you go to the trouble to MAKE crackers?  Is this for fun or is it a whole lot cheaper?" I stumbled around with my answer, explaining that they were fresh, without preservatives, varied in flavors, and cheap to make.  He didn't seem convinced. I then said, "...and it is my hobby, so it's fun."  That answer seemed to make more sense to him.  After tasting them though, he agreed that it was a good idea to make homemade crackers, as these are super yummy! I think the idea of my homemade cracker-making began when I was a young girl and went to Darrell's restaurant.  Did you ever go to that bizarre restaurant that had a bus and a jail and an elevator in it?  They served free form homemade crackers as an appetizer.  They were salty and buttery and memorable... clearly!

Whole Wheat Crackers (adapted from themarathonmom.com – ironically)
1 ¼ cups whole wheat flour 
          (or whole wheat pastry flour)
1 ½ Tbsp. sugar
½ tsp. kosher salt
¼ tsp. paprika
4 Tbsp. salted butter
¼ cup water
¼ tsp. vanilla
seasonings of choice

Preheat oven to 400 degrees. Line two baking sheets with parchment paper (or use baking stones).
In food processor, combine flour, sugar, salt, paprika, and butter.
Pulse until the mixture is crumbly.
Add water and vanilla and pulse again until evenly combined.
Form dough into ball and divide in half.
Roll out as thin as possible.
Using a pizza cutter or good knife, cut into squares.
(Also, cut edges to make it even.)
Prick all over with a fork.
pricking with a fork


chopping fresh rosemary from the garden


    Place crackers onto pan and sprinkle with seasonings of your choice:

Kosher salt, grated Parmesan cheese, rosemary, 
Italian seasonings, garlic powder, etc. 
ready for baking
    Bake for about 10 minutes or until lightly 
    browned.  (Watch closely to see how it’s
    coming). 


done!

8 varieties of crackers

Find a friend or two to join you in running a race, reading some books, making some crackers, or any pursuit that sounds more do-able and fun when done together.

Sunday, April 29, 2012

Brazilian Limonada


Do you ever find a recipe that is so tasty that you find yourself thinking about how and when you can fit it into your menus for the week, who you can share it with, or how you can justify making it?
This is the case with this Brazilian Lemonade. My friend, Melissa S., was coming to have pizza with us last spring and brought the stuff to make this recipe.  She had seen it online and had been wanting to make it.  She knew I would love it.  And she was right. 

I need to share my angst about the name of this beverage. When Melissa told me it was called Brazilian Lemonade, but was made with limes, I was perplexed.  I asked her if she was sure it wasn't called Brazilian Limeade.  She showed me the recipe from the blog where she found it, and I told her I couldn't do it!  I just can't call a thing what it is not.  So, I decided to do a little further research.  I googled around and found that in other places online there was discussion about why brazilian lemonade was made with limes.  The information I gathered was that in Portuguese a lemon is "lima" and lime is "limão".  This made some sense to me.  I also read that limes are much more prevelant in Brazil than lemons.  In addition ironically, in Brazil, some people call this recipe "Swiss Lemonade".  Naturally!  One place I found it called Limãnada, (pronounced LEE-mah-na-tha).   This made more sense to me than Lemonade.  So maybe it's not Lemon-ade, nor Lime-ade, but rather, a truer pronunciation of Limonada, reflecting its Brazilian origin.

I felt much better.  Now I call it Brazilian Limonada (or sometimes Brazilian Limonade) and I make it as often as I can justify it.  Now I just have to work on saying it with a straight face, as I shift from my southern accent to my Brahhzzillian accent in one sentence – (from Shelby of Steel Magnolias to Gloria of Modern Family).  "Hey y'all, do ya want me to make some Brazilian Limãnada tonight?" It makes me think of my witty friends Angela and Ray, who lived in Chile for a while after we finished college.  We always laughed as Angela told stories about Chile (pronounced Chee-lay as opposed to our incorrect pronunciation of Chill-E).  She would dramatically flip back and forth between her Tennessee and Chilean accents and we would all die laughing.  

The ingredients to this recipe are super simple but special. Are you ready for this? Limes, sugar, water and sweetened condensed milk (the nectar of the gods).  What is it about sweetened condensed milk? It makes everything better!  My favorite banana pudding calls for it.   Cold Coconut cake, I recently posted, is delicious because of this great ingredient. Coffee is better with it.  [There is a wonderful local coffee spot in downtown Nashville, Crema, that has a coffee drink called a Cuban.  The first time I went there I was told I must get the Cuban- it's espresso, steamed milk and sweetened condensed milk! It is ridiculous! I have been many times in the years since and I can't seem to bring myself to NOT order it.] Simply stated, sweetened condensed milk just seems to make everything better.

Back to the Brazilian Lime Drink.  
It's delicious! 
It is easy, and so creamy, zippy, and unique! 
I wanted to post it this week, in honor of Spring and the upcoming Cinco de Mayo.  It's a great non-alcoholic, warm-weather drink for your mexican fiesta, or just about any event.


4 juicy limes (ones with thin, smooth skins are the juiciest and the thin skin cuts down on the chance of your drink being bitter)
1 cup sugar

6 cups cold water


6 Tbsp. sweetened condensed milk

Make a “simple syrup” or “sugar water” by mixing cold water and sugar in a large jar or liquid measuring cup very well until sugar is dissolved. Chill until ready to use. (This step can be done ahead of time.)

Wash limes thoroughly with soap. Cut the ends off the limes and then cut each lime into 8ths.

Place 1/2 of the limes in a blender.


Add 1/2 of the sugar water into a blender, place the lid on the blender, and pulse 5 times. Place a fine-mesh strainer over a pitcher and pour the blended mixture through the strainer and into the pitcher. Use a spoon (or your hand) to press the rest of the liquid into the pitcher. 

Dump the parts of the limes left in the strainer into the trash. 

Repeat with the remaining limes and sugar water. Stir together. 


Add sweetened condensed milk. 


Test it. You may want to dilute it with water if it’s too thick or sweet for your liking. If it’s bitter, just add some more sugar and maybe a little more milk. 


Serve immediately over lots of ice.


Call it what you want to, attach it to any culture you would like: Brazil, Switzerland, Mexico, or the United States. Use a Portuguese accent if you'd like, or a southern drawl.  But whatever you do, don't omit the sweetened condensed milk!