Friday, January 28, 2011

We’re Having a Baby Pie

This weekend my baby is turning 3! It is hard to believe, and it feels like a big milestone. As I was thinking about her special day and what I could post in honor of it. I decided that I would share with you a pie that was inspired by her. It was actually inspired by her before I even knew she was a “her”, before we knew she was Lucy, before we knew she would be full of life, an early riser, a smile bringer and a passionate, sun-shiny soul.
My Chocolate-loving Girl!
When Dave and I knew we wanted to begin trying for #3 our dear friend, Amy, asked us to please try to be creative when announcing to her that we were pregnant. We have never gotten very creative when it comes to announcing pregnancy and this was a tall order coming from one of the most creative people I know- (check out her house design blog). So I began to ponder what I could do to creatively let her know that we were expecting a baby.

When I was only a few weeks pregnant, I went with a group of girlfriends (including Amy) to see Waitress in the theater. [One friend wore a cute apron to the movie. How fun is that? I wish I had thought to do that too.]
Have you seen the movie? It stars Keri Russell (who I think is great- so fresh and naturally beautiful) and Adrienne Shelly, who wrote, directed and acted in the film (RIP). The film is a dark, poignant, quirky, disturbing-yet-endearing story of love, dysfunction, dream seeking, and pie making. I love a movie where cooking is the context. She makes pies throughout the movie, and they are beautiful and delicious looking: including Falling In Love Chocolate Mousse Pie, Lonely Chicago Pie, Marshmallow Mermaid Pie and Bad Baby Pie. She makes rich chocolate pies, fruit pies, even quiche-like savory pies. She is creative and daring in her pie making, as she invests great emotion and meaning behind each one! I also love that she sings this childhood melody, “the Pie Song”, during the film. I left the theater wanting to make a pie and sing that song.
This gave me the idea!

I decided to make a pie: Amy’s favorite pie- Kentucky Derby Pie and serve it with a label on it: "We’re Having a Baby Pie".  So I made that pie, singing the Pie Song and invited Amy to have a piece of pie. She asked, “What kind of pie?” and I said, “we are having a baby pie”as i lifted the pie cover. She said, “what?” and the rest is history... 3 years and a few pies later we are celebrating that baby’s 3rd birthday.

There's really nothing novel about the pie.  You have probably had it many times at potluck dinners or grama's house. I don’t know what you call this pie. Chances are it’s probably not We’re Having A Baby Pie or Sweet Lucy Pie. Maybe Derby Pie, Kentucky Derby Pie or Chocolate Chip Pecan Pie. I sometimes call it Chocolate Chip Pie in front of my kids, hoping they won’t notice the pecans, which they think they don’t like. Any way you name it, it is simple and tasty, a crowd pleasing southern classic.It's great warm or room temp with a big scoop of vanilla ice cream on top.

Happy Birthday to Lucy- you’re as sweet as pie!

Derby Pie
1 cup sugar
1/2 cup flour
1 stick melted butter
2 eggs well beaten
1 cup chocolate chips
1 tsp vanilla extract
1/2 cup chopped pecans
1 refrigerated pie crust

Start with the pie crust and follow the directions on the box for prepping it.  I slightly roll it out on a floured mat to give it ample room to hang over the pie lip.

In a bowl, stir together sugar and flour. Then stir in melted butter and eggs by hand. Then stir in the Chocolate chips, vanilla and nuts.

 Finally pour into the pie shell.

Bake at 350 for 25-30 minutes. After 15 minutes I reach in and tent aluminum foil over the edges to prevent burning.  The only tricky part of the pie is determining done-ness.  You want it to not jiggle when you shift it around. Allow to cool for 15 minutes before serving. The pie will firm up during the cooling.

Friday, January 21, 2011

Roasted Winter Vegetables


Ina Garten is my favorite high profile cook.  I trust her.  She is real, down to earth, uses great ingredients (some that are far beyond my scope or wallet, but most not) and simple techniques.  One of the best things I have learned from her, through the several Barefoot Contessa cookbooks I own, is roasting.  She has taught me to roast chicken,  asparagus, peppers, new potatoes and carrots.  It is remarkable that the simple components of a hot oven, olive oil, Kosher salt and ground pepper could create such beautiful, savory, healthy, tasty dishes.  I stand in awe.

So we roast quite a bit in our house and we use a good amount of kosher salt, ground pepper and olive oil.  They are 3 of my dearest friends in the kitchen.  

Do you use kosher salt?  I think it was Martha Stewart who first introduced me to it many years ago.  Thanks Martha!  There is something valuable about the size and coarseness of Kosher salt for seasoning.  Because Kosher salt doesn’t shake out of a salt shaker very well, I began using a small bowl of it in my kitchen.  Then you're able to pinch or measure out what you want, rather than pouring it from the awkward box.  And it is remarkable how ground pepper from the mill brings so much more zip to a dish (though Dave sometimes accuses me of being pepper happy).

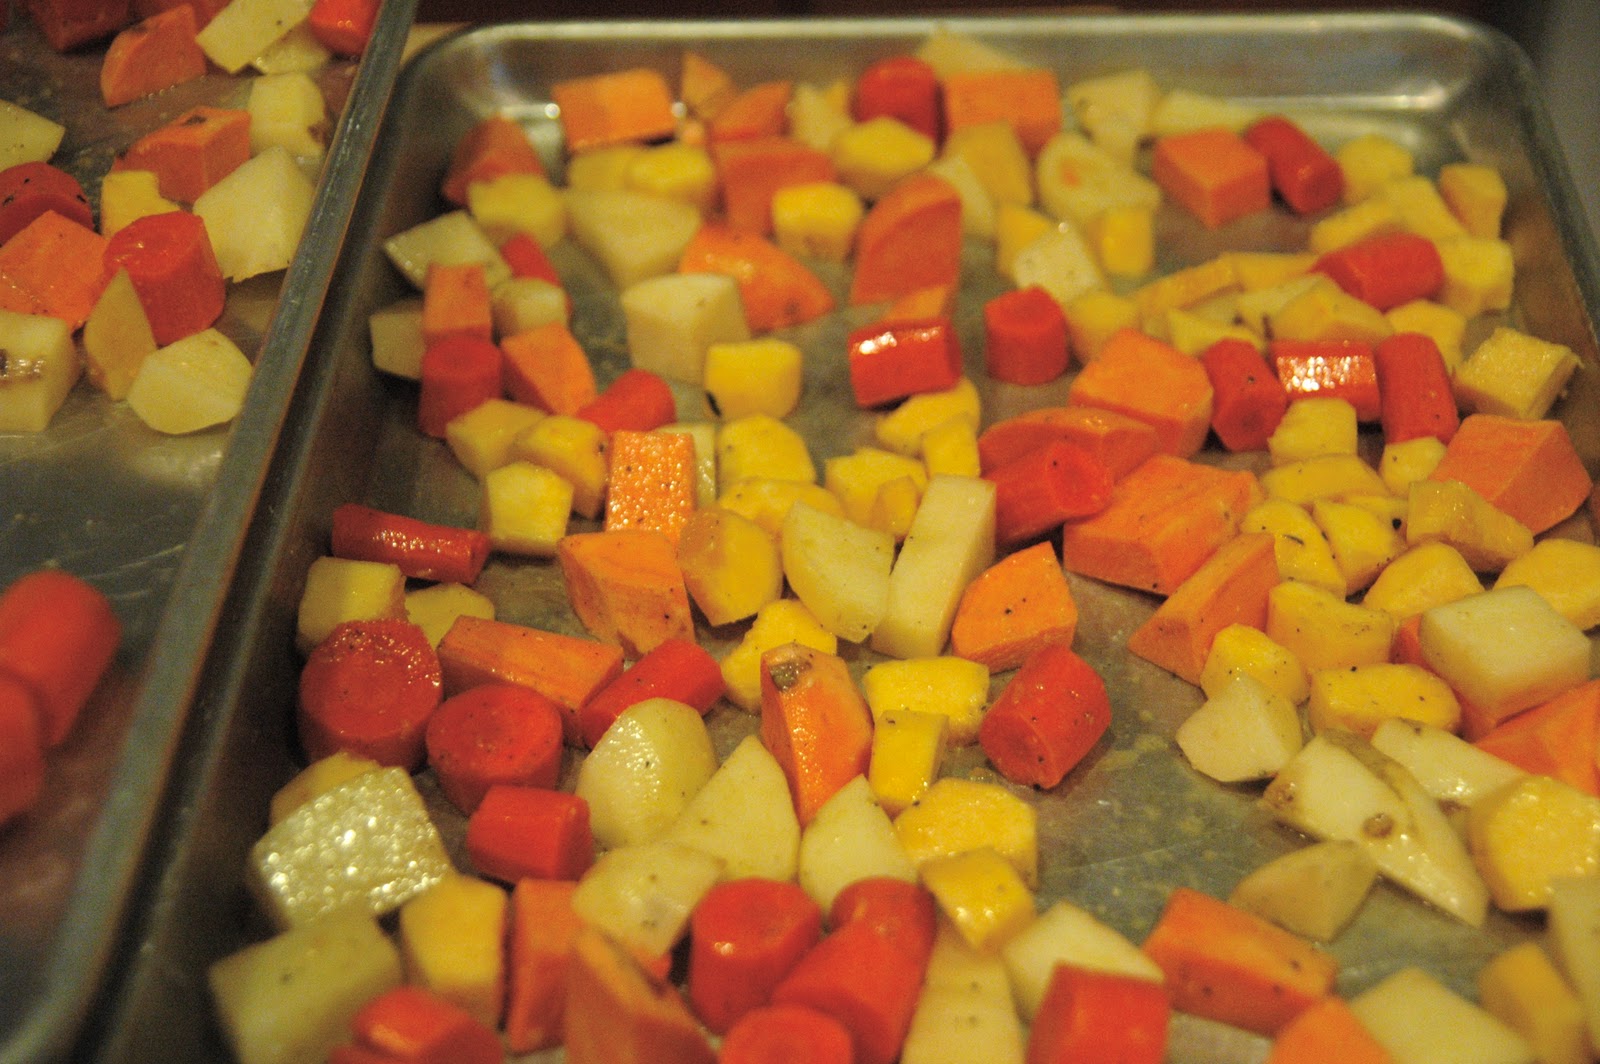
This season I have been making varieties of Roasted Winter Vegetables.  In Ina's original recipe she uses butternut squash, carrots, sweet potatoes and white potatoes.  It is beautiful and lovely.  I realized, however, that in this mix the squash is my family’s least favorite. It is also the most labor intensive to prep and most expensive to purchase.  I began to omit it.  Sometimes we just roast carrots, sometimes just new potatoes, at times only sweet potatoes.  This past week I roasted white and purple potatoes and sweet potatoes, and they were gobbled up by all…even my persnickety eaters.  I usually serve them with a dollop of sour cream, though my kids sometimes prefer a little ketchup or even some brown sugar with those sweet potatoes. 

They couldn’t be easier or yummier. In fact, they sometimes upstage the main dish on my dinner plate!

Preheat oven to 400 degrees.
Slice potatoes, (peel and slice sweet potatoes, carrots and butternut squash).
Toss in enough olive oil  to coat but not drench the vegetables.
Sprinkle with Kosher Salt and Freshly Ground Pepper (to taste).
Dump onto cookie sheet.
Bake until tender inside with some crispy outsides (30-45 minutes).  Using a spatula, toss and turn at least once during the cook time.
Once you start roasting, you might start thinking about other things in your fridge that you want to add to the mix.  Mmm, winter comfort...and healthy!

Friday, January 14, 2011

Honoring Dr. King

Asher's MLK illustration a few years ago

On Monday we will celebrate the life and work of Dr. Martin Luther King, junior.  I don't recall knowing much about him until I was in social work graduate school and began to learn of the man of integrity that he was, and the dedicated fight he fought for justice, equality, peace and unity.  I remember admiring him, but not thinking much about the holiday set aside to honor him.  (Which was first established in the late 1980s).  This changed when my son, in Kindergarten at the time, came home and asked me if I knew Martin Luther King, junior.  I said, “Well, I didn’t know him personally, but I know about him”. To which he earnestly replied, “Mom, he changed the world!” and then, with the same sincerity and inspiration that his amazing teacher must have relayed to the class, he went on to tell me some of the great things that Dr. King did.  “Mom, he fought against people being treated differently because of the color of their skin.  He was a preacher and he believed that God was for love and peace.  He said he had a dream that one day children: black and white, would go to school together and be friends. He was amazing, mom”.   I was choked up and ready to join the parade honoring this great man…and thus began a tradition of celebrating Dr. King’s life and work in our home.

So, this Monday at our house, we will have our 4th annual birthday celebration honoring Dr. M.L. King.  Rather than just trying to pass the time on a day when the kids are out of school, we try to seize the opportunity to actually celebrate the birthday of MLK.  We learn some history, talk about his life and seek inspiration to dream of what difference we might make with our own lives, following his example.  It has been a fun process of trying to figure out how to celebrate this holiday.  Book reading, video viewing, cake eating and dreaming of what we want to do with our lives are the key components of our celebrations. (Some of our favorite MLK books are Martin's Big Words by Rappaport & M.L.K. Journey of a King by Bolden).

We have attempted to symbolize racial integration and harmony by creating different varieties of vanilla/chocolate cakes: marble cake one year, white cake with chocolate frosting, chocolate cake with white frosting, and this chocolate cake with both white and chocolate chips topped with cream cheese frosting and chocolate shavings.

I have been thinking about the Black and White cookies that are sold in New York Delis.  Do you know these?  I found a recipe for them on Smitten Kitchen and a great blog entry that she has written about these cookies, which I think fits with the topic of the day.  I would like to make these cookies sometime as part of our celebration. 

I don’t know how you celebrate this holiday, or if you do, but I would love to hear your ideas!  I am humbled and inspired when I read about the lives of Dr. and Mrs. King, Rosa Parks, Rev. Fred Gray and other civil rights leaders who have courageously fought for Justice and Dignity in our country. 


This cake recipe was first introduced to me by my friend, Connie, who calls it Yummy Easy Chocolate Cake.  There is a similar cake in cookbooks called "Your Way" Cake, because of the flexibility of the cake.  You can vary the kind of cake mix, pudding, mix-in (chocolate chips, nuts, etc) and frosting (if you choose to frost it) that you use.  This is true for this recipe as well.  I call it Yummy Easy because it is indeed both yummy and easy- a great “go to” cake. 

1 box yellow cake mix 
1 small box instant chocolate fudge pudding
4 eggs
2/3 cup canola oil
1 cup sour cream
2 cups (or so) chocolate chips

Mix all ingredients (except for chocolate chips) together in a medium-sized bowl mix until well blended. Add chocolate chips.  Mix together.  Pour into greased and floured Bundt pan and bake at 350 degrees for 45-55 minutes or until toothpick inserted comes out clean.  

I often make this cake in a Bundt pan without frosting it.  However, if you want to ramp it up, the following cream cheese frosting does the trick.

Cream Cheese Frosting
1 block cream cheese, softened
1 stick butter, softened
4 cups powdered sugar
1 Tbsp vanilla

Mix together cream cheese and butter until smooth.  Add vanilla and powdered sugar and blend until smooth and creamy.  If it is too runny- add more powdered sugar; too thick- add a little milk or water.

[This frosting recipe is a little different than the one from my Red Velvet Cake recipe, simply because that one makes a larger batch for the layered cake...either are scrumptious!  The main difference is the amount of cream cheese.  You really can't go wrong either way.]

Friday, January 7, 2011

Your Very Own Vinaigrette

After indulging in all the baked goods and big holiday meals, I have been in pursuit of leafy greens in these January days.  I saw a sign today at Whole Foods Market that says, "This year I want to eat more plants".  I like that goal.  I love goal-setting in January-  I think I might add this one to my list.     I like salad, though I typically prefer it at a restaurant rather than at home. There are several salads at restaurants that I really, really like. I actually crave them. I think the difference in salads at home and at restaurants is the dressing.  I am always trying to de-code dressings when I am out to eat- trying to discern ingredients, seasonings, methods so I can come home and try to re-create them. 


Do you ever make homemade dressing?
They are cheaper, fresher, preservative-less, made-to-your-liking, and lighter (if you wish). I have found some of my favorites in Everyday Food Magazines. I find homemade dressing makes a significant difference in my feelings about salad.

My favorite green salads are Greek and ones with fruit and nuts on them.  In the summer I make strawberry and mango salads all the time, and in the fall and winter I top my green salad with slices of fresh pear and dried cranberries. The ONLY thing challenging about this salad is toasting the nuts.  I burn them frequently! Do you have this issue when you toast nuts?  I stick them in the toaster oven and it seems like they are raw until the 5 seconds that they burn!  So, you must watch them very closely.  I must say they are worth it though- so buttery and crunchy. YUM!

Here’s my recipe:
Lettuce (I like a combo of green leaf and spinach)
Crumbled Feta Cheese (a little feta goes a long way in flavor)
Toasted Pecan halves or pieces
Sliced pear or apple
A handful of dried cranberries
Red onion, thinly sliced (optional) 
Vinaigrette Dressing

I've included two of my favorite Vinaigrettes. Take your pick- one is balsamic vinaigrette, the other a sweet vinaigrette.  I love them both...OR get creative!  Basically if you have oil and vinegar (or lemon juice) and seasoning, you have the basics for a dressing.  You can add sugar or honey for sweetness; herbs: rosemary, basil, cilantro; garlic, salt and pepper for flavor.  You can use balsamic vinegar, apple cider or flavored vinegar.  Play around and make it to your liking.

My friend Rich was telling me last week that lately he has been making a lemon dressing by whisking up the juice and zest of a lemon, olive oil, salt and pepper.  I tried it yesterday and it was a tasty, zippy, quick dressing!  

What are your favorite homemade dressings?

1/3 cup balsamic vinegar
1 Tbsp mustard, Dijon or I love Nance’s Sharp and Creamy Mustard (thanks, Melissa for introducing us)
1 clove garlic, minced
¼ cup water
½ tsp. coarse salt
¼ tsp ground pepper
½ cup olive oil
Pour all of the ingredients (except for oil) into a blender and blend until smooth, then stream in the olive oil and blend until creamy. 

The blending creates a creamy, emulsified consistency.


OR 

½ cup oil
½ cup sugar (or less)
½ cup red wine vinegar
2 cloves garlic, minced
½ tsp. coarse salt
½ tsp. paprika
¼ tsp. pepper
Pour all ingredients into a jar and shake well.  

Thursday, December 30, 2010

Salsa: How do we love you? Let us count the ways...

Who doesn’t love Chips and Salsa?  It's one of our favorite food groups. I had tried, in the past, to make salsa that compared to restaurant salsa but was continually disappointed.  Then in 2003 I was on a retreat with some women and my dear friend Catherine made this Salsa, and Eureka! …this was it!  It became a favorite and through the years has become a staple in our kitchen.  I have been contemplating when to post about this salsa, and several friends, who make the recipe, have suggested I post it.  However, I have been waiting for just the right time.  I decided that this was the week.  It is Bowl Game watching time (though, personally,  I am much more interested in watching the bowl of chips that any other kind of bowl), New Year’s Celebrating and winter days that beckon for a spicy, bowl of tastiness.


Some of the reasons we love this salsa are:
the fresh stuff
·      It can be made year round! Because it is made with canned tomatoes, it doesn’t depend on summer garden tomatoes (but you’d never know it).

·      It makes a large batch! You’ll be glad.

·      It is easy to make.

·      It ramps up Dave’s egg white wrap in the morning, which evokes exclamations from him!

·      The flavor is complex and fresh and delicious.

·      It is healthy! (How could something this yummy be so healthy?)

·      It can be made-to-your-liking.  You can tweak the heat, size of chunks, tartness, and flavor (by varying the quantities of the ingredients).
 
chopping
2 cans Del Monte ORIGINAL stewed tomatoes
1 can Rotel, original
2 cloves of garlic, minced
3 green onions, chopped
20 + cilantro leaves
the juice and pulp of 1 lime
a couple of dashes of Tabasco (more if you like HOT)
¼ tsp crushed red pepper
½ tsp cumin (ground cumin seed)
juicing...kinda
½ tsp kosher salt (or table salt)

Place all in a food processor and pulse several times, to desired consistency.
Keeps 10 days or so in the refrigerator.
(I like it best when first made and at room temp)


juicing


scraping out the pulp


the ever-important testing step


One tip to keep in mind- if you are buying your green onions and cilantro from the grocery, you will have more than 3 times the amount you will need for the recipe. So, you might plan other recipes that call for these ingredients in the week that you are making the salsa.  You can also go ahead and buy enough of the other ingredients to make a second batch.  My friend, Melissa B. and I have a practice of sharing some of the onions and cilantro we have leftover with each other so that they don’t go to waste.  I love this quality in a friend- the produce-sharing quality.  She taught me this great tip for extending the life of greens...to lay them onto paper towels and loosely wrap them, then store in a large ziplock bag.
place flat on paper towels


Cover with more paper towels and gently roll

like this


Happy End-of-the-Year!  Celebrate with Homemade Salsa.

Monday, December 27, 2010

Chocolate Fun-Do


the cabin
I have spent the Christmas weekend with my family at my parents’ cabin in the woods- it is picturesque and perfect for a holiday.  It is rustic and has no internet, which provides a nice break, and yet, isn’t great for blog-posting.

So now that we are home,  I can send this post!  I hope you had a great Christmas.


What to post on this week of busyness, baking and feasting? I can’t think of anything as celebratory as Fun-Do, our name for Chocolate Fondue.  It is a food activity-you get to do which is so fun.  Thus…Fun-Do!  The word Fondue is actually a French word meaning “to melt”.  Do you ever fondue?  What a treat it is!

It came on the scene in the 1960’s and my mom has an avocado green fondue pot she got before we were born to prove it.  It’s groovy. (They probably made macramé carriers for them too in that era.)  On special occasions when I was growing up, we would have chocolate fondue.  Back in the day mom would melt a jar of bought chocolate cake frosting for the chocolate sauce.  It can be as simple as that! We dipped fruit, cake and marshmallows in it.  It felt extravagant and is a great memory from my childhood!

Fun-Do Bliss
We began a few years ago making Fun-Do a part of our holiday season- either dessert after dinner with friends, or on New Year’s Eve.  This year we did it when our cousins came to spend the night and then again this week on Christmas Eve!

A year or so ago, I was helping host a baby shower for my friend, Suzanne , when she was expecting her 3rd son.  We wanted to gather and pray and honor them and celebrate.  She is a major chocolate lover, so we decided to do an evening gathering for women where chocolate was the main dish.  Rather than having a table full of little baked goods, we decided to go for a Fondue Spread.  We made chocolate fondue and this ridiculous caramel sauce from the Joy of Cooking (my favorite standard cooking text), and a spread of fruits, cakes, graham crackers, pretzel rods, and even potato chips!  The co-host, Melissa, suggested the chips since her family knew people who sold chocolate covered potato chips in her hometown.  It was good!

[What I can’t stop dreaming about was the caramel dipped potato chips…since I am a big salty/sweet lover, it was perfection!  You might need to try it!]

It turned out to be a fun party food.  We served it on Melissa’s kitchen island and people could plate what they wanted or hover around the fondue pots and dip while they chatted.  And if they were trying to be healthy, they could have a fruit salad if they wanted. (Crazy them…but to each her own).

I have 2 fondue pots.  One is the electric, deep, non-stick Revel kind that is great for making a vat of fondue but is really designed for main dish fondue more than chocolate, as it is so wide and deep.  I also have a little ceramic one that I love, that my dear friend, Karin sent me from Crate and Barrel. It is the perfect size for up to 8 people. 

Here is the recipe I use.  It is basically a ganache.  You can vary the darkness of the chocolate according to your preference. 

1 cup heavy whipping cream
1 cup semi sweet chocolate, chopped
½ cup milk chocolate, chopped

Melt in bowl, in the microwave in 45 second increments, stirring after each, until melted and smoothly incorporated.  Place in fondue pot and light candle/ sterno.  Stir chocolate often to prevent burning on the bottom.

Use skewers (wooden or the metal ones that come with pot) and dip ‘til your heart’s content.

items for dipping (notice the retro fondue pot)
Our favorite items for dipping are: pineapple, banana, strawberries, pound cake (cubed), angel food cake (cubed), pretzels, and marsh-mallows.   And our conversation always seems to find it’s way to “what’s your favorite?”  and “ooh, try the marshmallow AND the banana together” and on and on.

So, maybe this season you too can do a little Fun-Do.
Happy Holidays!


Friday, December 17, 2010

the Best Brownies Ever

Brownies. Classic. Simple. Yet not so simple.  All brownies were NOT created equal!  In fact, the variance between brownies, in quality and taste, can be vast, yet they all go by the same name of Brownie!  I have realized in the past few years that I have a complex relationship with Brownies.  They are, on one hand, a dessert that I can pass up- if they are tough, or chewy from a box (you know, just add water, plain ole box brownies).  However, when brownies are dense and rich and homemade and fudgy and gooey, I don’t know if there is a dessert I love more.  How could it be?  I try not to be a "brownie snob" but I have been known to ask a brownie-bringer to,  “tell me more about them”, which sounds a little ridiculous as I type out the words!  But my underlying question really is, “are they worth the calories?” Because we know that: 1. all brownies are not created equal and that: 2. they are all full of fat and calories.

I have a great, classic, go-to brownie recipe that I have made for years that I got from my mom.  Cocoa is the source of chocolate in it.  It's yummy and can be whipped up in a jiffy.  However,  a couple of years ago, my friend Lane emailed me this recipe with the subject line  “the just right brownie”.  We are always searching for the "just right" recipes. And she found it with this one.  (You need to check out her beautiful, inspiring blog-Apron Days)
Well, just right it is!  It is made with 4 cups of chocolate chips; 2 cups melted into loads of melted butter and sugar and 2 cups stirred into the batter with the dry ingredients to evenly distribute.  They are fudgy, oh my goodness, rich and substantial.  I have been making them for the past couple of years as my new go-to brownie and playing around with mix-ins, toppings, etc. 


And I must speak to brownie batter since it is one of Dave's favorite things on the planet!  Because it is full of raw eggs, Dave gets dibs on it (I don't want to give it to my kids).  So he doesn't even have to play rock/scissors/paper to determine the bowl/beater/spoon licker.  Last year for his birthday he asked for brownie batter for his cake.  Really? Wierd.  So I made a smaller pan of brownies and the rest of the batter was served in a bowl. He loves the gritty sugar texture and the rich chocolate.  When he sees me reaching for the rubber spatula (his enemy) to scrape the bowl he says, "Really? Do you have to scrape it with the rubber spatula?"  It is much too thorough and leaves far too little for him.

  • I decided this was the week to post about these Just Right Brownies for 2 reasons:  1.  My sister's birthday is this week and she loves a good brownie.  She loves gooey, rich chocolate desserts.  For her birthday she typically prefers brownies with hot fudge and ice cream over a birthday cake.  She says that she sees cake as simply the vehicle to carry icing- since the icing is the part she loves.  So, because her birthday is in December and peppermint ice cream is available (and we love it), we often times have brownies with peppermint ice cream and hot fudge for her "birthday cake".  I got to make it last year for her 40th birthday and used this recipe. The recipe is birthday worthy.  So happy birthday Jennifer!

  • The other reason I wanted to post it is because one of my favorite varieties of this is Peppermint Brownies, which are so Christmasy!  I replace the 2 tsp.vanilla with 1 tsp. peppermint extract.  Then a few minutes before the brownies are done, I reach in and sprinkle crushed peppermint on the top of the brownies (see Peppermint Bark post for crushing instructions).  They are so pretty and YUMMY!


  • You can also make the classic brownies and then have toppings so that everyone can make it their way.  Like this week when my girls' group came over and we had brownies with vanilla ice cream, crushed peppermint and toasted sliced almonds as toppings with our brownies.

  • Another variety that is a consistent hit is Symphony brownies.  Have you ever made them?  I don't know who thought them up, but Paula Deen's cookbook was the first place I saw the idea.  They are a very special brownie- and leave people wondering about  the lovely filling.  You take Hershey’s Symphony Bars-the big ones (Symphony bars are milk chocolate bars with bits of toffee and almonds) and spread ½ of the brownie batter in the pan and then cover with 3 large symphony bars and then top with dollops of the remaining ½ of batter and gently spread together.  Bake normally and you have a chocolate almond toffee filling sandwiched between two amazing brownie layers.  (If you want to add another touch, you can throw some sliced almonds on top when there are a few minutes of bake time remaining)!
  • A little brownie tip- Cut brownies with a plastic knife…it's amazing!  Something about the plastic doesn't stick to the brownie like a metal knife does.  And you get beautifully-cut, gooey brownies.  Try it!
Brownies.  So much to say about them!  I love that brownies are just about perfect with ice cream and hot fudge and yet they pack great for a road trip, and are versatile when adding toppings and layers.  Happy baking! 

 2/3 cup butter (11 Tbsp)
1 1⁄4 cup sugar
1⁄4 cup water (or you can substitute brewed coffee for a little mocha kick)
4 cups (24oz) semi-sweet chocolate chips, divided
4 eggs
2 tsp vanilla
1 1⁄2 cups flour
1⁄2 tsp baking soda
1⁄2 tsp salt

Preheat oven to 325 degrees. Grease 13x9-inch baking pan
In heavy sauce pan, bring butter, sugar, water to boil, stirring until butter is melted and sugar dissolved
(or do this in the microwave).
Remove from heat and stir in 2 cups of the chocolate chips until all are melted. Cool a bit, then add vanilla.
In large mixing bowl, whisk eggs, then gradually add the chocolate mix, stirring with spoon until entirely mixed.  In another bowl, mix flour, baking soda and salt, followed by the rest of the chocolate chips, until combined. Finally, stir the dry into the wet, mixing well.  Spread into the pan and bake for 33-35 minutes until cooked through.  Do not over-bake!