Thursday, September 19, 2013

Cream Cheese Brownies

I was in an airport last spring headed home from a conference. My colleague and I popped into a shop to grab a magazine, some snacks and a last minute happy to bring our kids before we waited at the gate for our flight.  The "grabbing a magazine" ended up taking a long time, as I was stumped by selecting a magazine. I was over-analyzing my decision, probably because I knew these were the final hours of my trip before I was back to the chaos and non-magazine reading of my real life at home.  The pressure to pick the RIGHT ONE seemed intense. 
 There was a section on fashion. I knew these were not worth the $6 since it would only make me wish for cooler clothes and a thinner body –basically feed discontentment.  So I stepped to the next section, but I knew the fitness magazines would simply make me wish for a better figure and more of a desire to workout to achieve that figure.  Then, I looked for a few minutes at the home magazines, which are typically my favorite.  But I decided they would make me want things in my home that at this point I don't have the budget to buy.  I didn't even walk over to the People magazine genre because I don't care for them.  So, I landed on the recipe magazines. Surprise, surprise. I found this one, which was all brownies and bars.

 It is a special edition of Better Homes and Gardens – so it's more of a cookbook magazine.  I love it. It was a $10 magazine, but really it is a paperback cookbook filled with 120 recipes! I have made a few recipes from it and have on my list to try several more ASAP.


I made these Cream Cheese Brownies and they are as yummy as they are attractive! They possess several qualities I admire in a bar: gooey, complex and pretty!  
They aren't hard but not simple. They require a few steps and a couple of bowls and pans but I think they are worth it.

Cream Cheese Brownies
borrowed from Brownies & Bars (by Better Homes and Gardens)

 for chocolate layer:
8 oz. semisweet chocolate chips (or coarsely chopped bars)
3 Tbsp. butter
4 eggs
1 1/4 cups sugar  
1/3 cup water
2 tsp. vanilla
1 cup all-purpose flour
1 tsp. baking powder
1/4 tsp. salt
3/4 cup chopped toasted pecans (or walnuts)


for cream cheese layer:
1 8 oz. pkg. cream cheese, softened
2/3 cup sugar
2 Tbsp. all-purpose flour
1 Tbsp. lemon juice


Step 1:  In a saucepan cook and stir chocolate and butter over low heat until melted; cool.  Meanwhile, preheat oven to 350 ˚. Line a 13 X 9 inch baking pan with foil, extending the foil over edges of pan.  Grease foil; set aside.
Step 2: In a large mixing bowl, beat 2 eggs with a mixer on medium speed until foamy.  Add the 1 1/4 cups sugar, the water, and 1 tsp. of the vanilla.  Beat on medium speed about 6 minutes or until mixture is slightly thickened and lemon in color.  Beat in chocolate mixture.  Stir in the 1 cup flour, the baking powder, and salt; stir in nuts. Pour half of the batter into the prepared baking pan, spreading evenly.  
Step 3: In a medium bowl beat the remaining two eggs, the remaining 1tsp. vanilla, the cream cheese and the 2/3 cup sugar, the 2 Tbsp. flour, and the lemon juice until smooth.  Carefully spread cream cheese mixture.  Using a table knife, swirl gently to marble. 
Step 4: Bake for 40 minutes or until toothpick inserted comes out clean. Cool in the pan on a wire rack.  Chill about 1 hour.  Using the edges of the foil, lift brownies out of pan. Cut into bars.

Store in refrigerator. 


foil lined pan with overhang
melted chocolate & butter

Toasting pecans
add the nuts to the chocolate
spread in the pan

carefully smooth the cream cheese layer on top
blob remaining chocolate on top

and SWIRL with a knife!
Isn't that amazing?


Tada!

Speaking of magazines, the other night I fell asleep on the sofa as I was taping torn-out magazine pages into my spiral-bound sketch books that I use for my recipe notebooks.  I was thinking about my students who came to my house for the Social Work dinner the other night.  One of them said my house was so "pinterest" which cracked me up because most everything in my house was inspired by a stack of torn out magazine pages, before there was a pinterest.  I call my notebooks "old school pinterest".

Tuesday, September 3, 2013

Mexican Layer Dip- A Party Food Where The Party Is Optional


Do you love Mexican Layer Dip as much as I do?  Tell me you've had it.  It's one of my favorite party foods to make (and eat). It is always a crowd-pleaser.  You can add or delete anything you like.  I put cilantro, mostly because it's so fresh and pretty, but you can omit it.  I didn't put olives, though some people include them.  I was afraid the non-olive people would be turned off.

 In deciding what to blog about this week,  I was looking through photos of food I have made and kept coming back to the photos of the Mexican Layer Dip.  It's so yummy! It's a shame that it is a party food, since I don't have any parties to cook for this week and instead I have family dinners I need to be cooking every night!    

The more I think about it and the longer I look at these photos, the more I'm tempted to make this for dinner this week – served with chips and warm tortillas. And we can scoop up the dip and make a meal out of it.  

Who says Thursday night family dinner can't be a party, right?   


2 cans refried beans

cumin, garlic powder & hot sauce

16 oz. container of sour cream

guacamole (bought or homemade)

1 cup grated cheese (cheddar, pepper jack, colby-jack)

lettuce- shredded

diced tomatoes

cilantro leaves


Warm beans in a skillet on the stove top.  Add 2 tsp. ground cumin, ½ tsp. garlic powder and a couple of dashes of hot sauce.

 Stir together and warm until thoroughly heated. Spread on platter. Smooth until even. 


Spread sour cream on top, leaving an edge to reveal the beans underneath, and then guacamole


Continue to layer with cheese, lettuce, tomatoes and cilantro.

Serve immediately (or keep covered in refrigerator until time to serve).  Serve
the day you make it. 


Wednesday, August 21, 2013

Blueberries: Rustic Mini-Pies, Muffins and Ponderings on Perfectionism


Blueberry season has been a fun one in our household.  We love them.  We eat them like candy.  Mostly because they have been tasting like candy! This summer we had the chance to go berry picking a couple of times and it was such fun!  I didn't freeze any of them, because between eating them by the handful, on yogurt and granola in the morning, in fruit salad at dinner; and baking these rustic mini pies, blueberry muffins and cake, they have been gobbled up!  

There has been this internal dialogue happening for me surrounding blueberries and perfectionism.  I have a child who is quite the perfectionist (in certain areas of her life).  And when it comes to blueberries, which she adores, she is extremely selective.  When I buy them from the store, I find her eyeing carefully before reaching in to pick one to eat.  Even when we buy frozen berries, she is careful to find the dark blue ones and reject the pinkish purple ones.  She prefers dark, plump berries – and the biggest, roundest of all.  This annoys me and her brother! We see it as selfish! "How dare you pick out the "good ones" and leave the less than great ones for all of us!?", we say.  I have tried to help her see this.

The interesting thing that happened when we were blueberry picking in July was that she was the VERY BEST picker.  Her discernment in selecting the very best berries makes her an excellent picker.  If you have ever gone picking, you know it is a little tricky because the same branch will most likely contain berries across the spectrum of ripeness, and you have to carefully move about, plucking the very darkest, plumpest, best berries and leaving the green and pink ones for a later week.  I realized that this quality of hers, that in one sense is a selfish quality – one that needs to be reformed, in another situation, is the quality of discernment, carefulness, skillful selectivity.  In this action, rather than plucking the best for herself out of the bowl at home, she was gathering the best for our collective basket for all of our benefit. 
Isn't this true. Don't we all know that our strengths turned around can potentially be our greatest weaknesses?  It's hard to see this in others sometimes.  And it makes parenting a tricky, and skillful journey of trying to guide and shape the character of these humans under our care!  I would imagine  you would hope your surgeon is a perfectionist.  I sure do! And however, I want my friends to love me with my imperfections and all. 

I think there is great value in having high standards, being an achiever, discerning and striving for excellence!  And yet we can become enslaved to it, or defined by it, or run down from trying to maintain perfection, or becoming self-absorbed with our perfectionism.  One of my favorite truth-tellers is Brene´ Brown and in her book,  The Gifts of Imperfection, she dismantles this dangerous pursuit and gives antidotes which include Gratitude, Authenticity, Self-Compassion, and more.

So, back to berries.
I decided to make some pie out of the blueberries we picked.
When thinking about it, I decided individual pies would be easier to serve and would be fun to make.  
I looked up a filling recipe from my standard, The Joy of Cooking, and used a frozen roll-out pie crust from Trader Joe's.  (You can, of course, make a from scratch crust.  I just didn't have the time or oomph. The Joy of Cooking recommends a couple of crusts, if you're looking for a crust recipe.)

I really like rustic pies.  I like that they are free-form, not all alike, and can be made on a baking sheet.  I think I like the freedom of imperfection in them!  They are more artistic, less tidy, and somehow European-cool.  Some cookbooks call this kind of pie a Galette or in Italian, a Crostata. Maybe that's why they seem European.

For these Galettes, here's what to do:

Thaw the frozen crust according to the package.

Make the filling:
[Combine and let stand 15 minutes]:
5 cups blueberries
3/4 cup sugar (more or less depending on the sweetness of your batch of berries)
3 1/2 Tbsp. cornstarch
1 Tbsp. lemon juice
1 tsp. grated lemon zest
1/8 tsp. salt

Divide dough into 8 balls.  Lightly flour the dough and roll out between sheets of parchment paper.  Peel off the top sheet of paper.
Place rounds on parchment lined baking sheets. Spoon berry mixture in center of dough.  Gently wrap the dough around to form an edge, pinching and squeezing as you need to to create a pouch.  Sprinkle with Turbinado sugar.

Bake in 375˚ oven for 15 minutes or until crust is golden and berries are bubbly.  Serve immediately with vanilla ice cream!

I have been working daily on my school prep – selecting articles, designing syllabi, and course assignments and getting kids back to school.  In all of this I have had very little time to blog and very little time to play around online.  But I let myself do some pinteresting one day and saw a friend had posted these "very best blueberry muffins" and when I clicked the link, it was In Praise of Leftovers, one of my favorite blogs.  So, I knew I had to try them.  And I will say, they are delightful! They are certainly more of a cake-for-breakfast-muffin, than these BRAN MUFFINS or these CORNMEAL MUFFINS but man are they good.  So, hop on over to her BLOG and check out these muffins, if you are more in a muffin-making than pie-making mood.  


The "Best" Blueberry Muffins via In Praise of Leftovers
For batter:
6 Tb. unsalted butter
1/3 c. whole milk
1 egg
1 egg yolk
3/4 tsp. vanilla
1 1/2 c. flour
3/4 sugar
1 1/2 tsp. baking powder
3/4 tsp. salt
2 c. blueberries

For topping:3 Tb. cold unsalted butter, cut into little cubes
1/2 c. flour
3 1/2 Tb. sugar
Preheat oven to 375 and butter a 12-cup muffin pan.
Melt butter in a small saucepan over moderately low heat; remove from heat. Whisk in milk, egg, yolk, and vanilla until well combined.
Whisk together flour, sugar, baking powder, and salt in a medium bowl. Add milk mixture and stir until just combined. Gently but thoroughly fold in blueberries. Divide batter among muffin cups and spread evenly.
Combine all ingredients for topping in a bowl and rub together with your fingertips until crumbly. Sprinkle evenly over batter in each cup.
Bake until golden and a wooden pick or skewer inserted into the center of a muffin comes out clean, 15-20 minutes. Cool in pan for at least 5 minutes (10 would be better), then run a knife around edges of muffin tops and carefully remove from cups. Serve warm or at room temperature. 

          ……………………………………………………………………………………………………………………………
If your area still has blueberries to pick, I hope you can do it.  If not, I hope you can find some at the store and make something yummy with them before the calendar turns September...and consider how your perfectionism could be best utilized!


Sunday, August 4, 2013

Corn: Popping and Shucking


Sometimes it’s the simple things that make life enjoyable – like freshly popped popcorn, cooked on the stove-top on a summer afternoon!  I have been loving making stove top popcorn.  I used Coconut Oil one day and was impressed with the taste of the popcorn with just salt added.  De-Li-Cious!  (Not to mention that Coconut oil evidently has health & nutritional value.)  I had usually made microwave popcorn as my go-to in life. It seemed the simplest, as stove-top appeared complex and tricky.  Though I have a great popcorn machine that is easy to use, I just have to climb up in the laundry room shelves to get it out to use it. Which has been a barrier.

Stove top popcorn seems magical and classic but I was always intimidated. However, it is amazingly simple.  The instructions are even written on the popcorn bag!


How to make it:
You simply heat 3 Tbsp. oil.  (I have been using Coconut Oil) in a large pot with a handle and lid on Medium/High heat. Place 3 corn kernels in the pot, cover with lid. Listen for those 3 to pop.  When they do, the oil is ready.  Add ½ cup of corn kernels to the hot oil.  Cover with lid. 
Move pan back and forth, around on the burner while it’s popping to prevent burning.  You will hear the corn popping!  If you have a glass lid, which I unfortunately don't, you can see it as well!  When you begin to hear the popping slow down, remove from heat. 

Pour in a bowl and sprinkle with salt and mix around with your hands to distribute.
Enjoy!
We have savored many an afternoon snack of stovetop popcorn this summer. (And it costs pennies!)

For Kettle Corn- Follow the above listed steps but simply add 3 Tbsp. of sugar to the oil before popping into the hot oil and swirl it around to distribute it evenly amongst the kernels.  Make sure you salt the popped corn well, as the salty/sweet combo is what makes it so super-delicious!


Another trick that we like in the summertime is cooking corn on the cob in the microwave.  I have a few complaints about cooking it in a pot of water (the way I traditionally think of cooking corn).  1.  I feel like all the nutrients are being swallowed up by the water, and the corn is left soggy. 2. You have to have a really big pot to fit a bunch of ears of corn in.  3. It takes forever to get an enormous pot of water to boil!  (And a watched pot never boils, I have found to be true).

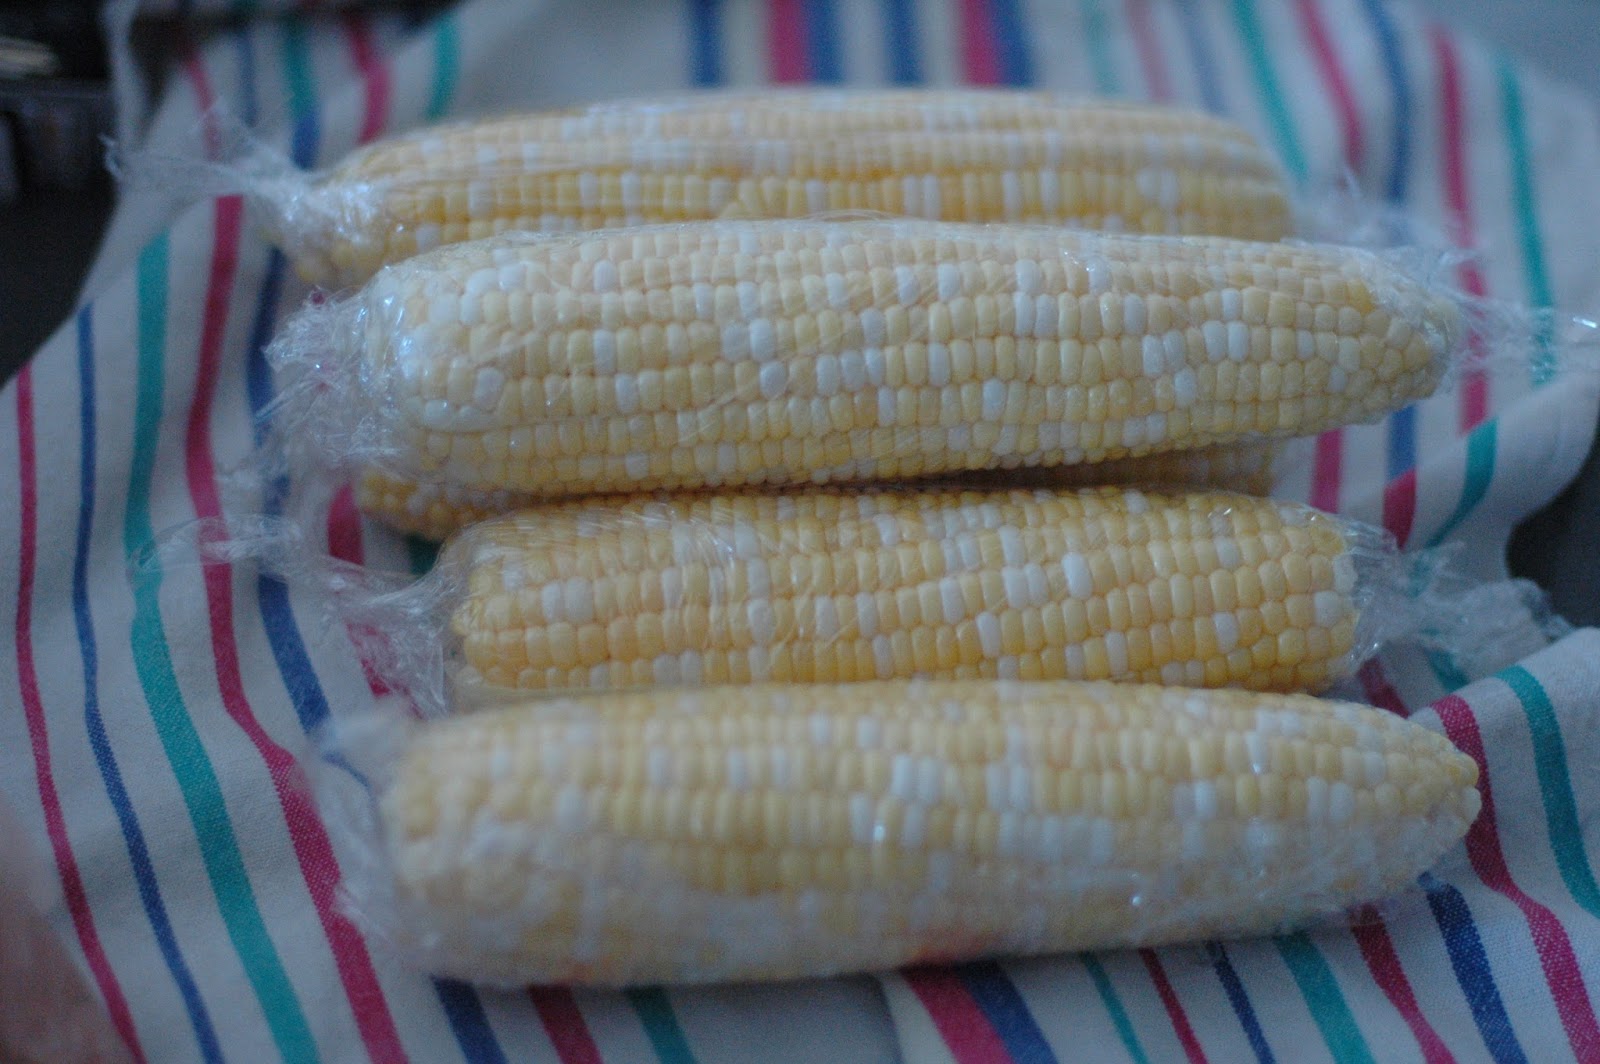
A while back I learned to cook it in the microwave.  Shuck the corn and clean well.

(My kids are usually willing to do this task).  Then cut a piece of plastic wrap for each ear of corn and wrap each ear– making a little tassle on each end with a twist of the plastic wrap.

I have to tell you, at this point, that there is an incredible plastic wrap on the market.  I felt sure that I had written about it before, but when I searched the blog I couldn’t’ find it.  I apologize.  I have been keeping it a secret unintentionally!  STRETCH-TITE
Any of you who have been around my kitchen much at all,  know about Stretch-Tite.  It’s really pretty amazing.  It is easy to work with, doesn’t fly about, sticking to itself.  It is thick and sturdy.  The roll has a lot on it and lasts a good long while.  It creates a strong seal on dishes.  When my mom first discovered it, it was at an appliance store.  She gave my sister and me each a roll of Stretch-Tite for Christmas.  I am sure that first Christmas we were curious, and less than enthusiastic about getting Plastic wrap in our stockings.  However, we were quickly converted and it is now our annual tradition to get Stretch Tite for Christmas.  It's now available at some groceries, and CVS Pharmacy and Costco now distributes it with their storebrand name added. I have actually been known to give it as a gift once in a while to a friend.

After wrapping the corn (which you can do earlier in the day to have it prepped and ready), Place ears of corn in the microwave and cook for about 4 minutes per ear of corn.  I usually start with 8 minutes for my family of 5 and then check with my fingernail for doneness and cook additional minutes as needed.  The challenge is that the steam inside the wrap is VERY hot – so you have to be really careful.  I pull the plastic “tassles” at each end and tear off the wrap.  It’s hot and ready to eat.


This week, as I was working on this post, I looked online to see if there was a consistent guide on number of minutes to cook corn in the microwave so I could give you a more specific instruction.  I happened upon this YouTube video that astounded me! This dear man cooks corn on the cob in the husk in the microwave and not only does it cook it, the shucking is mess-free without silks everywhere. I tried it and it is really good.  I don't know how many ears of corn would work in the oven at the same time, but I am wowed!


Try this switch: instead of microwaving your popcorn, try stove-top popping
and instead of stove-top boiling your corn on the cob, microwave it!  And look for some Stretch-tite.  It might change your life, and maybe even your Christmas shopping list! 


Friday, July 26, 2013

Cheese Grits


I remember the first weeks of college, having such fun getting to know great people from all over the country.  Friends on my hall were from Chicago, Colorado, California, Michigan, rural Tennessee, and New Jersey.  Being in Tennessee, my home-state, for college I had the opportunity to be part of introducing friends to some southern customs, foods and practices. 

One of those was Grits.  Many friends had never heard of them. Some have never tasted them, and others were leery of them.  Kind of like the Salmon Cakes I wrote about this spring, grits can span from “down home” to high class ­– from Cracker Barrel Restaurant served as a side with the bacon and eggs breakfast platter to upscale restaurants serving them to accompany grilled shrimp.

I like grits simply served with a little salt, pepper and butter.  But cheese grits, well, they are an altogether different thing.  They are fabulous.  They are great for breakfast as well as a side dish.  A local BBQ restaurant serves grits of all flavors- each day offering Grits of the Day as well as their always–available Garlic Cheese Grits. 

To those of you who are fans of cheese grits, this recipe is a keeper. To those who have never had the privilege of having them, this is worth the try.  It is my mom’s recipe that we have served for brunches and special breakfasts for years.  Recently, with our love of Shrimp and Grits, I have made them for dinner (served with shrimp).  Another night we had Cheese Grits with neighbors when we grilled pork tenderloin and chicken (and had those Quick Sour Cream Biscuits).  For my family I have halved the recipe because it makes so much.  Dave prefers that I make a full recipe so that he can eat the leftovers for breakfast.

This recipe is soufflé–like in that it has eggs in it and is baked in a casserole dish, so it fluffs up a bit.  It keeps well and even freezes well.  The original recipe calls for Velveeta cheese, which I resist because it is "processed cheese spread" by their own admission.  However, it does melt so nicely.  That's its benefit.  I like to use 1/2 Velveeta and 1/2 sharp cheddar cheese.  You can experiment and find the cheese(s) you like best.


Cheese Grits
Yields 9 X 13 pan

1 1/2 cups dry grits
1 stick butter (or less)
1 lb. Velveeta Cheese cubed or combo of cheddar and velveeta, or your choice - equaling 5 cups grated cheese
2 tsp. hot sauce (Tabasco, Cholula, etc.)
3 eggs, beaten


Cook 1 1/2 cups grits as directed on package.
While hot, add butter (cut into slices to make it easier to melt), cheese, tabasco, and eggs.

Pour into a casserole dish coated with cooking spray.
Bake for 30 minutes at 350˚ or until fluffy and golden.

(You can freeze grits in the pan and bake them later).


Ready to stick in the oven


If you want to make Shrimp and Grits, use raw (uncooked) shrimp.  I buy it frozen and thaw it in a bowl of water.  Peel shrimp.  Toss in some melted butter and sprinkle with garlic powder and coarse salt.  Place on a hot grill pan or skillet.  Cook for a couple of minutes.  Turn over.  Cook other side.  Remove and plate with Cheese Grits.  I like to serve with simple tossed greens, sautéed green beans, or roasted asparagus.


Whether you're going for down home or high class, find a way to incorporate some cheese grits into your menu planning!