Monday, July 16, 2012

An Inspiring Book and Easy Dessert (before I leave the country)

I've been packing my bag, marking things off my lists, leaving instructions for my family, and preparing to leave for India today. I'm headed with 2 friends from my church to spend a week with our friends who live in Northern India. We will be seeing their world and learning how we can support and be involved in the work that they are doing there.

I can't believe it!  The day is finally here.  I am excited, expectant and yet feeling utterly unprepared for what lies ahead on this journey I am about to take.  Before I go, I thought I'd leave you with a couple of things I've been wanting to pass along to you.

So, I'll make it quick:

This inspiring book.

If you are a mom, you should think about reading this book.  If you know a mom, you should think about recommending this book to her. Last week I started reading 52 Things Kids Need From A Mom,  by Angela Thomas.  I like her a lot.  I saw this book at a store a couple of months ago and picked it up.  
CONFESSION: I have a book buying issue.  I know, it's true.  This weekend, when I was running to Target with my pal, Amy, to pick up my last things for the trip, we were in the book section and I was really trying to only buy one new book.  I confessed to her that "I have a book buying problem", which I knew was safe to share, since she too has this "issue".  She said, "it could be worse... that's the way I see it!  We could be spending our money on far worse things than books."  She's right.  Although, you know, from my summer reading stack, that I didn't need one more new book this summer.  (And Amy gave me a copy of a book she is also reading , The Supper of the Lamb, by Robert Farrar Capon.  Have you read it?  I'll be taking it on my trip and will let you know more!)


So, this Mom-book is great.  I knew it would be solid, but had no idea how fresh and practical and fun to read and INSPIRING it would be.  Each chapter is just a couple of pages and highlights one of the 52 things she proposes that kids need from their moms.  She is gracious and bold and fun and intentional all at the same time. She is the mother of 4 children.  She knows what she's talking about. 

Now, I'm sure it would be great to read one chapter each week for the year...stretching it out for 52 weeks, but I can't.  I will say, I am trying to shut the book after each chapter and think about it, maybe tell someone near enough to listen.  Then I proceed to the next chapter. Like putting your fork down between bites of food.  
I love her examples and her humility with which she boldly challenges us to be intentional moms.  I have been trying to implement some of her suggestions already.  
I started to send an email to several friends telling them about the book, and then I decided to just write about it here to share with even more people.  

When I find something that I love, it's hard for me to keep from sharing it with others!


A yummy easy dessert:

The other tidbit I want to share with you is a recipe that I've been meaning to share for a while.  It's a simple, tasty dessert from Everyday Food magazine from several years back, that we like at our house.  It was originally called "Cookie Break Up".  We call it 
Cookie Brickle though .  While the name Break Up is accurate, as it's a cookie that you "break up", I think it's a downer name for such a great cookie!  Who wants to eat a break up?  I try to avoid break ups in my life.  I renamed it Cookie Brickle a few years ago.  It looks like a chocolate chip cookie, but broken into pieces.  However, it's texture is crunchy and is very buttery tasting – reminescent of toffee.  Brickle reminds me of Butter Brickle Ice cream, which is toffee flavored and the definition of Brickle is "easy to break".  So...Cookie Brickle it is .  It's super yummy and because the pieces are broken you feel justified in eating a little piece, and another little piece, and another...

It is the best recipe to make when you have just a few minutes and can't get to the store.  You surely have all of the ingredients in your house.  It's a great thing to take to picnics or places, as it's easy to transport and can't mess up along the way.  (They are conveniently already broken!)  We have taken them to a pool party and a picnic at the creek this summer, and they were well received and easy to pack and take. 


Cookie Brickle 
¾ cup unsalted butter, room temperature
1 cup sugar
½ tsp salt
½ tsp vanilla extract
2 cups flour
1 heaping cup semi-sweet chocolate chips

Preheat oven to 350˚.  Line a 10 X 15 inch rimmed baking sheet with parchment paper; set aside.

With an electric mixer, cream butter and sugar until light and fluffy.  Beat in salt and vanilla.  Reduce speed to low; mix in flour (dough will be crumbly).
Stir in chocolate chips.

Press mixture evenly onto prepared sheet.
Bake until golden, about 20 minutes.
Cool in pan 5 minutes then transfer to a wire rack to cool completely.
 

To serve, break into pieces with your hands.


 My kids help me make it.  Asher made it by himself the other day with just minor supervision (mostly about not pouring flour all over the floor). 

In these last days of July, if you are needing some inspiration, here is my two cents worth. 

I'll hopefully have great photos to share with you of my journey to India and stories of the people I encounter.  Who knows, I might even get to bring back some Indian recipes or culinary skills!


Wednesday, July 11, 2012

Road Tripping: Healthy Snacks and PackingTips!

Summer means road tripping.
GORP (or trail mix, you might call it)  is a favorite treat of mine to take on the road, to the pool, on a hike, or vacation. What exactly is GORP? I did a little research about the etymology of GORP and here's what wikipedia tells me.  Good Ole Raisins & Peanuts is one suggestion of the meaning of this oddly named snack.
[DISCLAIMER to Belmont students of mine: don't see this reference to wikipedia as a model of solid research which you can emulate in your research paper writing.  This is good for food blogging about silly inquiries like, "what does GORP mean?"]  

It's the simplest, easiest snack to make.  I will say, it can be pricy.  But it goes far and really packs in nutrients.  My ONLY complaint about GORP is when people select their handful, and pick out certain things.  Our GORP has nuts, dried fruit and M&Ms.  Guess which items disappears the fastest? You guessed it...the M&Ms.  I tell my people that they aren't allowed to pick out the M&Ms.  I tell them they need a balanced handful.


my Lucy says, "I just love that scoop! And I don't not like anything in GORP, Momma"
I tell them that the beauty of GORP is the salty/sweet/chewy/crunchy/chocolatey combo.  I tell them it's  a fun surprise to dig in the scoop and see what comes in their hand and then gobble it up and enjoy the combo.  They look at me like, "You don't understand."  Then they sneak.  Wikipedia references the word GORP in the dictionary being a verb meaning "to eat greedily".  So, I might need to use that technical term.  "STOP  GORPING the GORP!"


Another road trip favorite is Granola Bars.
I wrote about my love for Joy the Baker's Granola Bars a few months ago HERE.
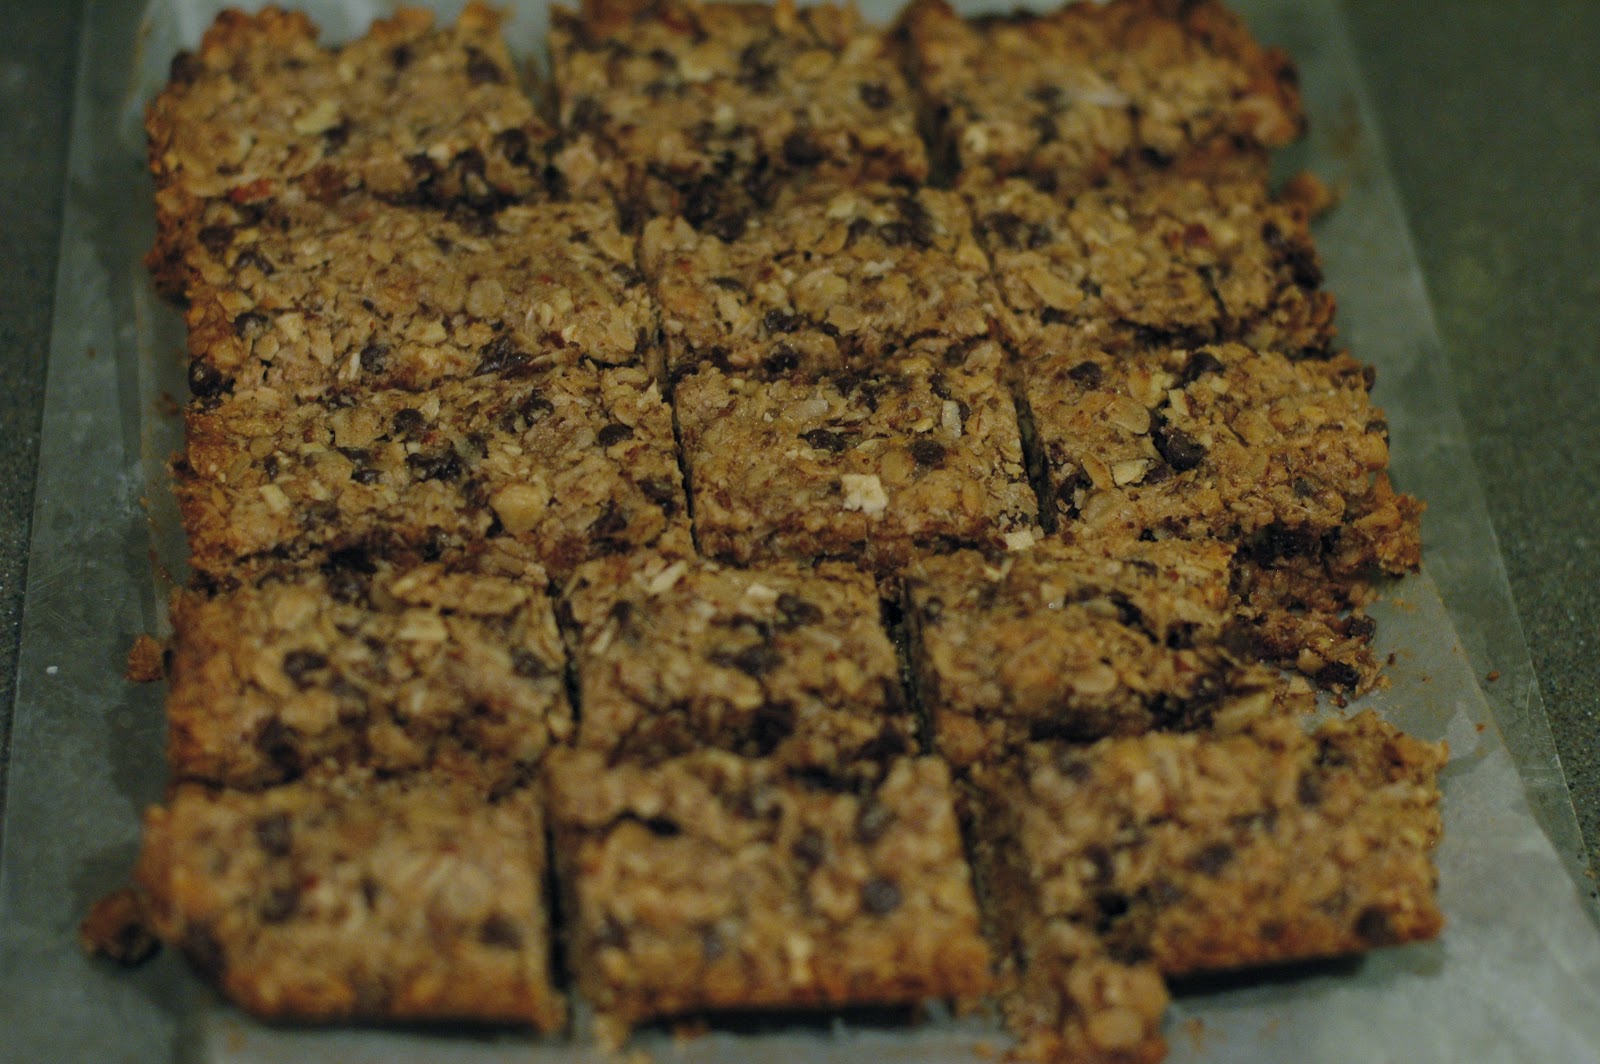
My lovely friend, Lane, just wrote about another version of granola bars on her delightful blog, Apron Days.  I made these for our trip this week.  They are YUMMY with all that nutty, oaty goodness AND peanut butter, coconut,
 and mini chocolate chips.  You should try these.  I have eaten them for breakfast, afternoon snack, and as a cookie with homemade peach ice cream after dinner.  They are multi-purpose! 


I also made my standard granola to have with us on vacation for breakfast parfaits every morning- vanilla yogurt, peaches and cherries and a scoop of granola on top! Mmmm. (It's not great for eating in the car, as it's crumbly, but it's great to have for breakfast!)


If you are as overwhelmed by packing as I usually am, I have a tip for you.  A couple of days before our recent preparations for a beach trip, we saw our friend, John, at the pool.  I was telling him about our upcoming trip, and how much I appreciated that my son's spend the night camp provided a packing list, which made things so simple and how I wish someone would give me a vacation packing list.   He suggested I check out the trip packing list on Simple Mom blog.  (If you don't know this blog, you should check it out.  She is such a great resource – so practical and smart and creative).  
The list is a little overwhelming when you see that it's 4 pages, but it's comprehensive and it's really a helpful tool.   I loved having a checklist to ensure that we didn't forget things.  (She also has these daily docket "to do list" print-ables, which I like.)

Speaking of packing, one of my favorite ways to pack is with laundry baskets.  Depending on the room in your car, and your destination, packing at least some of your stuff in laundry baskets is super easy.  They hold tons of stuff, and are especially useful when you are carrying oddly shaped items (like sand toys and shoes) and bulky items (like beach towels), and great for when you arrive at your destination. You can USE the basket as your laundry basket on your trip – and then bring your dirty clothes home in it, ready to hit the wash when you return.

And one more fun tip.  Why not create a soundtrack for your trip?  I remember being on a trip with a friend in high school and her dad had a mix tape for the beach trip with all of his favorite vacation songs.  It was so fun to have a soundtrack to the vacation. We are working on our music Playlist for our vacation. It's a span of tunes including: You're the Inspiration, Careless Whisper, The Mexican Hat Dance, The Greatest Love of All, All The Good Things, and Cruel Summer.  Random, for sure.

So, here's to road trips: making memories, having fun – with yummy snacks, easy packing and a soundtrack!  Any favorite road trip snacks or tips you have up your sleeve?  Do share.


Monday, July 2, 2012

Collaboration Meals


Summertime-
a season when our meals center around produce – what we find at the farmer's market.

Oftentimes melon, corn on the cob and tomatoes are at center stage.

Getting together with friends is also a favorite aspect of summer supper.  We like it especially when it's casual and easy. One of my favorite ways to share meals with friends is by having what we call A Collaboration Meal.

What's a collaboration meal, you ask?  A Collaboration Meal, which we sometimes call a hodge podge,  or Yours Mine Ours,  is when we get together with friends, bring whatever we have on hand from each of our kitchens, and put it together to make a feast.  One might confuse this with People's Choice, which I wrote about a while back, and it has some similar qualities, but the collaborative aspect of this usually yields a far more exciting menu.  There is something more delicious about eating food that someone else bought or prepared.
our Tapas night- turkey meatballs, garlic pastries from trader Joe's, bruschetta, and a fruity green salad


We have a couple of friends with whom we have done quite a lot of collaborating and have had some great meals as a result.
The planning of these Collaboration Meals goes something like this:
The friend and I are talking on the phone.

Me: Let's have dinner on Thursday night.
Friend: What should we have?
Me: Well, what do you have on hand that we can use as a starting point?
Friend:Let's see...(peering into the fridge) I have 3 turkey burgers,
Me: I have 4 hotdogs,
Friend: I have 3 buns,
Me: oh, I have 5 sandwich rounds, which can work.
fries in the making
Friend: I have some potatoes and can make some fries,
Me: I have some fruit to make a salad,
Friend: Oh, I have some apples, I think.  And I saw a recipe in everyday food magazine for this great dessert I want to try but not sure if my kids would like it.
Me: Oh, make that and I'll bring the cookie dough I have in my fridge to make some choc. chip cookies for the kids.
Friend: Sounds great! We'll come at 4:30!

Done and done! The plan is in place.  And you never can predict what the final product will be, but it almost all of the time exceeds our expectations!  And the sum is always better than the parts.


Sometimes it is more thematic- like "Pasta Your Way" (a couple of different pastas with different sauces, veggies, etc.)


or Tapas night (appetizers as a meal)


and sometimes it's Open Grill (sticking whatever we have that might be grill-able on the grill and serve a smorgasbord).

barley salad
One night we created a Southwestern Salad with tilapia.  We put together our collective greens and lettuces, a ripe avocado and beautiful tomato and my left over texas caviar and brown rice and tortilla chips.  We whipped up some southwestern ranch dressing (out of sour cream, ranch dressing and some salsa) and grilled the tilapia that we spiced up a bit with lime, garlic, cumin, and salt.  My friend brought ingredients over to make a very yummy cornmeal raspberry crumble and it was a delightful feast!

I remember another night we made Kale Chips (because I had been wanting to make them and wished for a partner to venture with me), a few turkey burgers, a few chicken sausages, barley salad that I had made the day before, leftover orzo salad from a couple of days before, a ripe avocado, "s'mores bark"–  (all out of things we each had in our kitchens).


sauteed veggies pitched in between us - for pasta night
Pasta Your Way

Pasta MyWay
We had pasta night last week, where we boiled a couple of types of pasta, made a marinara sauce, sauteed some veggies and prepped some raw veggies and fruit for the kids and dinner was served! 


So, call a friend and look into your freezer, fridge, pantry, fruit bowl...dig deep, as I say, and have a friend do the same. Talk it out and dream up a meal.  It doesn't have to be perfect or even logical.  Sometimes the quirky meals are when we discover new tasty combinations! And it feels so rewarding to use what you have to make a feast.  How resourceful and responsible!

Do you have fun ideas to share with us about how you collaborate to create easy, yummy meals with people?  Please share your ideas with us!


Sunday, June 24, 2012

Ice Cream Churnin'

Triple Berry Homemade Ice Cream in a mug (one of my favorite ways to eat ice cream)
Homemade Ice Cream.  There is nothing like it. I compare making homemade ice cream to roasting a turkey at Thanksgiving.  I rarely do it, but when I do, I think, "this is so simple and so great! Why don't we do this ALL the time?"

I have many fond memories from childhood of Homemade Ice Cream.
My mom would make the mixture and dad would man the ice cream maker with the layering of rock salt and ice.  It was a loud and messy adventure that always signaled summertime.

There are a couple of specific ice cream making stories in my memory:
The Fruit Dilemma and The Missing Cork.
I love how a moment in time can be memorialized in a way that then becomes a "story to be told" for the next 30 or 40 years.  (I think of this at times with my children in our home.  Wondering which moments, out of the millions in their childhoods, will become THE memorable moments – the ones that will be legendary to them.  And what makes them so?  Is it the moment itself?  The significance of the event?  Whether the story is subsequently told, or is it more about the perspective of the person?)  I wrote more about this HERE.

The Fruit Dilemma:  My parents would often make strawberry ice cream OR banana ice cream.  One evening, they realized that they didn't have 4 cups (the required amount for their recipe) of either, but they had 2 cups of each.  Mom was stressed about this and was thinking she needed to run to the store to get some more fruit.   Then my dad creatively suggested that they go with what they had and put them together and see what happened.  What happened was that a new favorite ice cream was born.  So Strawberry/Banana became the family's signature ice cream flavor.

The Missing Cork is a story about the day when friends came over and ice cream was scooped into bowls.  After serving, mom realized that the cork (that was always placed in the lid of the ice cream canister after the paddle was removed), was missing.  It didn't take long to realize that it must have fallen into someone's bowl of ice cream.  And so... a playful announcement was made that some lucky person had a hidden cork buried in their bowl of ice cream.  This lucky cork-finder would be the prize winner.
Banana scooped up

I guess both of these legends follow the theme of making lemonades out of the lemons that life deals you.  Which is in keeping with my mom's outlook on life.  (Which I have talked about HERE, and HERE, oh, and HERE.)

We have had a simple RIVAL ice cream freezer (the salt and ice kind) forever.  We were given one as a wedding present by my dad's co-worker, and we have loved it.  We had to replace it a few years ago when ours petered out.  And last year for Dave's birthday, my mom gave him a countertop ice cream maker.  It's special.  It's makes a much smaller batch than the traditional one, but it is so easy and accessible.  It invites frequent ice cream making.

As far as recipes go, they are varied and Dave and I have been debating on a great basic recipe.  He prefers rich, creamy (and fatty); and I have wanted to lighten it up.  We made sorbet a while back and it was AMAZING and "healthy", but super expensive, as it requires so much fruit.  We wonder if it even makes sense to make sorbet when you could more easily and possibly more affordably buy it at the grocery.

So, I called my mom to ask for her favorite ice cream recipe and she sent me "Grover's Ice Cream".
I texted her, "Who's Grover?"  I wasn't sure if it was a restaurant or a friend or a furry, lovable monster.
the recipe with my grandmother's alteration – circa 1950's
She called me to explain that this recipe was from Grover, a man from her church when she was growing up.  He was a very generous man, a friend of her parents and always hosted meals for people.  This was his recipe.  So it's vintage, we could say.  It's from the '50s. I love the directions on this typed recipe card.  It's so dated. Mom said she always liked this recipe because it is eggless and therefore, you don't have to cook it and then cool it before freezing it.

I made it last week and used my bunch of ripe bananas, just to give it a try and we were very pleased.  The recipe is versatile, and is actually a base for whatever ice cream you want to make with it.  I wanted to try it again...in order to honestly tell you that it is versatile.  We used a frozen berry medley. And it is super tasty.  I tried it with 1% milk instead of 2% just to see how it fared.  Ice cream made with skinnier milk is a little icier and a little harder when frozen, but equally delicious! Even Dave agrees.

Chocolate topped with slivered almonds


Then my 8 year old begged for chocolate, her favorite flavor.  I used Grover's recipe and adapted it to chocolate by melting 1 cup semi sweet chocolate chips with some of the milk in a saucepan and using unflavored gelatin in place of the jello.  (we learned the hard way the second time making it, that you need to dissolve gelatin in the cold milk, not in the warm chocolate-melted milk.)  I finely chopped another handful of chocolate chips to stir into the ice cream. I wasn't sure what I was doing, but it is super tasty! I think it would be great with raspberries...or swirls of peanut butter...or marshmallows.


THE SCOOP 
I also have to tell you about the greatest ice cream scoop that I've met to date.  I have tried many, many ice cream scoops trying to find the perfect one.  I won't detail all of the styles and kinds of scoops I've tried... you probably have done the same.  But when my mom was on a business trip with my dad to France last year, she bought this scoop at a cooking shop there.  It's our kind of souvenir - a kitchen gadget! After getting home and trying it she wished she had gotten a few more to give my sister and me and friends as gifts.  Lucky for us, she then found them at a grocery store in the states. This was great news... and yet, it makes her French-Imported-Scoop a little less novel.  Now you can buy it on Amazon online for $15!  You squeeze it and scoop and then release your hand and the scoop pops out.  Brilliant.
(If you want to see some of my other favorite kitchen gadgets go to the Kitchen Wish List post. )

Grover's Ice Cream (with my grandmother's substitution, and my updates)
1 1/2 cups sugar
1 (3 oz.) pkg. Jello gelatin (lemon for vanilla...or a corresponding flavor of your choice)
1 quart (4 cups) milk, divided
1 cup (1/2 pint, that is) whipping cream
4 cups of fruit (bananas, berries, peaches, etc.)
     or flavoring- vanilla, chocolate:


fold in whipped cream
Set 1 cup of milk out on counter to reach room temperature (to help the jello dissolve).
Mix Jello and sugar together.
Add 1 cup of room temperature milk.  Stir well until sugar/jello are dissolved.

Add remaining milk.

Use wooden spoon (not quite sure about the significance of this, but I'm following Grover's lead).

Whip 1 cup of cream in a separate bowl with mixer.

add chopped fruit
Fold in whipped cream.

Add fruit (and/or flavorings).
Stir together well.

Freeze ice cream according to Ice Cream Freezer directions.

Banana ice cream
Triple Berry packed and ready to eat


Sunday, June 17, 2012

DIY Magic Shell

There are some things you can recreate at home.
There are some things you cannot.
Sometimes you have to learn the hard way.
Sometimes the costs are high – in money and in time.
And sometimes they are low.

For example:
I saw on Pinterest a recipe for homemade magic shell.  You know the hardening chocolate sauce for ice cream like a Dairy Queen dipped cone?  Magic shell came on the market when I was a kid and we thought it was such a cool concept.  I remember getting the original and the chocolate mint flavors.  

So naturally, when I saw a recipe for homemade magic shell I was excited.  When I clicked and read the blog post, I was even MORE excited because the recipe contained only 2 ingredients: Chocolate Chips and Coconut Oil.  Even better! It looked simple and not filled with a bunch of junky ingredients.   And then I tried it.  To my delight it took only 3 minutes to make, didn’t cost much, left no mess and it worked!!!  So now, we magic shell things whenever we can.
  
 
Bobbie's Dairy Dip is a local favorite spot here in Nashville and they serve dipped cones, as suggested in the name.  They always have chocolate and another flavor.  The flavors rotate and include: peanut butter, butterscotch, coconut (YUM!), blue raspberry (ick!), etc.  So, after making the magic shell, my inventive son suggested we make another flavor, inspired by Bobbie's.  We decided since peanut butter chips can be purchased, it would be an easy substitution.  It worked.  (Though I would rather have a spoonful of actual peanut butter in my ice cream).  

This is an example of DIY gone right.

In contrast, after combing the entire Target store the other day with my 8 year old (who had a gift card from her birthday burning a hole in her pocket), she came to a decision.  She wanted to get a Dippin' Dots maker.  I was less than thrilled with this decision, as I had a feeling it was too good to be true.  After all, the real Dippin' Dots are made at 360 degrees BELOW zero with Liquid Nitrogen!   My rational opposition to this purchase was negated and overridden by my husband and daughter.  “It’s worth a try!”,  “It’s kinda fun”, “What if it works?”, “It’s her money after all, and a giftcard!”  I knew that Dave’s love for Dippin' Dots had overtaken his mind.  I looked at Asher.  We shook our heads and said, "this isn’t gonna work."  But we lost, and they won. 

all of the pieces that come with this contraption, which we then have to store somewhere in our house (notice the prepared Dippin' Dots are a sketch vs. the photo of the other parts...clever)
She bought the Dippin' Dots Maker and upon arriving home, we opened the package and took out the 35 parts and began reading the instructions.  A few minutes later, we realized that there was no “flavor packet” included, and then saw the fine print that stated that it is sold separately.  So, there we were with a lot of little parts, an instruction manual and no ice cream stuff.  It said, “use your favorite drink.” So, we made chocolate milk and gave it a go.  It was a complicated, messy process.   And the result….
4 hours later was blobs of chocolate ice milk that were formed into circles that were connected into round sheets.  They didn't resemble Dippin' Dots, nor ice cream. What a let down.

When I looked online at the reviews, AFTER THE FACT, the average score of over 100 reviews was a 1.9 on a 5 point scale.  One of the customer reviews that I thought illustrated the DIY probability profoundly said:

"Will not make real Dippin' Dots!
The only way to make real Dippin' Dots is with liquid nitrogen. It's a bit complicated and a parental supervision is a must, but it can be done. Liquid nitrogen can be purchased from your local welding gas supplier usually. You'll also need to buy a few things on [...].. A "dewar" to transport the liquid nitrogen, a condiments bottle, and a stainless steel mesh strainer. I also use a open top vacuum flask to make the dots in, but any stainless or Pyrex bowl will work fine. It's actually really easy to make it, once you get together the parts you need. You make any ice cream base recipe you can find online... Pour the liquid nitrogen into your bowl from the transport dewar. Drip the ice cream base from the condiment bottle into the bowl with the liquid nitrogen... Then scoop out the dots with the strainer and put them in the bowl you intend to serve them in. Stir them around till they've melted to the side of the bowl a little bit to ensure the temp isn't too cold or you'll get frost bite (bad)."


That simple, huh? 

Dave found coupons for Dippin' Dots stores included in the box.  He saw this as the redemption of the money lost on this not-very-effective product.  I saw the inclusion of these coupons as an acknowledgement by the company that these “DIY Dippin Dots” would be so disappointing that you would have to go to the store to buy the real-made-at-360-degrees-below-zero-Dippin' Dots.

I overheard Dave the next day, when they were making round two, say, "we can only make these when I am in town!!  You can't ask your mom to do this with you all." Good call, Dave.

So the moral of this story is:  
Some things are DIY and some things are just not. 
I usually ask myself questions like:  Is it easy?  Is it cheaper than the real thing?  Is it more convenient than the real thing?  Is it fun to make? Healthier? How many ingredients do I have to buy? How much equipment do I have to store?  IF these questions are answered favorably, then I’m willing to go for it and try to "do it myself."  Otherwise, forget about it.

To make Magic Shell:
Place 1 1/4 cups semi-sweet chocolate chips
and 1/2 cup coconut oil 
into a glass 2 cup measuring cup (or bowl).

Stir together.
Place in microwave for 1 minute.  Stir.  Return to microwave if needed for a few seconds at a time until fully melted.
Add a couple of pinches of coarse salt.
(You can do this process on the stove top in a small pan if you'd rather).
Pour over ice cream and wait for a few seconds for it to harden.

I bought plastic squeeze bottles at the dollar store to use for pouring and storing it.

It can keep for weeks unrefrigerated.  If it becomes solid, warm it up for a few seconds and it should be good.

We tried it with peanut butter chips.  You can also add flavoring to the chocolate – like mint!  Or you can top ice cream with pecans or coconut along with the magic shell....my favorite!


Monday, June 11, 2012

Asian Salad Spring Rolls


Several years ago, a friend offered to bring soup to my house to share for lunch.  When she asked what kind I like, I told her most everything, so bring whatever she wanted and surprise me! She wowed me by bringing a wonderful ginger rice soup with fresh vegetables from International Market (a local Asian market/diner) along with a little carton of fresh veggie spring rolls with a super tasty sweet-sour-peanutty sauce for dipping.  I loved it.  I could have dipped anything in that sauce and been happy.  I began to crave this flavorful, unique and very healthy meal.

A few years later, I was looking on Pei Wei's website (P.F.Chang's more casual restaurant- if you aren't familiar) to check out the nutritional information and see what might be my healthiest option.  I found these Vietnamese Chicken Salad Rolls.  When I tasted them, I realized they were much like those yummy spring rolls from the International Market, but with chicken in addition to the veggies.  They too are served with a sweet chile sauce that is super tasty as well as a peanut sauce for dipping.

I decided they couldn't be too difficult to make, so I attempted these at home.  They worked! 
My philosophy about these spring rolls is much like my philosophy on Wraps (which I wrote about a few weeks ago) but with an Asian twist.  I look at all the veggies and herbs I have and see what I think would be tasty together (and what my eaters might eat) and throw it in rice paper and wrap it up.


And the sauce is really key.


I think we have had these 3 times, and I have tweaked the sauces each time.
I have bought some, made some and doctored up some bought sauces.
We have served it with soy sauce, peanut sauce, duck sauce (sweet and sour), and sweet chili sauce.  A favorite is duck sauce with a few drops of Sriracha and some chopped peanuts!


Just like a good salad dressing really makes the salad, the sauces for these veggie-filled rolls  makes them so tasty!


Here's what you do:


The wraps can be filled with: 

  • cooked chicken (we have used rotisserie chicken from the grocery), 
  • herbs (basil, cilantro, mint), 
  • veggies (shredded carrots, cabbage, scallions, cucumbers, leafy lettuce),
  • skinny rice noodles (which come in bundles and are soaked for a few minutes in water to hydrate)
  • chopped peanuts and a squeeze of lime if you'd like.

rice paper dry


First, prep the fillings (washing, cutting, chopping, etc.)  If you are including rice noodles as a filling, prepare those.

soaking rice paper  (these are Dave's hands, FYI- this is a tricky process
to photograph while doing)
Then, individually soak rice paper (which I buy at the International Market but is also available on the International Aisle at the local grocery) following the soaking directions on the package.

Prepare rice paper one at a time and fill with the goodies of your choice.

pile it on
Wrap them- tucking in the ends and then gently and securely rolling them up.  (The paper sticks nicely to itself.)

Place on a plate.

Prepare sauces.

Serve.

These can be made ahead and refrigerated too, which is nice.


peanuts in sweet chile sauce


We have been eating ours accompanied by steamed edamame and rice and sometimes sliced melon or other fruit. (Since I believe fruit goes with every meal).

Our favorite twist on rice when serving Asian dishes is to prepare the rice with Coconut Milk as the majority of the liquid in place of water.  My friend Melissa S. introduced us to this when she came for dinner a couple of years ago.  I feared it would taste too coconutty and "obvious" for my kids, but it doesn't. It is creamy and tasty and adds such a nice subtle difference to the rice.  You must try it!
I just add a can of light coconut milk to my rice.  If I am making 2 cups of rice, I use the can's amount (usually about 2 cups milk) and use water for the remaining 2 cups of liquid called for with 2 cups of dry rice.  (And a sprinkling of kosher salt).

Don't be afraid to try making these Salad Spring Rolls!
It is really not difficult.
It's actually fun and beautiful.  And it is perfect for the warm days of summer.
And my kids really like it.  (Though last time Asher told me I went a little heavy on the cilantro.  I think I was so excited that my cilantro was growing in my garden that I didn't hold back.)


Monday, June 4, 2012

Portland Muffins (Despite my Directional Issues)


I told you a couple of months ago that I visited Portland, Oregon for the first time this spring... remember when I saw Joy the Baker?  What a great city!  One of my favorite things about visiting a city is going to local food spots and having great meals and tasty treats, and being inspired to recreate them at home. (Like this savory dinner from Sizzle Pie).

One of my least favorite parts of visiting a new city is how often I get turned around/ sometimes lost/ have to think so hard about my proximity and how to get back "home".
Confession:  I am a food-lover and a directionally-challenged person.  These are two truths about me.

It takes me a few days to get my bearings in a new spot, which is just about how long most of my trips are.  So, inconveniently,  just when I get the hang of the place, POOF! the time has flown and it's time to go home.

I thought my fancy smart phone was going to help me with this directional issue.  And it does, to some extent.  Except that I really prefer a paper map.  I want to look at the entire map at the same time and get my bearings, and be able to read the street names simultaneously.  This doesn't happen on an iphone screen.  And then there are "directions" and "route" options, which throw me off.  I'm faced with these decisions: should I look at the itty bitty-up-too-close-or-too-far-away map? or do I read written directions?

One night a couple of years ago, I was trying to be in two places at once (which, by the way, doesn't work, in case you were wondering.  I keep trying to do this and it just doesn't ever work out).  I had typed in the location of the birthday party I was trying to attend prior to getting in my car.  It was in an edgy part of town and I was traveling on the interstate.  I was confused because my map wasn't tracking me, or I wasn't tracking it.  I was off course.  I realized that something had gone wrong.  So, I flipped to "route" and started following its lead.  It took me into an area of town that I wasn't expecting to enter and was a little reticent.  I then realized that while I needed to just pull over and figure this out, I wasn't comfortable doing that in this shady area.   I looked at the phone which stated that the estimated time for travel was 25 minutes.  "OH NO!!!!!!! WHAT IN THE WORLD! WHERE AM I? WHY DID I TRUST THIS DEVICE?!"  I called my husband at that point (who is ridiculously directionally skilled) and had him talk me through getting to my destination.  I was so grateful.

When I looked more closely on my phone, after reaching my destination, I realized that there were options at the top of the screen: car, bus, and walking.  I had somehow, in my flustered moment tapped the walking button by accident and that's where it all went wrong.  I clearly have some issues.

Well, back to Portland and my love for new foods...

I started my meals off well by meeting a couple of students and a colleague at a bakery just a few blocks away, for muffins and coffee (Pazzoria) the first morning.  It was a cute little cafe attached to a restaurant.
the home of the muffin - photo,  thanks to Becca

my out of focus photo I took of the muffin
to help me remember...
When making the difficult decision about which muffin I would enjoy with my coffee, the employee gave me a rundown on the options.  When he described this muffin: lemon cranberry, made with a cornmeal base,  I knew it was the one for me. SOLD! Yummy flavors, fun texture, and unique.  I was excited.  And it didn't disappoint.

I then thought about the muffin for the next two days. Their hours and my schedule didn't work for me to visit again until the morning we were leaving the city.  I decided that before we left town, I could walk up to the bakery and get another one!  So, on the day of our departure, I left my packed bags in the lobby of the hotel with our people who were gathering there to head to the airport, and ventured out to quickly secure a couple of these dreamed-about muffins.


a Portland sign
The only problem was that I got turned around when I swiftly exited the downtown hotel, where there are multiple entrances, and the "turn left to go to the muffin shop" tape in my mind wasn't true.  I didn't realize this until I had power-walked several blocks and began to realize that none of these landmarks were the correct ones for the muffin path.  DARN! Now, I have to have enough time to backtrack the 4 blocks towards the hotel and then travel the other (correct) direction to get to my destination.  Would I make it? Was this insane?  Is a muffin worth it? And what if they didn't have the muffin once I arrived? I decided to jog and try to make it.   I ran in the door, asked for the cornmeal based muffins.  They had a blueberry and cranberry.  I got one of each, to share with my muffin-loving friend, Jenny.  I ran back in time to rush with our group to the bus stop to then stand and wait 20 minutes for our lift to the airport.

We ate the muffins.  We liked the cranberry better because it had a lemon component and the blueberry didn't.  Which I hadn't realized was so essential to the greatness of the muffin.

I came home and started working on my version of the "Portland Muffin". (I decided the "Pazzoria muffin" didn't have as much connection for me as the "Portland Muffin").  I tried 3 different recipes that I found in cookbooks and online and tweaked a little here and there.   I never found a recipe for this specific combo of lemon, cornmeal and cranberries.  My neighbor, Sumner, was my taste tester. She was always willing and thankful to test another muffin on another morning.

This recipe is my best attempt so far, but I feel like it's still not exact.  Maybe they used fattier ingredients than I do.  I would love to know.  But it is tasty and unique and reminds me of a lovely food experience in a fun city.

The texture of the cornmeal (I LOVE lots of texture) and the zip of the lemon (I LOVE zip), and the sweet of the Craisins are a lovely combination.  I will say, these muffins are far better on day one, as they tend to become dry by day 2.  I experimented with white and yellow cornmeal and with varying amounts.  You can alter it depending on how gritty you like it.

If you have ideas, I would love your input.  It's a work in progress.
(Lemon/Cranberry/Cornmeal Muffin)

1 ½ cups flour (all purpose, white wheat, whole wheat/white combination….your choice)
½ cup fine-ground cornmeal
2 tsp. baking powder
½ tsp. baking soda
¼ tsp. kosher salt
Juice of one lemon (approx. 3 Tbsp.)
Zest of one lemon
2/3 cup firmly packed brown sugar
2 large eggs
1 cup milk
6 Tbsp. butter, melted [or for a lighter muffin 4 Tbsp. melted butter and 2 Tbsp. low-fat vanilla yogurt]
1 cup dried Cranberries
Turbinado sugar for sprinkling

Preheat oven to 400 degrees. Spray 12 muffin cups with cooking spray.
In bowl, stir together the flour, cornmeal, baking powder, baking soda, salt and brown sugar.  Set aside.

In a large bowl, whisk the eggs until blended.  Whisk in the milk and butter (and yogurt if using it). Pour the egg mixture over the dry ingredients and stir until moistened.  Fold in the cranberries.

Spoon batter into prepared muffin cups, filling each cup about ¾ full.  Sprinkle Turbinado sugar all over the top.

Bake until toothpick inserted into the center of the muffin comes out clean, 15-18 minutes.

Let cool in the pan for 2 minutes, then turn out onto a cooling rack. 
this lemon tea towel inspires me to sing about lovely lemons
(muffins, round 3- this time I made a few w/o Craisins
as per my kids' request)
So, here's to knowing your deficits, having friends that are skilled in those areas (on which you can lean), and replicating terrific treats that you discover on your travels!